ClareVision Cameras Quick Start Guide
Last Modified 07/08/21
Introduction
The ClareVision camera line includes Value, Performance, and Varifocal series cameras which are available in bullet, dome, and turret forms. This guide covers the setup process for using these cameras standalone with only the ClareVision App and how to add them to work with the ClareOne Panel and ClareHome App.
FAQ's, Best Practices, and How-To's:
How do I configure ClareVision WiFi Cameras?
How can I fix streaming issues when viewing a camera feed in the ClareVision App?
What video encoding does the ClareOne Panel or Control4 system support?
How do I configure Smart Events like humanoid detection?
How do I set up Cloud Storage for ClareVision cameras?
Understanding Recording Schedules vs. Arming Schedules on ClareVision Cameras
Part 1 of 3: ClareVision Camera Setup:
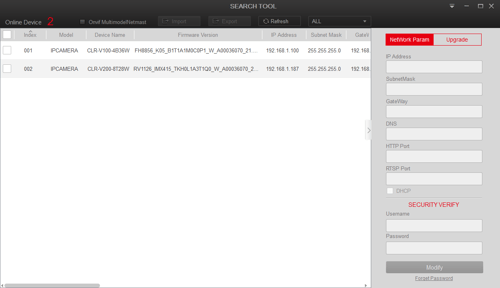
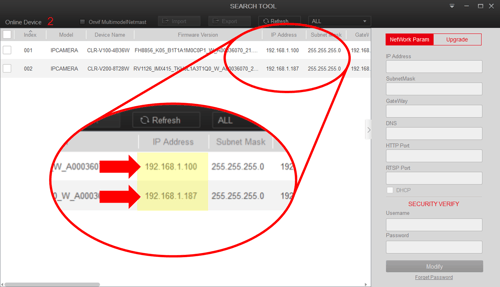
4. Enter default camera username and password.
The password is case sensitive:
Default Username: admin
Default Password: First SIX characters of the UUID/SN
Note: The UUID/SN can be found on the rear of the camera and installation manual.
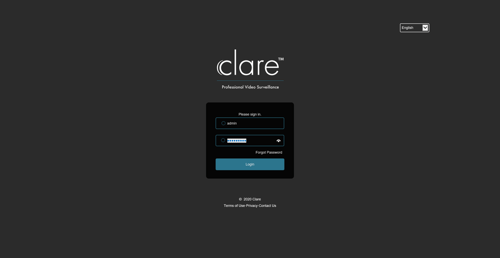
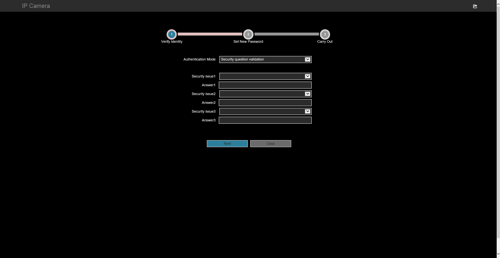
NOTE: You should now be able to log into the camera web console which gives you access to all advanced camera configuration settings. Here you can adjust motion detection settings, storage, smart events (Performance Series cameras), and more. For a complete breakdown of these settings and to view the in-depth camera setup guide, please click HERE.
Part 2 of 3: ClareVision Account Creation and Camera Inclusion:
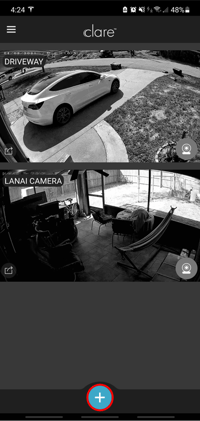
2. Ensure the device is connected to the same network as the cameras.
NOTE: If setting up the cameras to work with an NVR, please follow the Quick Start Guide steps outlined HERE.
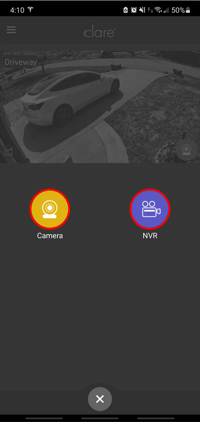
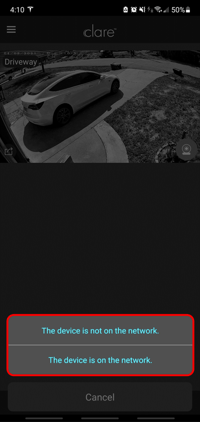
"The device is on the network"
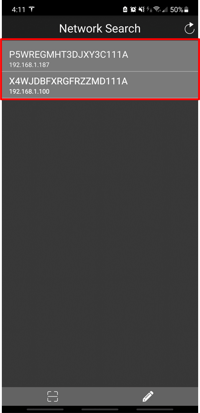
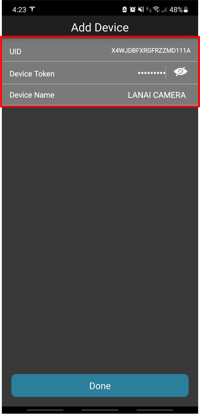
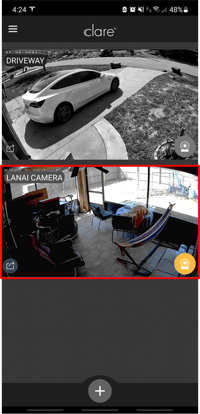
Cameras can now be accessed using the ClareVision App and will work Standalone. Camera setup for standalone use is now complete. Please follow the next step if you would like to integrate the cameras to work with the ClareOne Panel and ClareHome App.
Part 3 of 3: (Optional) Setting up ClareVision for use with ClareOne Panel and ClareHome App
1. Navigate to FusionPro and access the customers account.
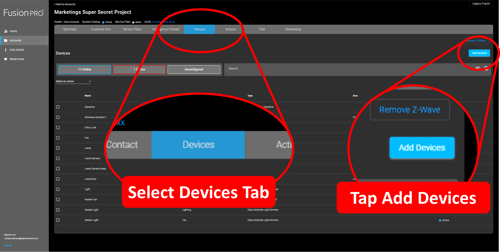
4. Select "Cameras" from the list.
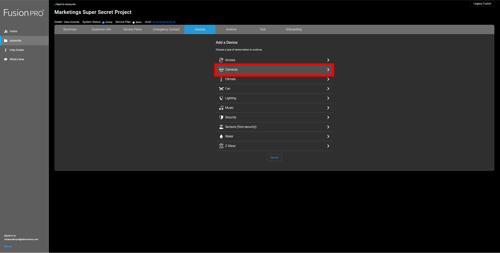
5. FusionPro will search the network for compatible cameras and display a list of all available cameras found.
6. Add a check mark next to your desired camera and input the default username "admin".
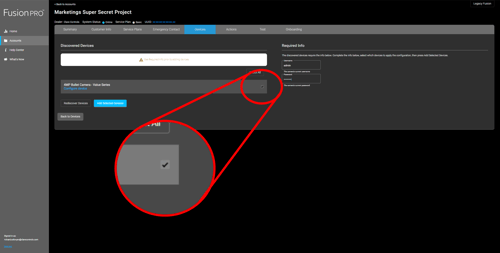
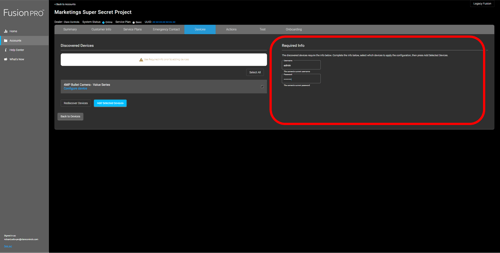
Each cameras live feed can now be access in the ClareOne Panel and ClareHome App. For steps on how to add the camera tiles to the ClareOne Panel or ClareHome App, please follow:
Adding camera tiles to ClareOne Panel and ClareHome App:
1. Tap on any free tile on the ClareOne or ClareHome Favorites screen to bring up the device list.
2. Select "CCTV" from the list.
3. Tap "+ add" next to the desired camera.
Devices Covered
The list of cameras covered by this Quick Start Guide are as follows:
|
Model Number |
Camera Name |
|
CLR-V100-2T36(B/W) |
ClareVision 2MP IP Turret Camera, 3.6MM lens, 16GB SD Card, (Black/White) |
|
CLR-V100-2B36(B/W) |
ClareVision 2MP IP Bullet Camera, 3.6MM lens, 16GB SD Card, (Black/White) |
|
CLR-V100-4B36(B/W) |
ClareVision 4MP IP Bullet Camera, 3.6MM lens, 32GB SD Card, (Black/White) |
|
CLR-V100-4T36(B/W) |
ClareVision 4MP IP Turret Camera, 3.6MM lens, 32GB SD Card, (Black/White) |
|
CLR-V200-4T28(B/W) |
ClareVision 4MP IP Turret Camera, 2.8MM lens, 32GB SD Card, Starlight, WDR, (Black/White) |
|
CLR-V200-4B28(B/W) |
ClareVision 4MP IP Bullet Camera, 2.8MM lens, 32GB SD Card, Starlight, WDR, (Black/White) |
|
CLR-V200-4D28(B/W) |
ClareVision 4MP IP Dome Camera, 2.8MM lens, 32GB SD Card, Starlight, WDR, (Black/White) |
|
CLR-V200-8D28(B/W) |
ClareVision 8MP IP Dome Camera, 2.8MM lens, Starlight, WDR, (Black/White) |
|
CLR-V200-8B28(B/W) |
ClareVision 8MP IP Bullet Camera, 2.8MM lens, Starlight, WDR, (Black/White) |
|
CLR-V200-8T28(B/W) |
ClareVision 8MP IP Turret Camera, 2.8MM lens, Starlight, WDR, (Black/White) |
|
CLR-V200-4DVF(B/W) |
ClareVision 4MP Motorized Varifocal IP Dome Camera, 2.7-13.5mm, Starlight, WDR, (Black/White) |
|
CLR-V200-4TVF(B/W) |
ClareVision 4MP Motorized Varifocal IP Turret Camera, 2.7-13.5mm, Starlight, WDR, (Black/White) |
|
CLR-V200-4BVF(B/W) |
ClareVision 4MP Motorized Varifocal IP Bullet Camera, 2.7-13.5mm, Starlight, WDR, 60M IR, (Black/White) |