Overview
The following article provide the following information:
- Setting up your WiFi camera
- Configuring motion, image, and event settings
- Adding the camera to the ClareVision App
Step One: Connect the Camera to Your LAN
To add the camera to a WiFi network, first connect the camera to the Local Area Network (LAN) through a router, modem, or network switch.
- Using an Ethernet cable, connect the WiFi camera to a router, switch, or modem that is on the network you would like to configure WiFi for.
- Power up the camera using the included power supply (Bullet and Turret cameras)
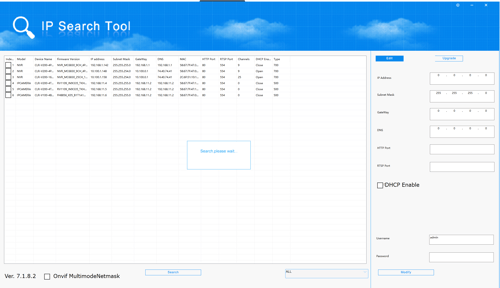
- Once the camera has connected to the network, use the IP Search Tool to discover the camera IP Address.
IMPROTANT: The WiFi Turret (CLR-V100-4T36WF-W) and Bullet (CLR-V100-4B36WF-W) do not support POE. You must connect the camera to the network using an Ethernet cable and power the camera with the included power supply.
Step Two: Discover the Camera
All Clarevision cameras ship with DHCP turned on. DHCP simply means the router will assign an IP address to the camera when it boots up using the LAN IP address scheme. Example:
- Router IP Address: 192.168.1.1 (typical)
- IP address range that may be available: 192.168.1.2 through 192.168.1.255
- Router will assign an address like this: 192.168.1.x, where x can be any number between 2 and 255.
- Install and launch the IP Search Tool and select "Search"
- Open a Chrome or Edge browser and input the WiFi camera's IP address into the URL field on your web browser
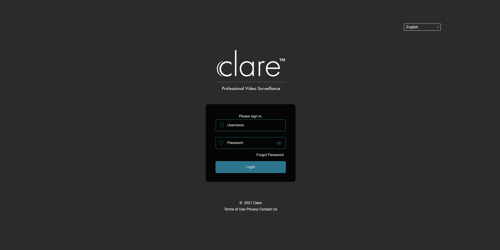
- Input the default username and password.
IMPORTANT:
The default username is: admin
The default password is the first six characters of the UUID. The UUID can be found on the camera label or the quick start guide. If those are not available or inconvenient, you can use one of these methods found HERE to discover the UUID.
Tip:
When you login, you will be asked to change the password and answer security questions. Make sure you configure the security questions and store them. If you do not and you lose the password you will have to go to the camera and physically reset it.
Step Three: Update the Camera to the Latest Firmware Release
Clare Controls releases camera firmware with new features about once every four months. Chances are, your camera will need to be updated when you take out of the box. The camera firmware database is located here.
- Log into the camera and go to the Configuration > System Configuration > Device Information to review the firmware version.
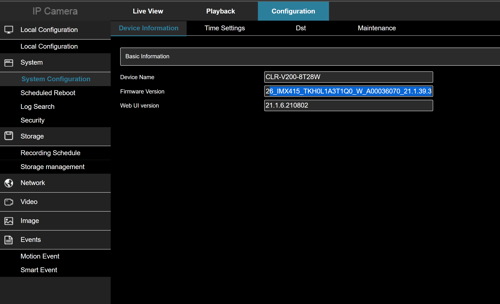
- Cameras with version numbers where the last 3 digits are lower than 30.x will require you to to to the maintenance tab and upload the firmware to the camera you retrieved from our website. Cameras with version numbers greater than 30.x will have online update services directly from the web console as shown below:
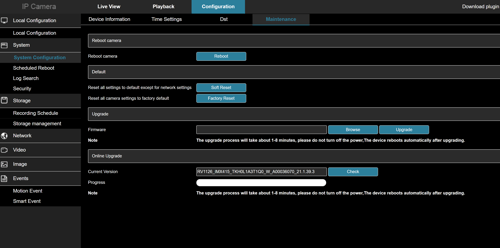
- Simply click on the "Check" button and the camera will check our servers for an update and if available ask you if you want the camera updated. Updates take about 3 minutes.
Step Four: Configure the WiFi Settings
Make sure the camera is connected to a router, switch, or modem before proceeding with the next steps.
- Select WiFi Configuration on the home page or navigate to Configuration > Network > Advanced Setup > WiFi.

- Tap Scan to discover available WiFi 2.4GHz WiFi networks.

- Select the desired WiFi network you would like to connect the camera to.
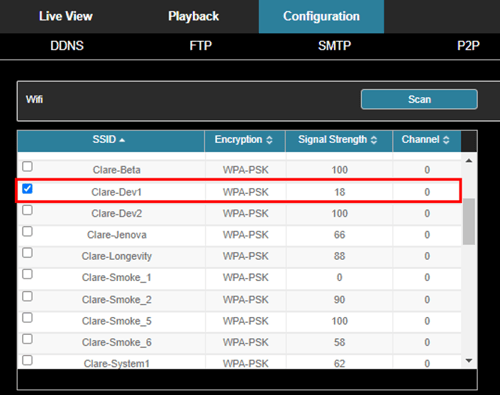
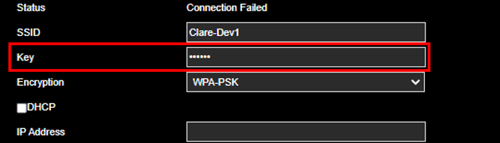
- All fields should automatically populate when you select a WiFi network. Input the WiFi password into the Key field.
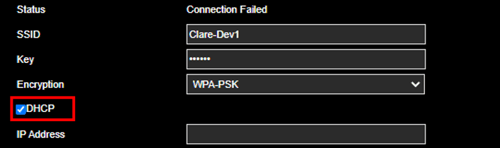
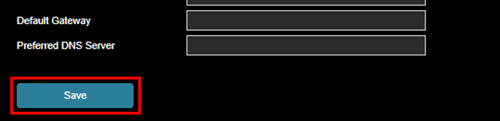
- Check DHCP if you would like the network to assign the network parameters automatically. Leave this field unchecked if you would like to manually configure settings such as IP Address, Netmask, Default Gateway, and Preferred DNS Server.
- Tap Save to complete and save your configuration.
Step Five: Configure the Video Stream
Video stream: the IP Camera streams one or more streams to mobile apps, NVR's and integrated systems. The video settings control the configuration of those streams. Image settings control the parameters that affect the way the image is captured.
The video stream is configured through two basic menu items: Video and Image.
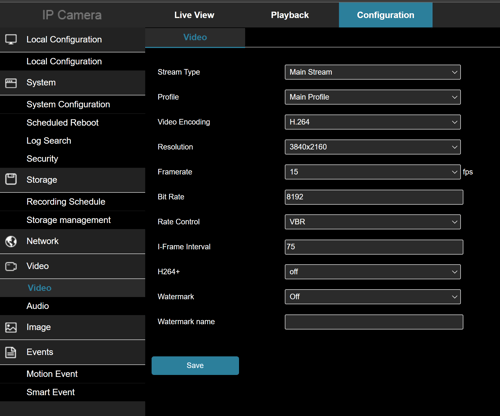
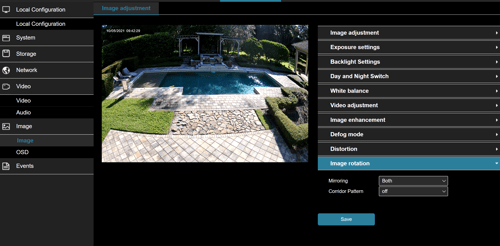
ClareVision Cameras are configured for best optimal settings out of the box. You will most likely not need to adjust settings unless specific settings require it. You can adjust image settings under Configuration > Image > Image Adjustment.
Tip:
We have configured the encoder for H.264 encoding on all streams. You may want to encode the main stream (stream 1) using H.265 as it requires about 50% of the network bandwidth and 50% of the HDD storage space vs. H.264. We set the main stream to H.264 because certain control systems and mobile phones do not decode H.265. You can tune this to your application.
Step Six: Configure Events
Events are the heart of the intelligent camera. All configuration is found under the Configuration Tab/Events. Events are broken into two categories: motion and smart.
The standard configuration for events from the factory is as follows:
- Motion detection: enabled, full field (entire field of view
- Motion sensitivity: 5 (medium) - will detect a human about xx feet for Value Series and yy for Performance Series
- Motion record calendar: 7x24
- Motion event arm calendar: 7x24
- Motion record: main stream (except V100 4mp, which is set to sub-stream)
- Smart event: disabled
1. Determine whether you want to use Smart Events or Motion Events:
-
- Smart Events: detects human objects only and is quite accurate. Use this when other objects, like vehicles are not required. Smart events include intrusion zone, line cross detection, loitering and people gathering. False positives with Smart Events are very rare.
- Motion Events: detects motion of any kind (human, package, vehicle, animal)
Tip:
When using the camera stand alone, do not set up more than one event type (motion, smart). It is the event arming action that sends the event to the push notification server and the recording engine inside the camera. The camera will only record ONE event type (motion OR smart). If you arm both, you will get both event types sent to the user as push notifications but only one will record. The user could then receive a push notification for which there is no recording.
2. Go HERE for details on setting up motion events
3. Go HERE for tips on setting up smart events.
Step Seven: Configure Storage
While you may store events locally to the SD Card and to an NVR at the same time, in this example, we will discuss the SD Card storage only.
1. Go to Configuration > Storage > Recording Schedule.
Set the storage schedule and event type you wish to store.
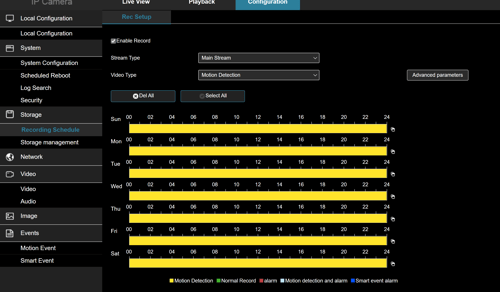
Tip:
It is the COLOR of the bars that indicate the events that are going to be recorded NOT the drop down box above.
Caution:
Always set the recording schedule to 7x24 and use the EVENT ARMING calendar to control when something will actually be detected, recorded and a push notification sent.
2. Click on storage management to see the status of the SD Card. If it needs to be formatted it will indicate that, simply press the FORMAT button. The SD Card overwrites by default.
3. Advanced properties allows you to control the pre-record and post record interval. When an event is detected in the example below, the camera will store the 5 seconds leading up to the event and 10 seconds after the event ends.

Step Eight: Add the Camera to the Mobile App
Now that you have set up your camera, it is time to add it to the ClareVision app. It is quite simple.
- Launch the ClareVision App
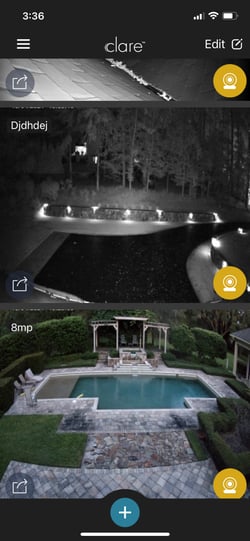
- Tap the 'Plus' sign and you will be presented with the three options shown below.
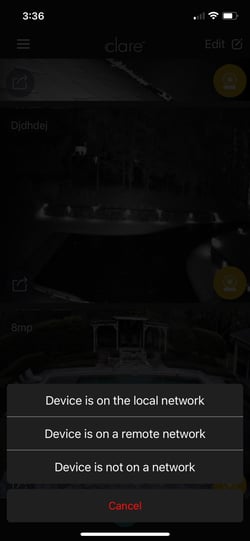
- If you tap device is on the network, the app will scan the LAN for any ClareVision cameras and present them in the following screen. Device is on a remote network provides you with the option of scanning a QR code for a camera on a remote network.
The system will locate it anywhere in the world and provide you with a login screen to add the remote camera.
In our example, we tapped on "Device is on the local network" and two devices were found.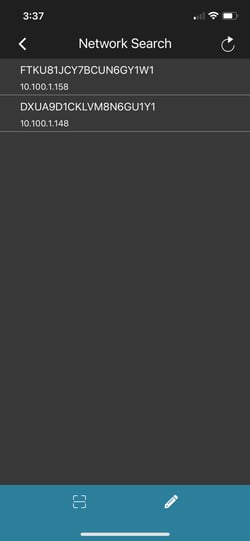
- Tapping on a device brings you to a login screen where you may enter the credentials
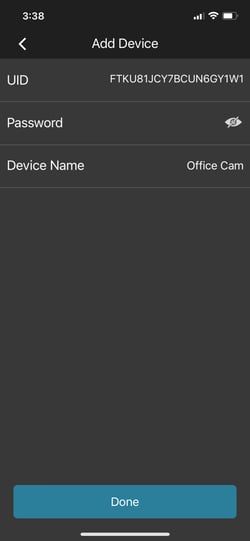
- And DONE!
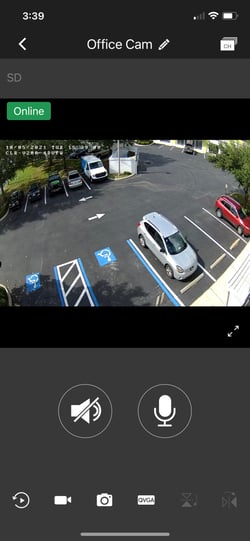
You have just successfully installed, configured and enabled a stand alone ClareVision camera on the ClareVision mobile app. Any push notifications and events that are configured will automatically propagate to your customer's mobile device.
Last Updated: 02/01/2022