Step One: Go to the configuration tab, Events/Smart Events

Make sure you ENABLE Intelligent Detection such as Humanoid detection. You must have Intelligent detection enabled to use any of the presents below.
There are four smart event types:
- Intrusion: intrusion events are boundary intrusion events. Intrusion detection can be configured with up to four zones.
- Line Crossing: line crossing detection can be configured as a unidirectional crossing or bidirectional crossing.
- Loiter Detection: detects when people stay in a region of interest for an certain time period.
- People Gather: detects when the density of people in an area exceeds a threshold.
All of these events are human based. Vehicle detection is being worked on at this time and will be in a future firmware release.
Although there are four smart event types, they all are stored and propagated to the mobile app as 'Smart Events'. There is meta-data that indicates the smart event type in the event log in the mobile app and in the push notification. You can configure more than one smart event type.
Step Two: Intrusion
Intrusion is the most commonly used smart event type. It is similar to motion detection in concept but is restricted to human detection. False positives are very rare with smart intrusion events.
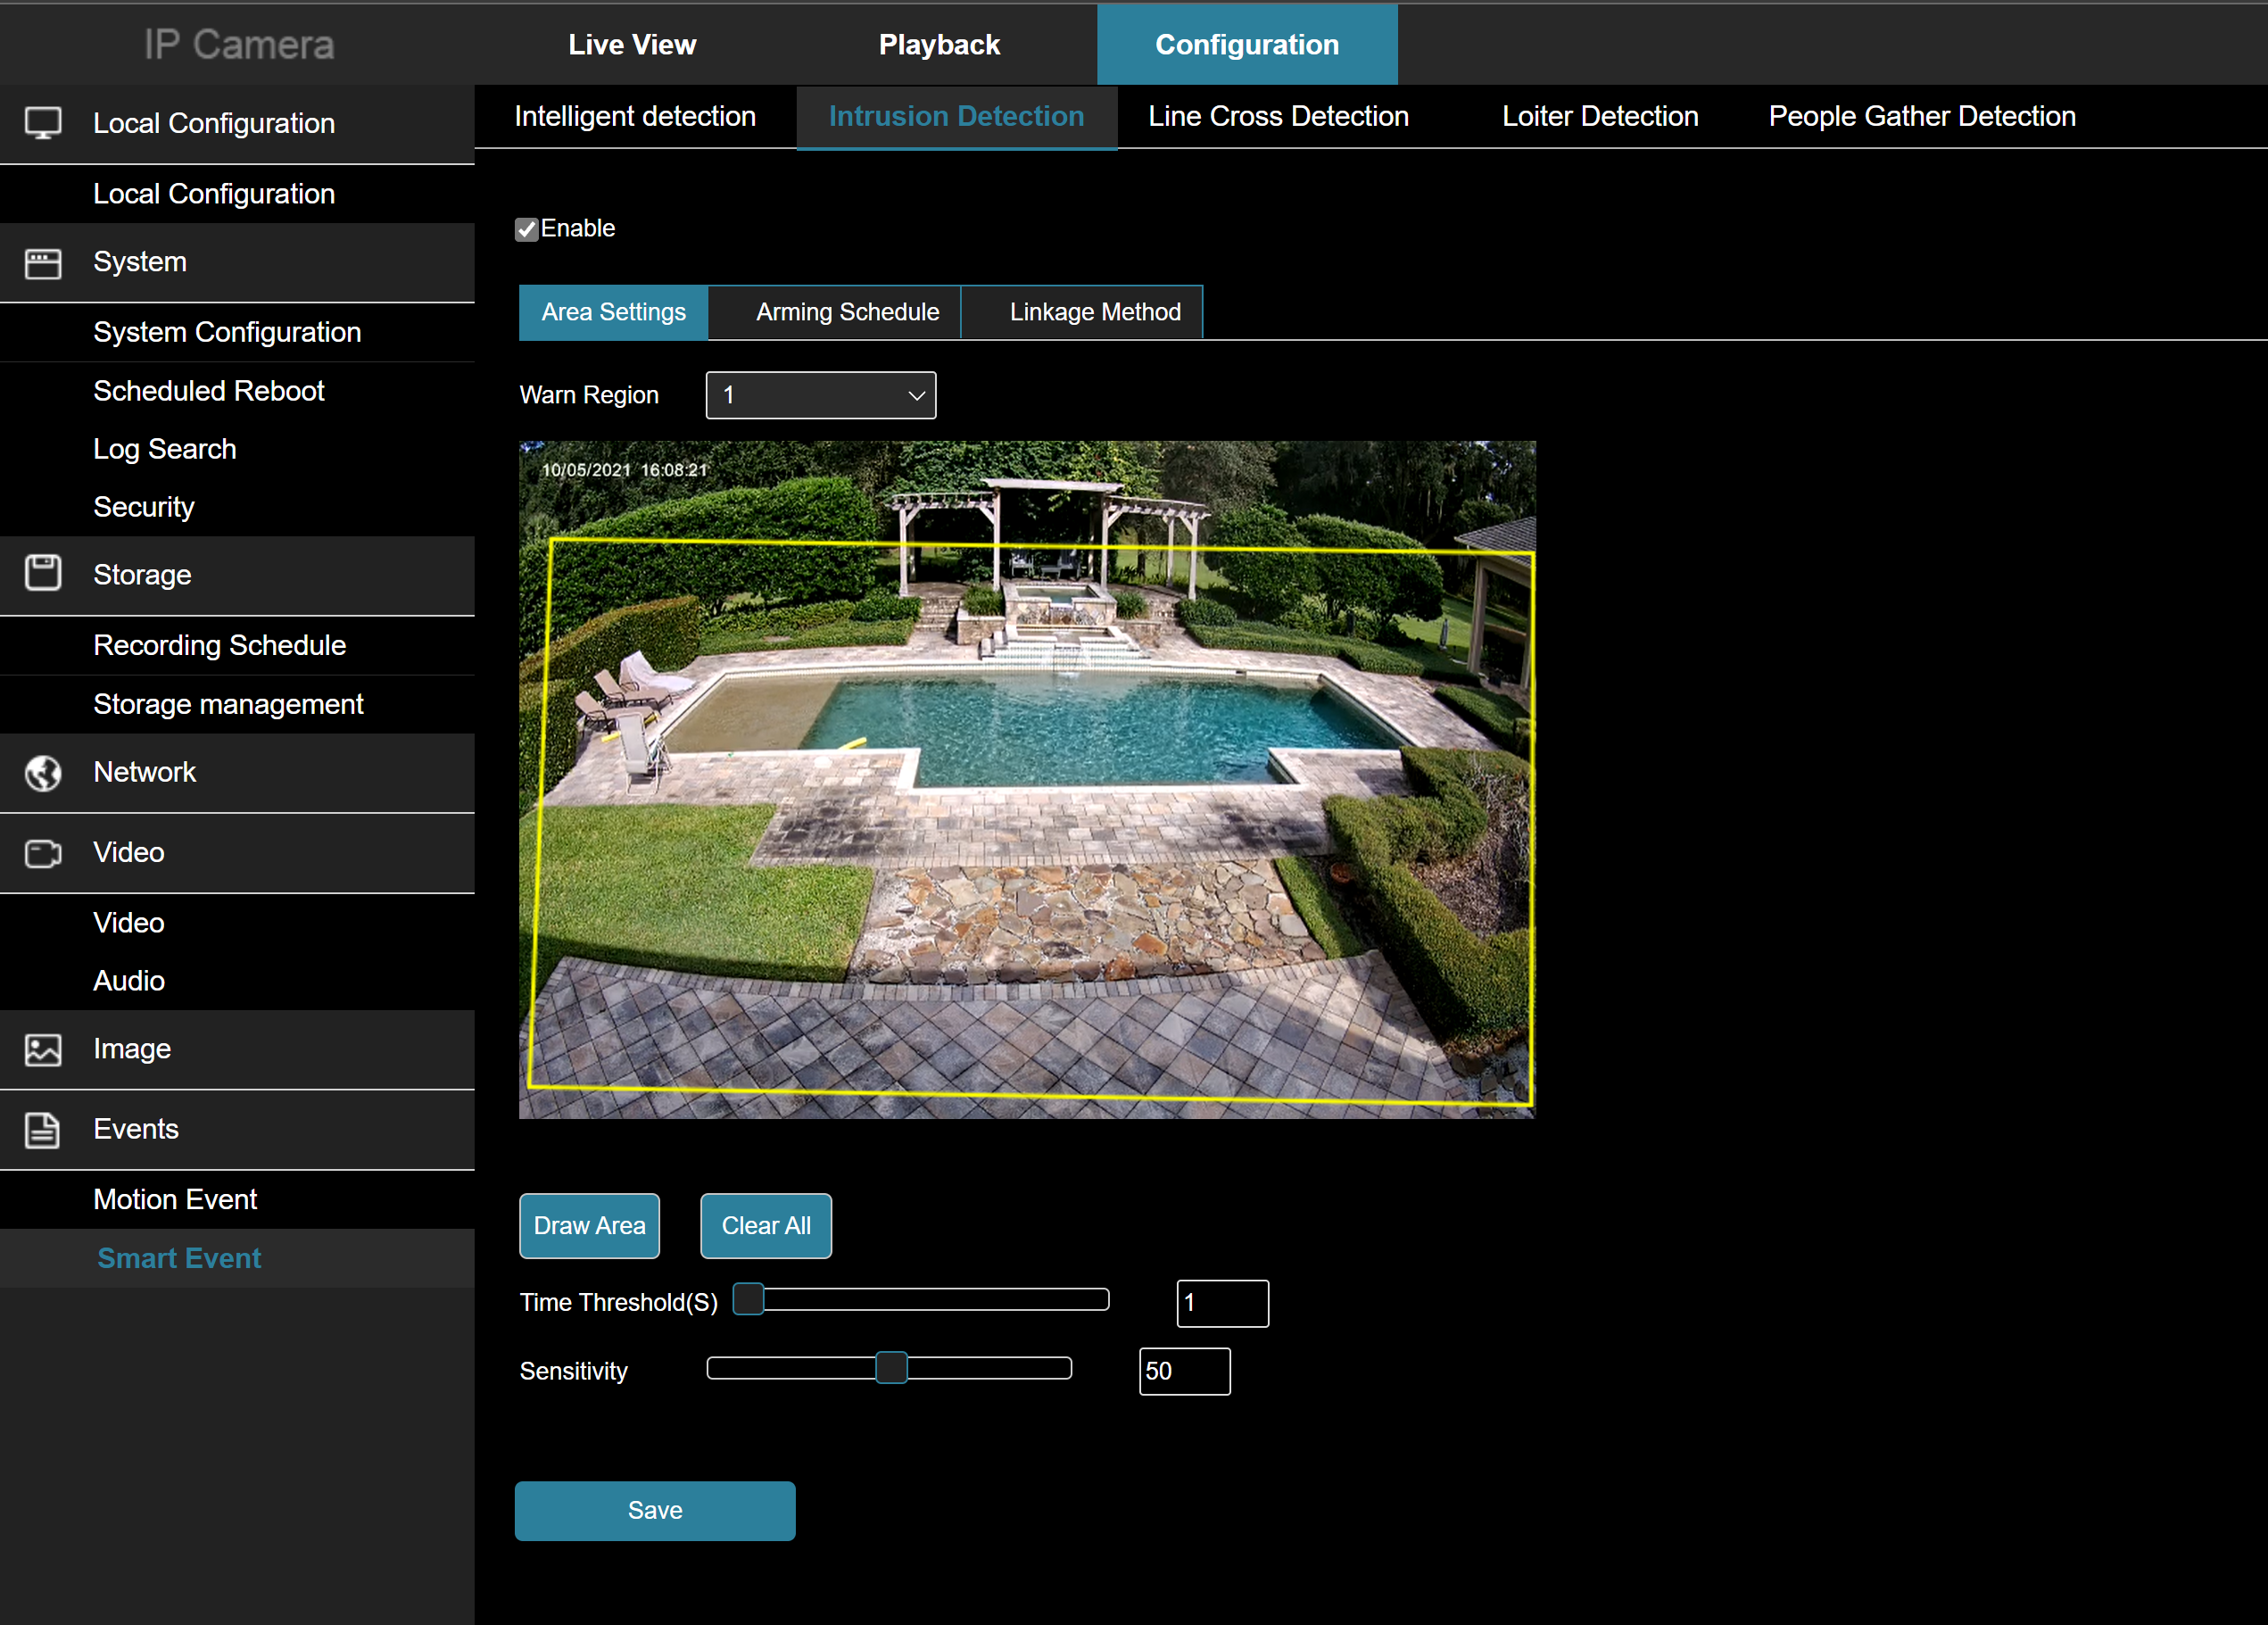
First - check the 'enable' box. Without the event enabled, nothing will happen.
Click "Draw Area". You can draw a quadrilateral anywhere on the screen. If the region of interest does not fit nicely within a quadrilateral, you can draw a second quadrilateral by using the "Warn Region" dropdown box. You can have up to four regions of interest.
Any intrusion in any of the up to four regions will trigger the intrusion event.
The "Time Threshold" is the duration the person needs to be in the region for the event to trigger. The time is in seconds.
"Sensitivity" is the human detection sensitivity setting. A higher number will detect humans further away from the camera, but may be prone to more false detections. Lower sensitivity has the reverse effect.
Step 3: Line Crossing
Line crossing is used when you want to know when someone has entered or exited a specific threshold or doorway as opposed to simply knowing if someone is in a region
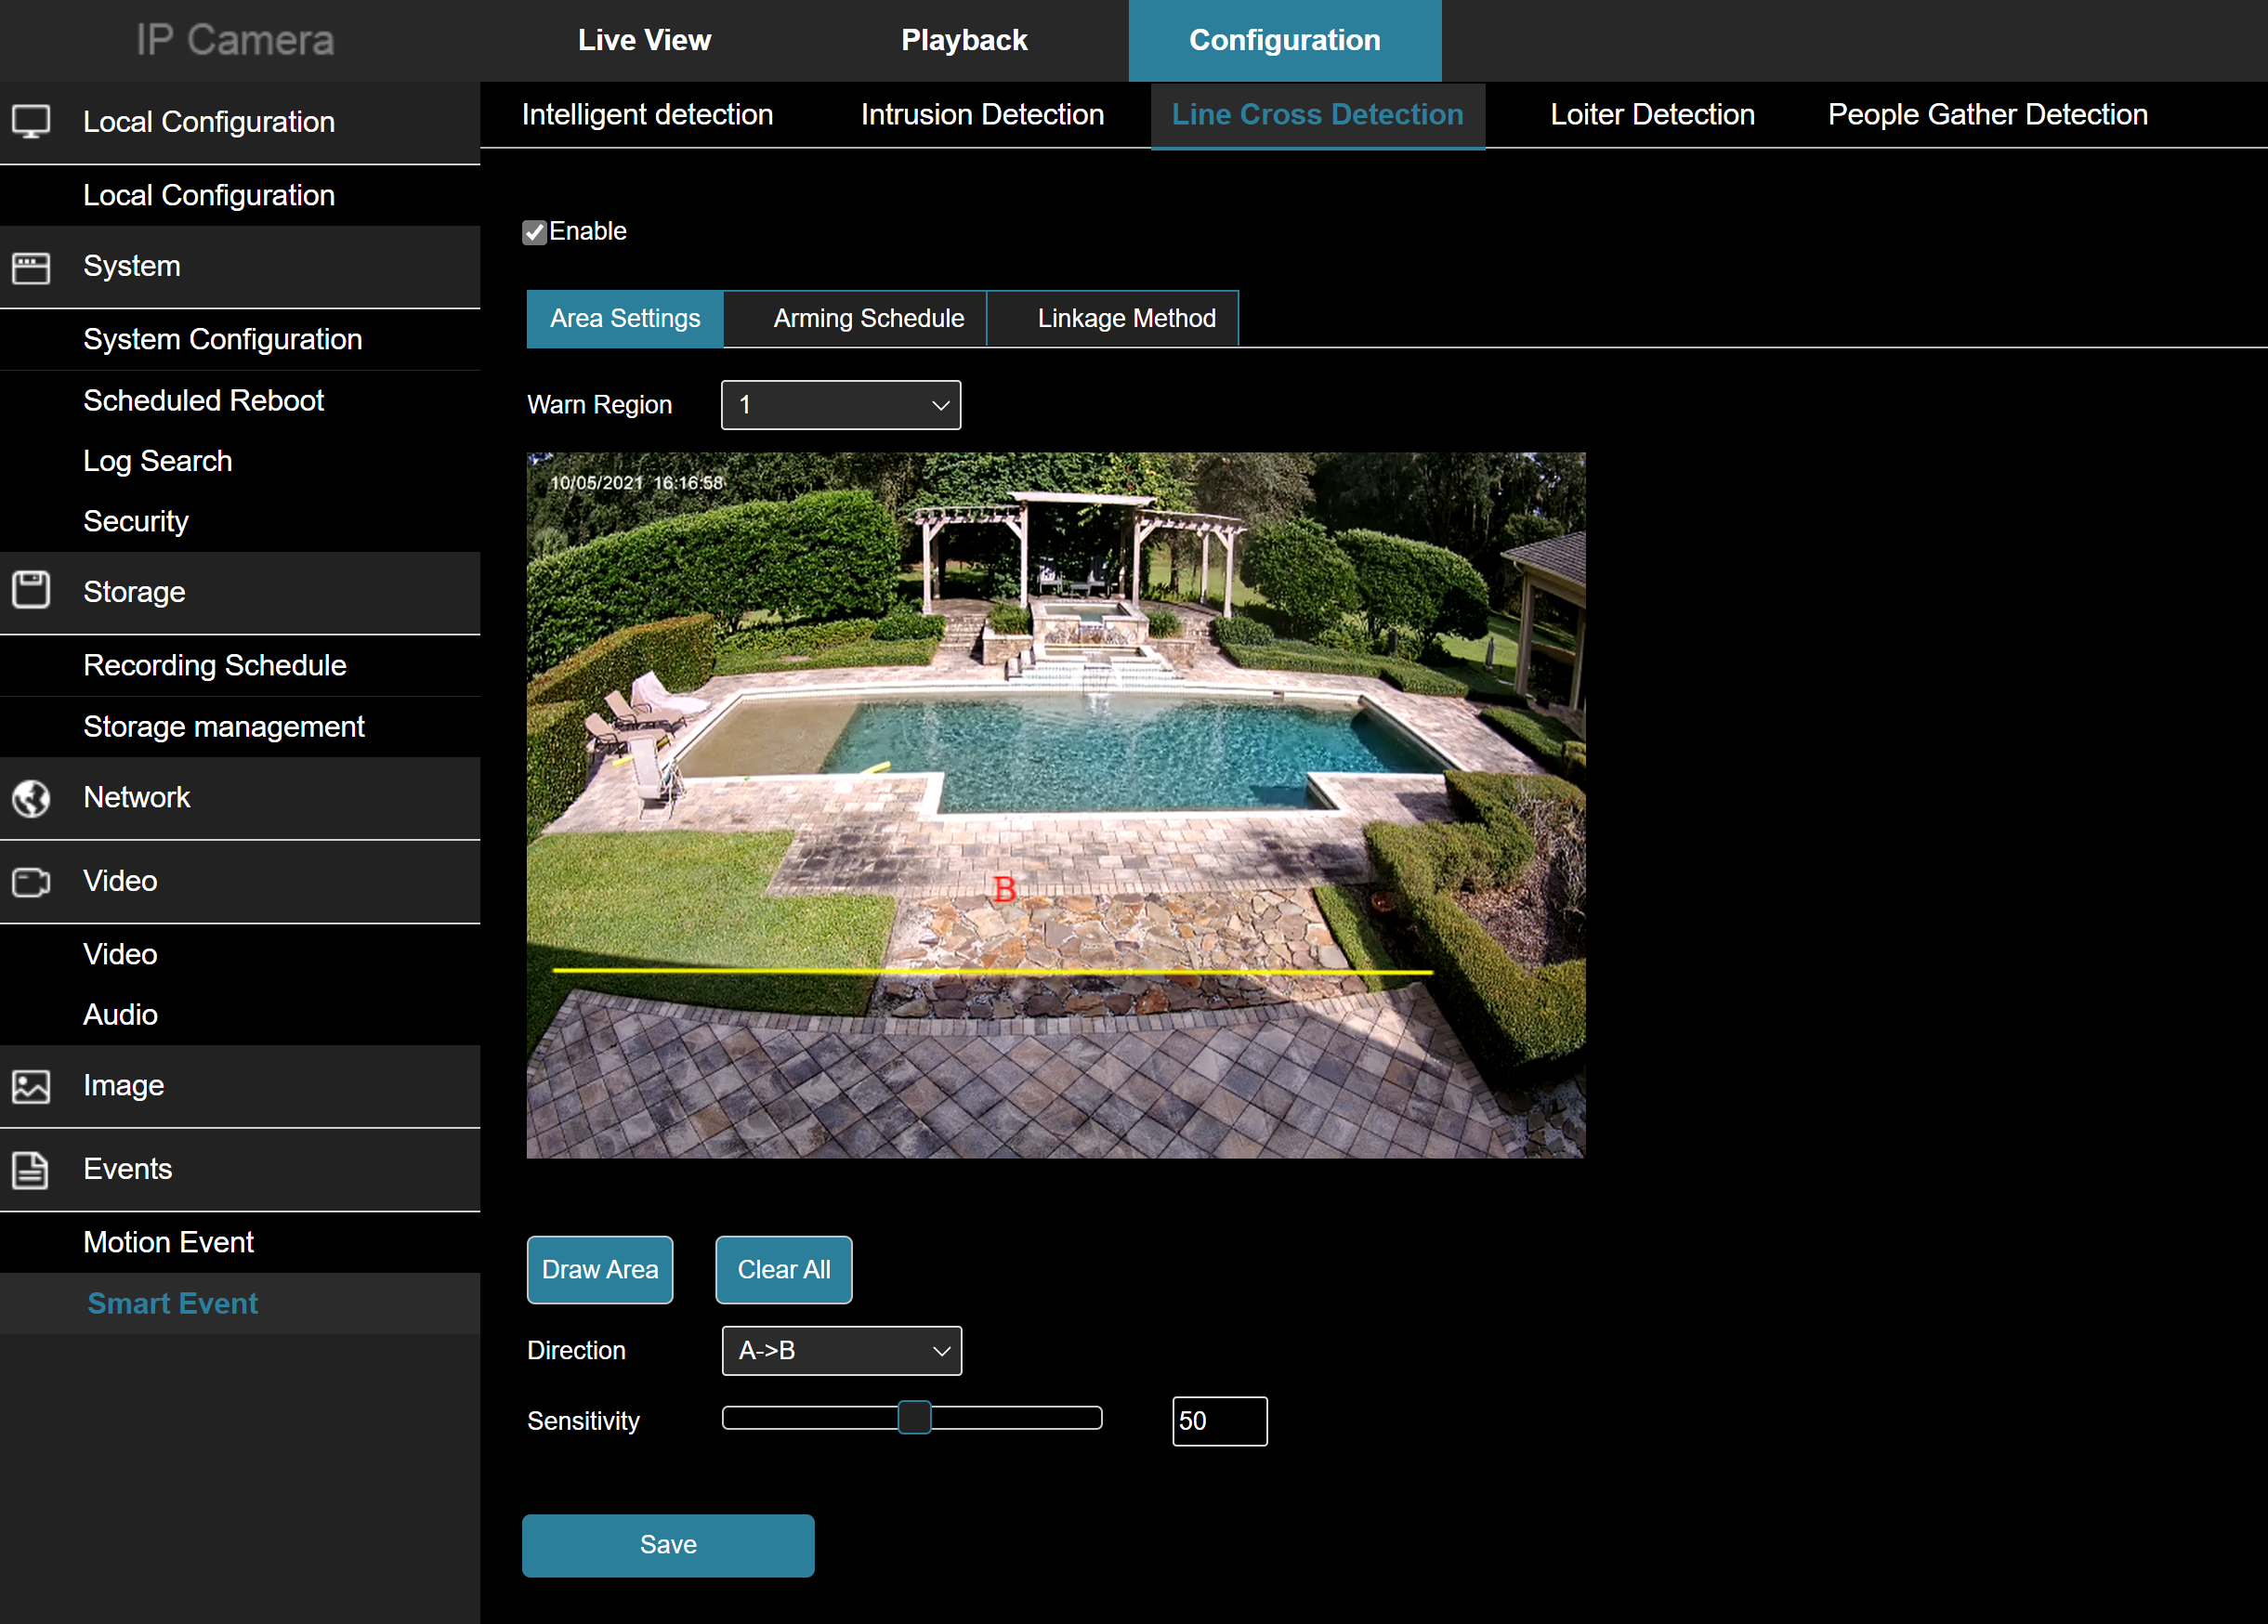
In this example, the camera will trigger when someone walks from the house to the pool, but not the reverse.
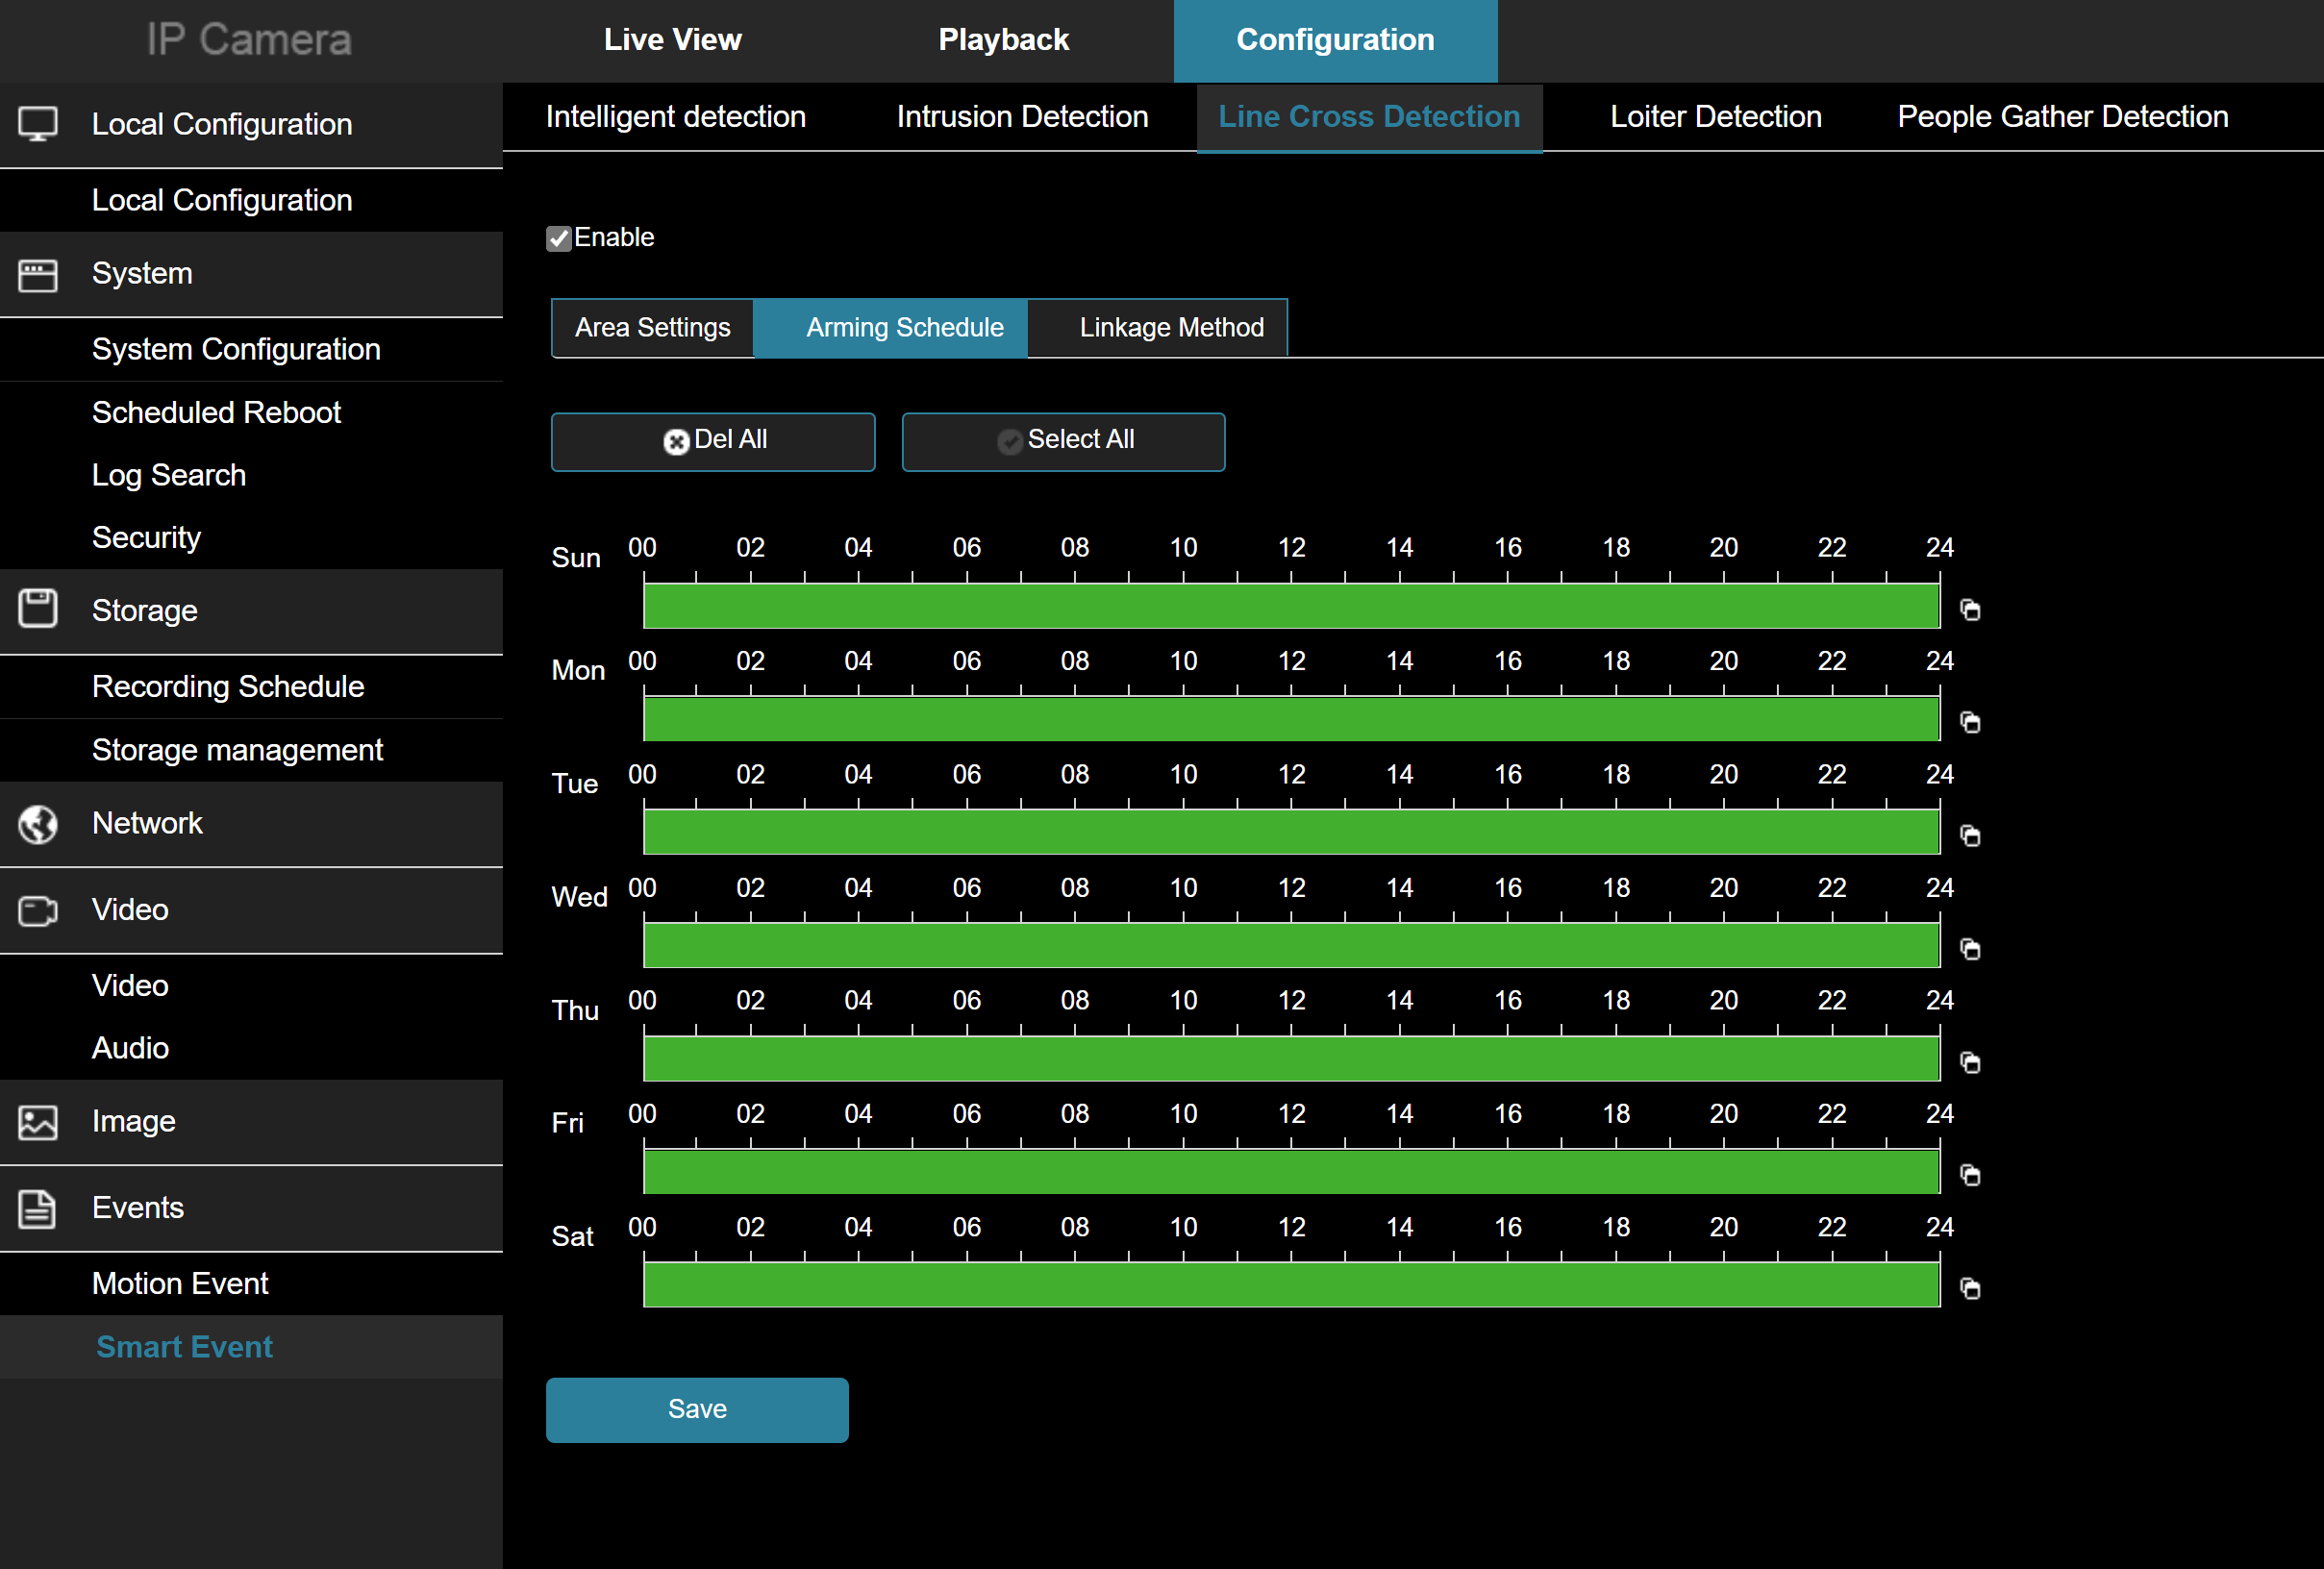
Step Four: set the arming schedule.
The arming schedule is what controls when the camera will process smart events. Each smart event type can have its own arming schedule. When a smart event is created, it is automatically sent to the push server (stand alone) or sent to the NVR for processing. Additionally, when a motion event is created, it will be sent to the recording engine in the camera and if configured to record, it will be recorded to the SD Card.
The arming schedule default is 7x24.
Caution:
It is easy to get confused by the multiple calendars that are in a camera or NVR. The event arming schedule shown above is the primary calendar you need to manage.
If your installation requires events to be disabled during certain hours of the day or days of the week ALWAYS do the following:
1. Use the event arming schedule to control when the event will be analyzed and propagated
2. Leave the record schedule on 7x24 record. DO NOT try to match the two calendars - use the event arm schedule to control when events happen NOT the record schedule.
Step Five: TEST
This is an easy thing to skip - make sure you test your Smart event! Watch the area of interest and make sure objects moving in that area are captured (go to the Playback tab to view). You can use the sensitivity setting to adjust the distance the camera will pick up a human event.
DONE!
Last Updated: 10/06/2021