Motion events are quite simple to set up.
Step One: Go to the configuration tab, Events/Motion Events
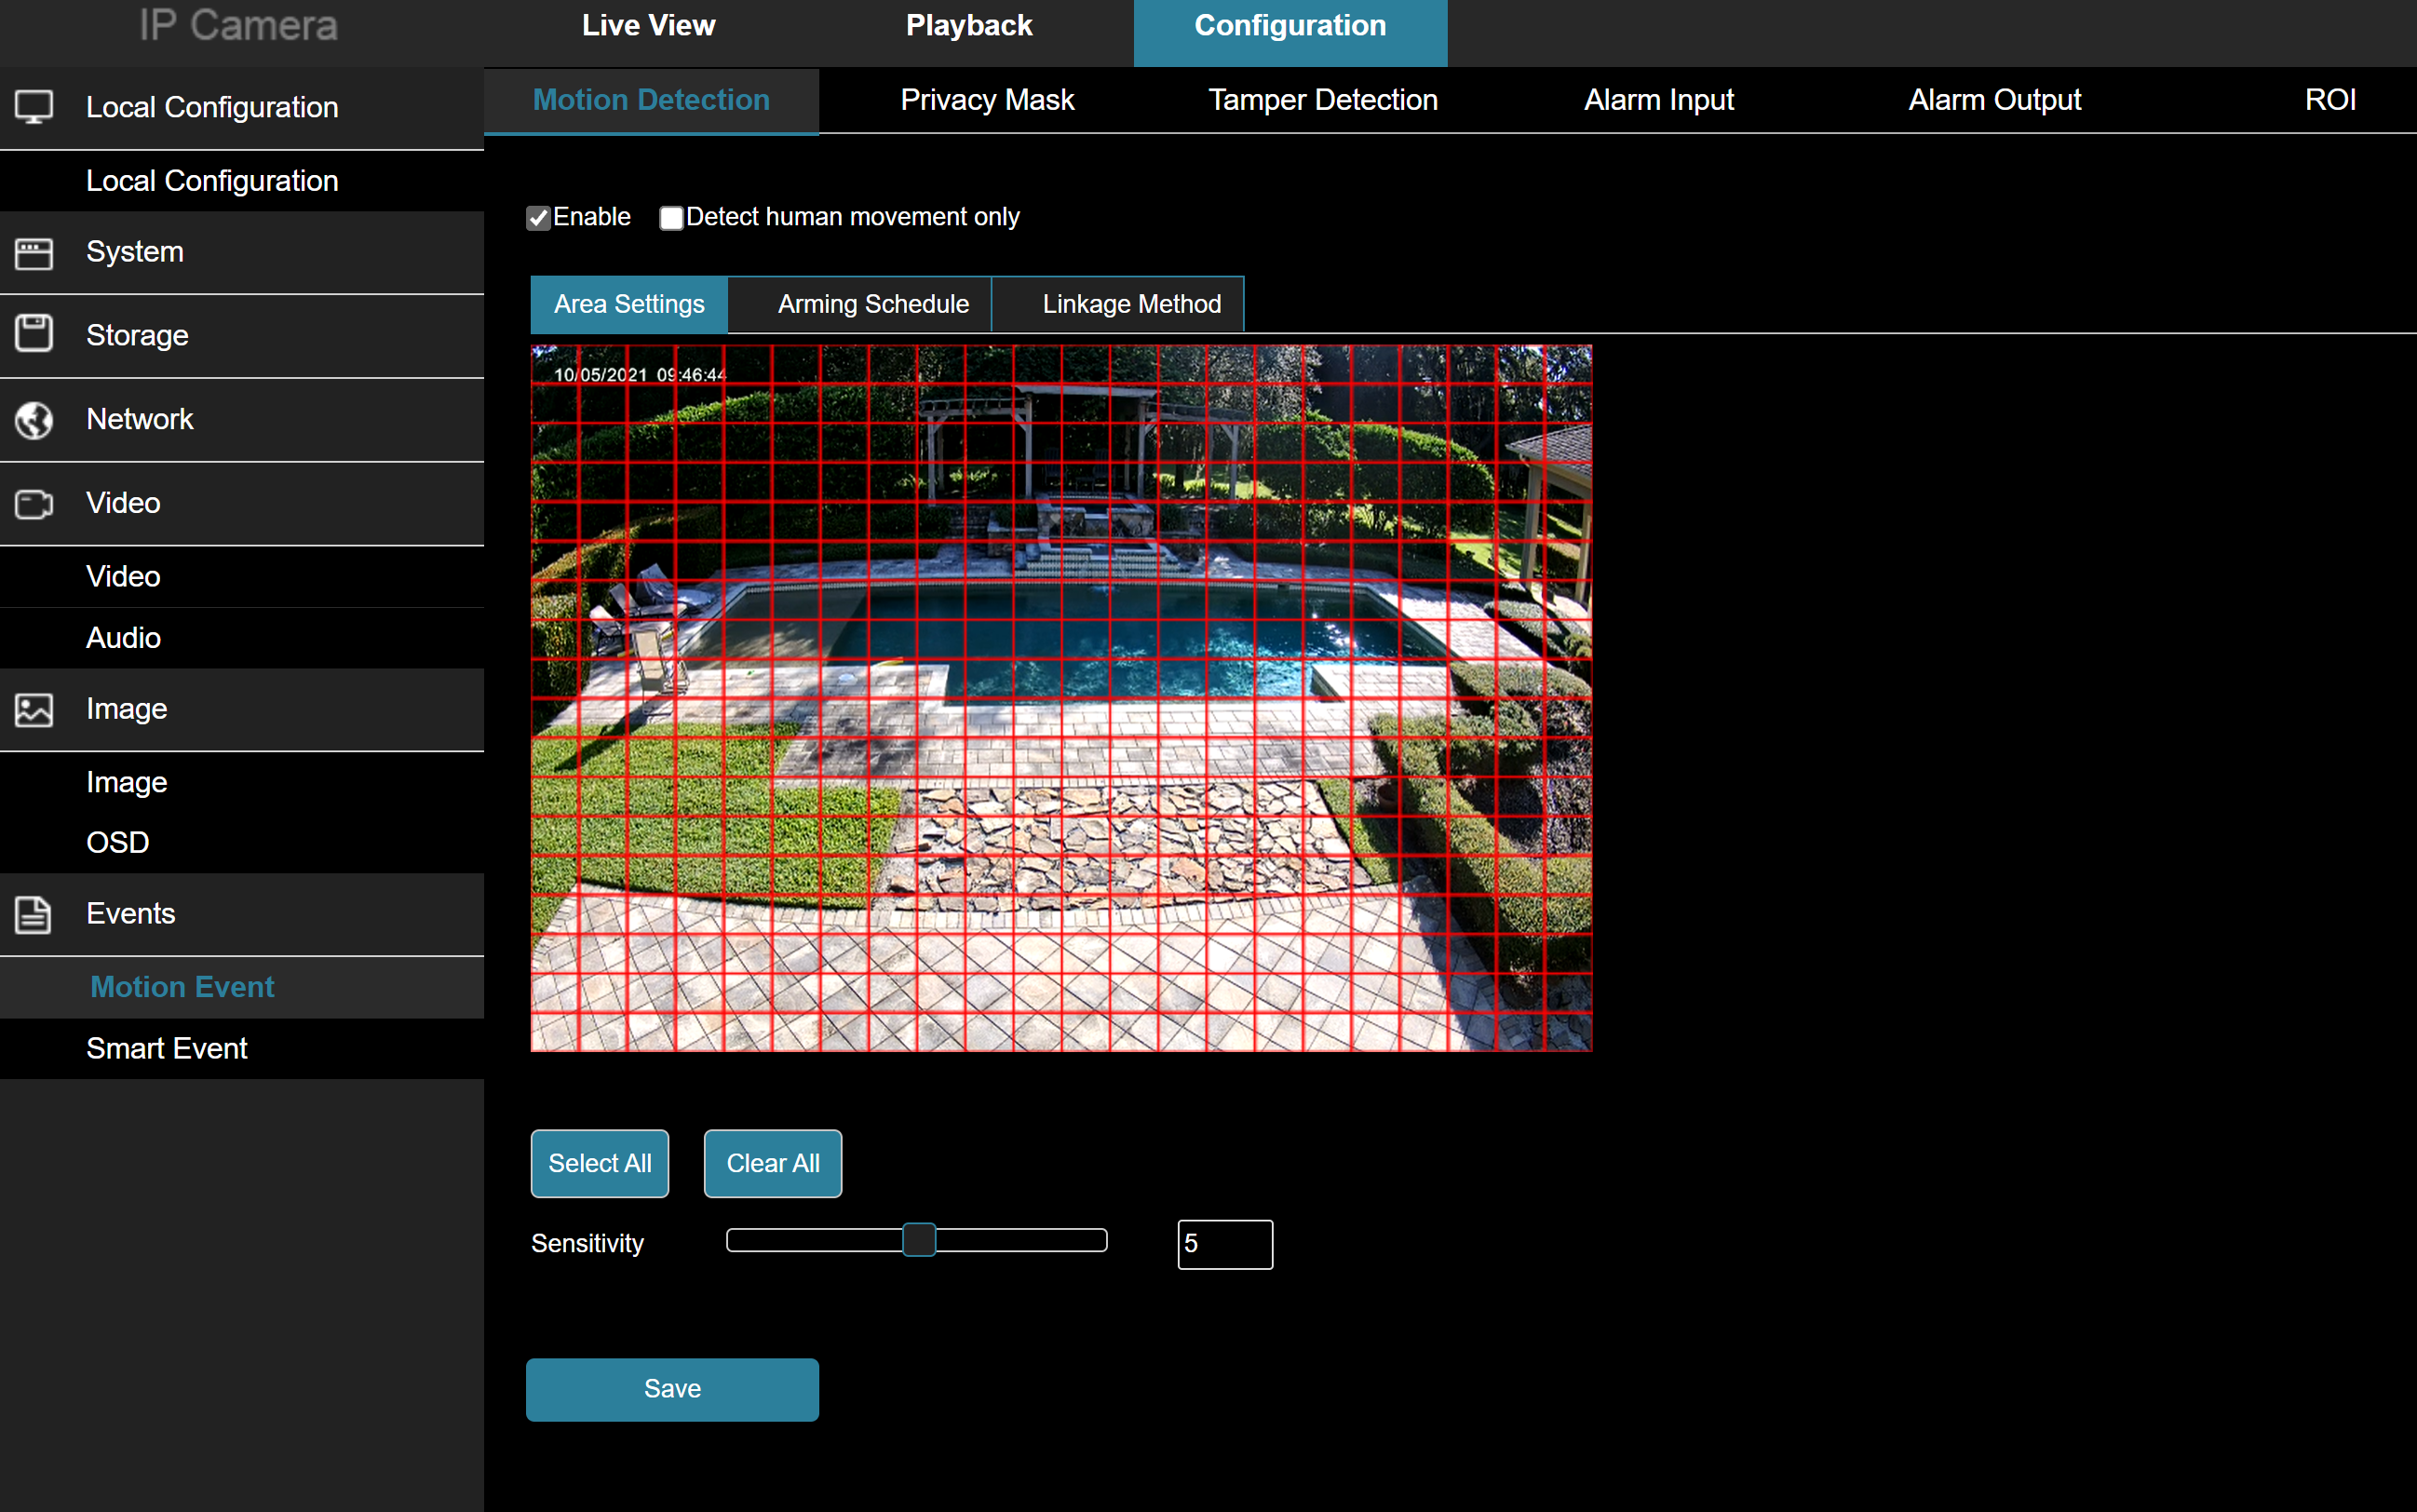
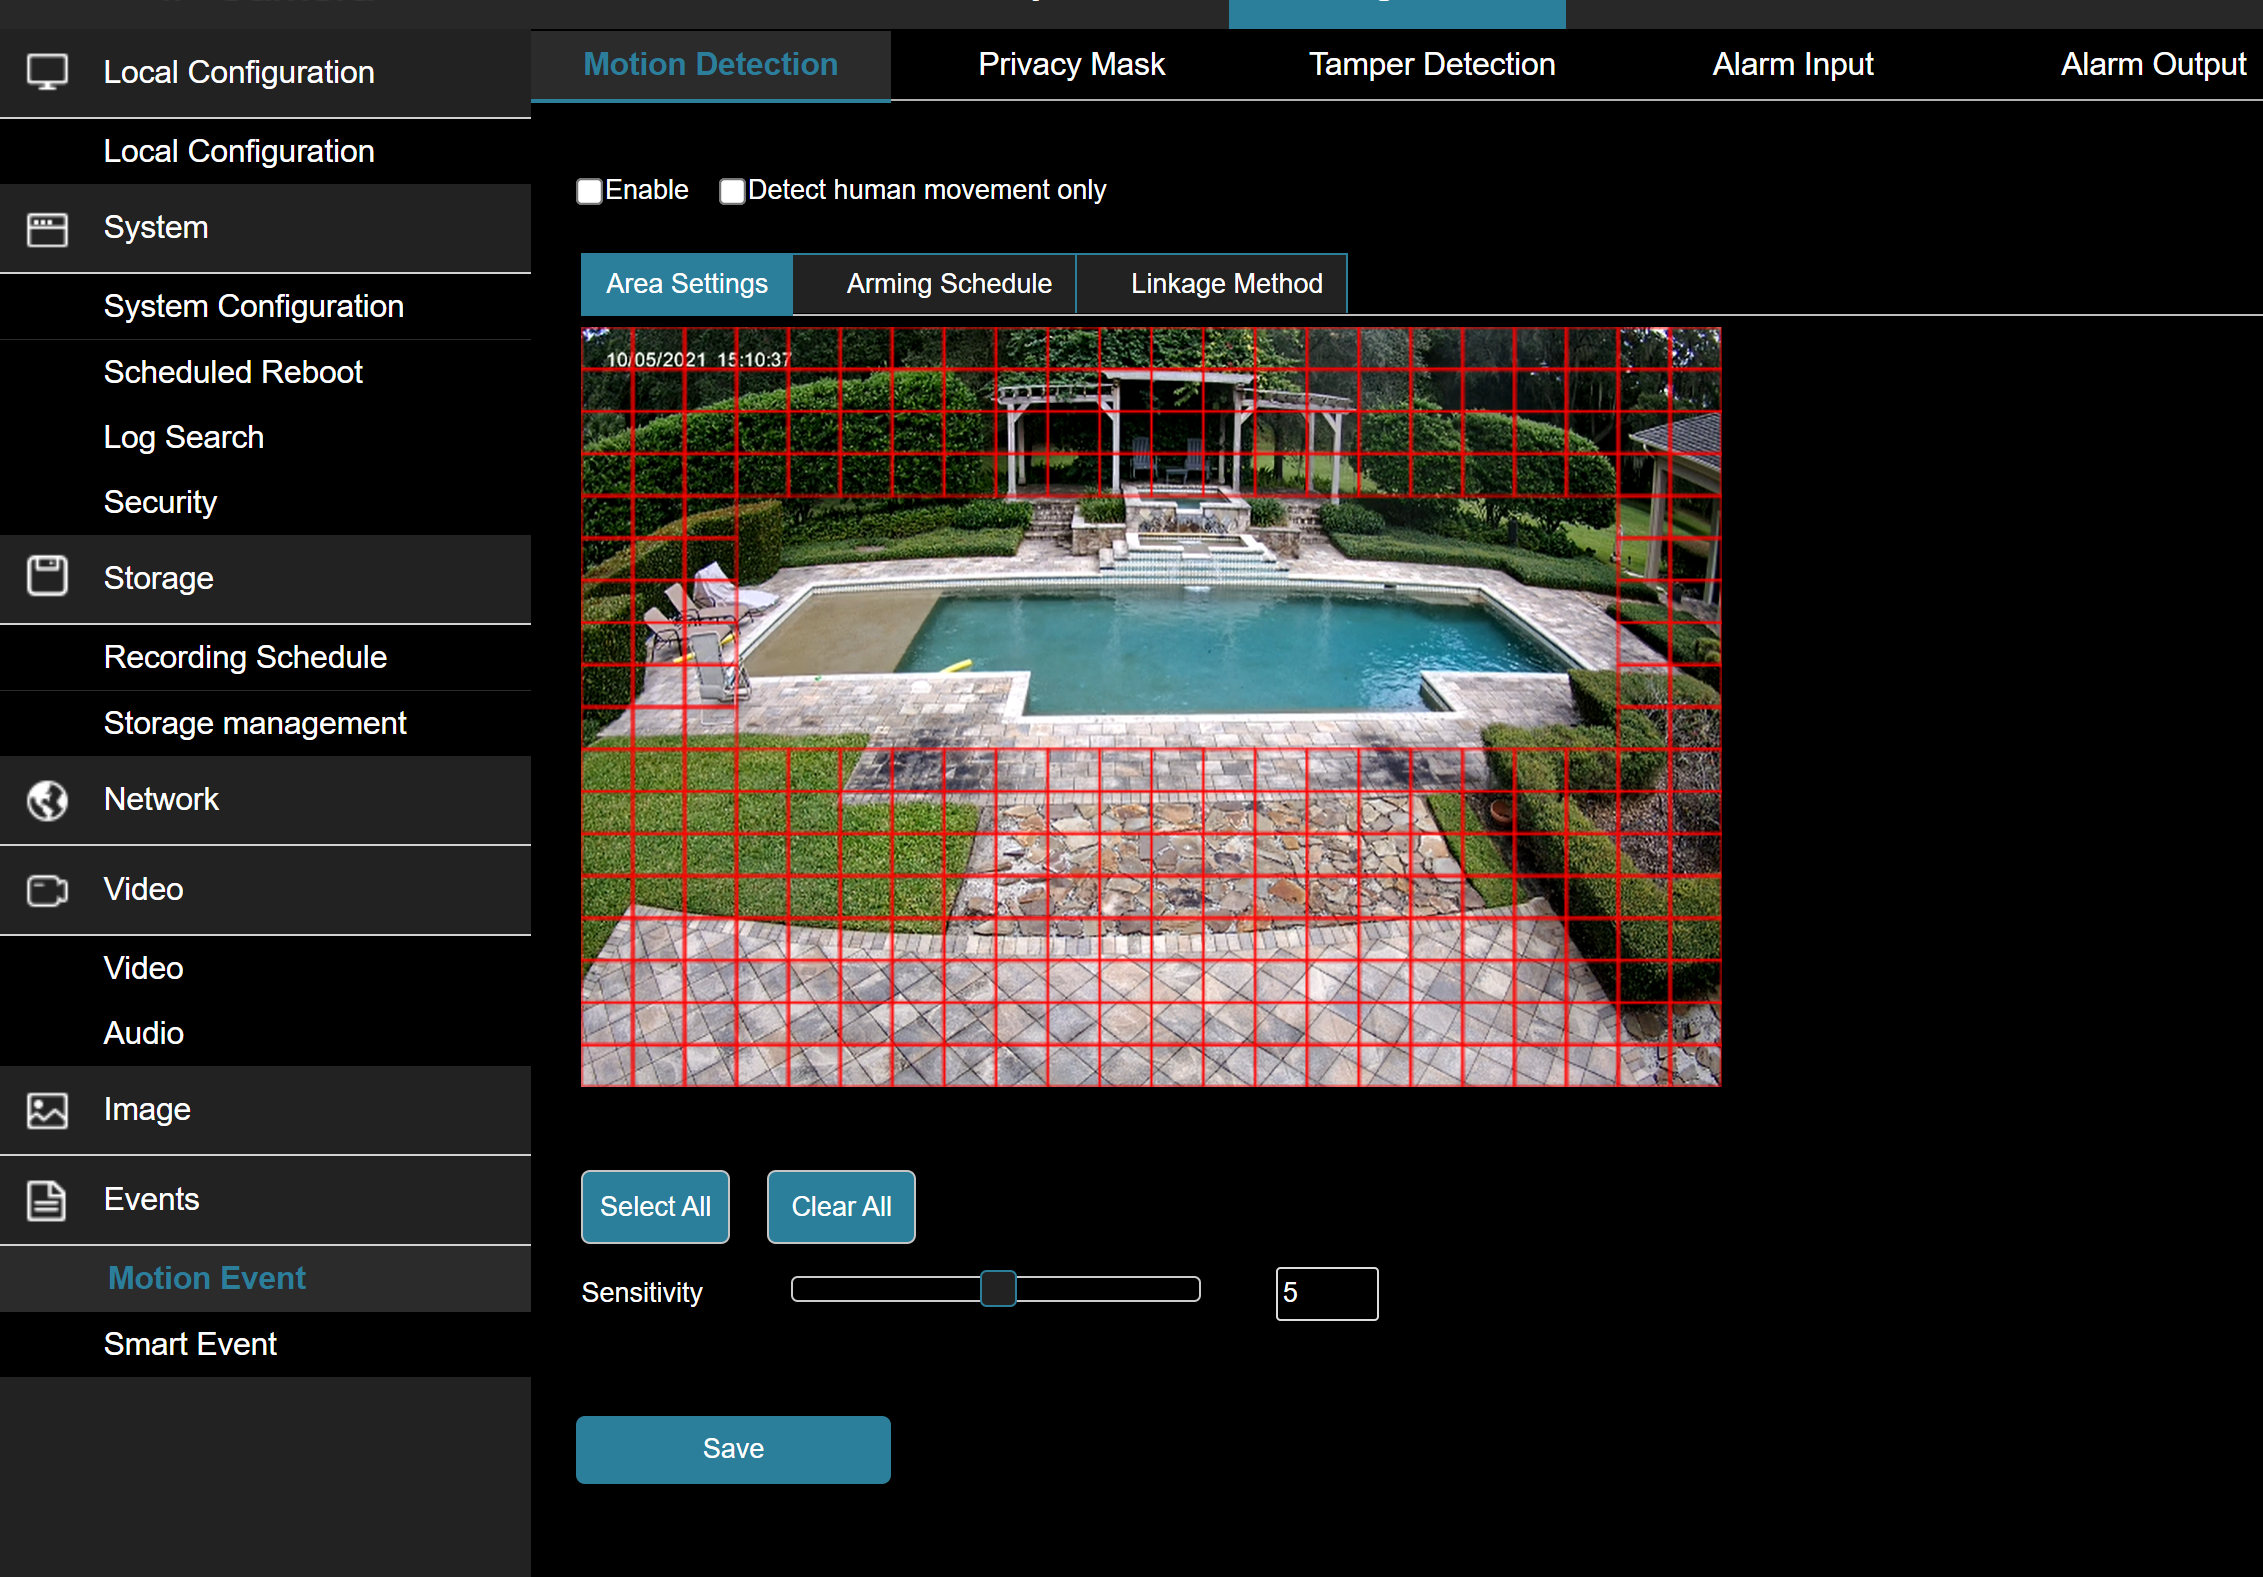
Step Two: Set the motion area.
Set the motion area by dragging your mouse over the grid pattern. The area without grid coverage will not be analyzed for motion. In the image above, the pool surface should be removed from the motion detection area as the spa spillway will create rippling on the surface of the pool which will result in false triggers.
You should also watch for nearby bushes/trees/foliage that may move when the wind is blowing. The motion algorithm in the ClareVision cameras was overhauled in the fall release. As a result, insects, birds and foliage in the distance will rarely cause false triggers.
Step Three: Tune the Sensitivity.
As you lower the sensitivity, the likelihood of false triggers will be reduced, but the camera's detection zone for a human size object will also be reduced. See the table below:
| V100 2MP Cameras |
V100 4MP Cameras |
V200 4MP Cameras |
V200 8MP Cameras |
| 1 - 13ft | 1 - 13t | 1 - 34ft | 1 - 33ft |
| 2 - 15ft | 2 - 15ft | 2 - 35ft | 2 - 37ft |
| 3 - 16ft | 3 - 16ft | 3 - 35ft | 3 - 33ft |
| 4 - 20ft | 4 - 20ft | 4 - 38ft | 4 -37ft |
| 5 - 23ft | 5 - 23ft | 5 - 40ft | 5 - 38ft |
| 6 - 23ft | 6 - 23ft | 6 - 41ft | 6 - 40ft |
| 7 - 25ft | 7 - 23ft | 7 - 45ft | 7 - 45ft |
| 8 - 27ft | 8 - 27ft | 8 - 45ft | 8 - 46ft |
| 9 - 30ft | 9 - 30ft | 9 - 70ft+ | 9 - 70ft+ |
| 10 - 31ft | 10 - 34ft | 10 - 70ft+ | 10 - 70ft |
Note: the above table is for human sized objects and the fixed lens cameras. Cars, for example, will trigger motion events at greater distances and zoom adjustment on a varifocal camera will allow you to detect human objects at greater distances than those listed above.
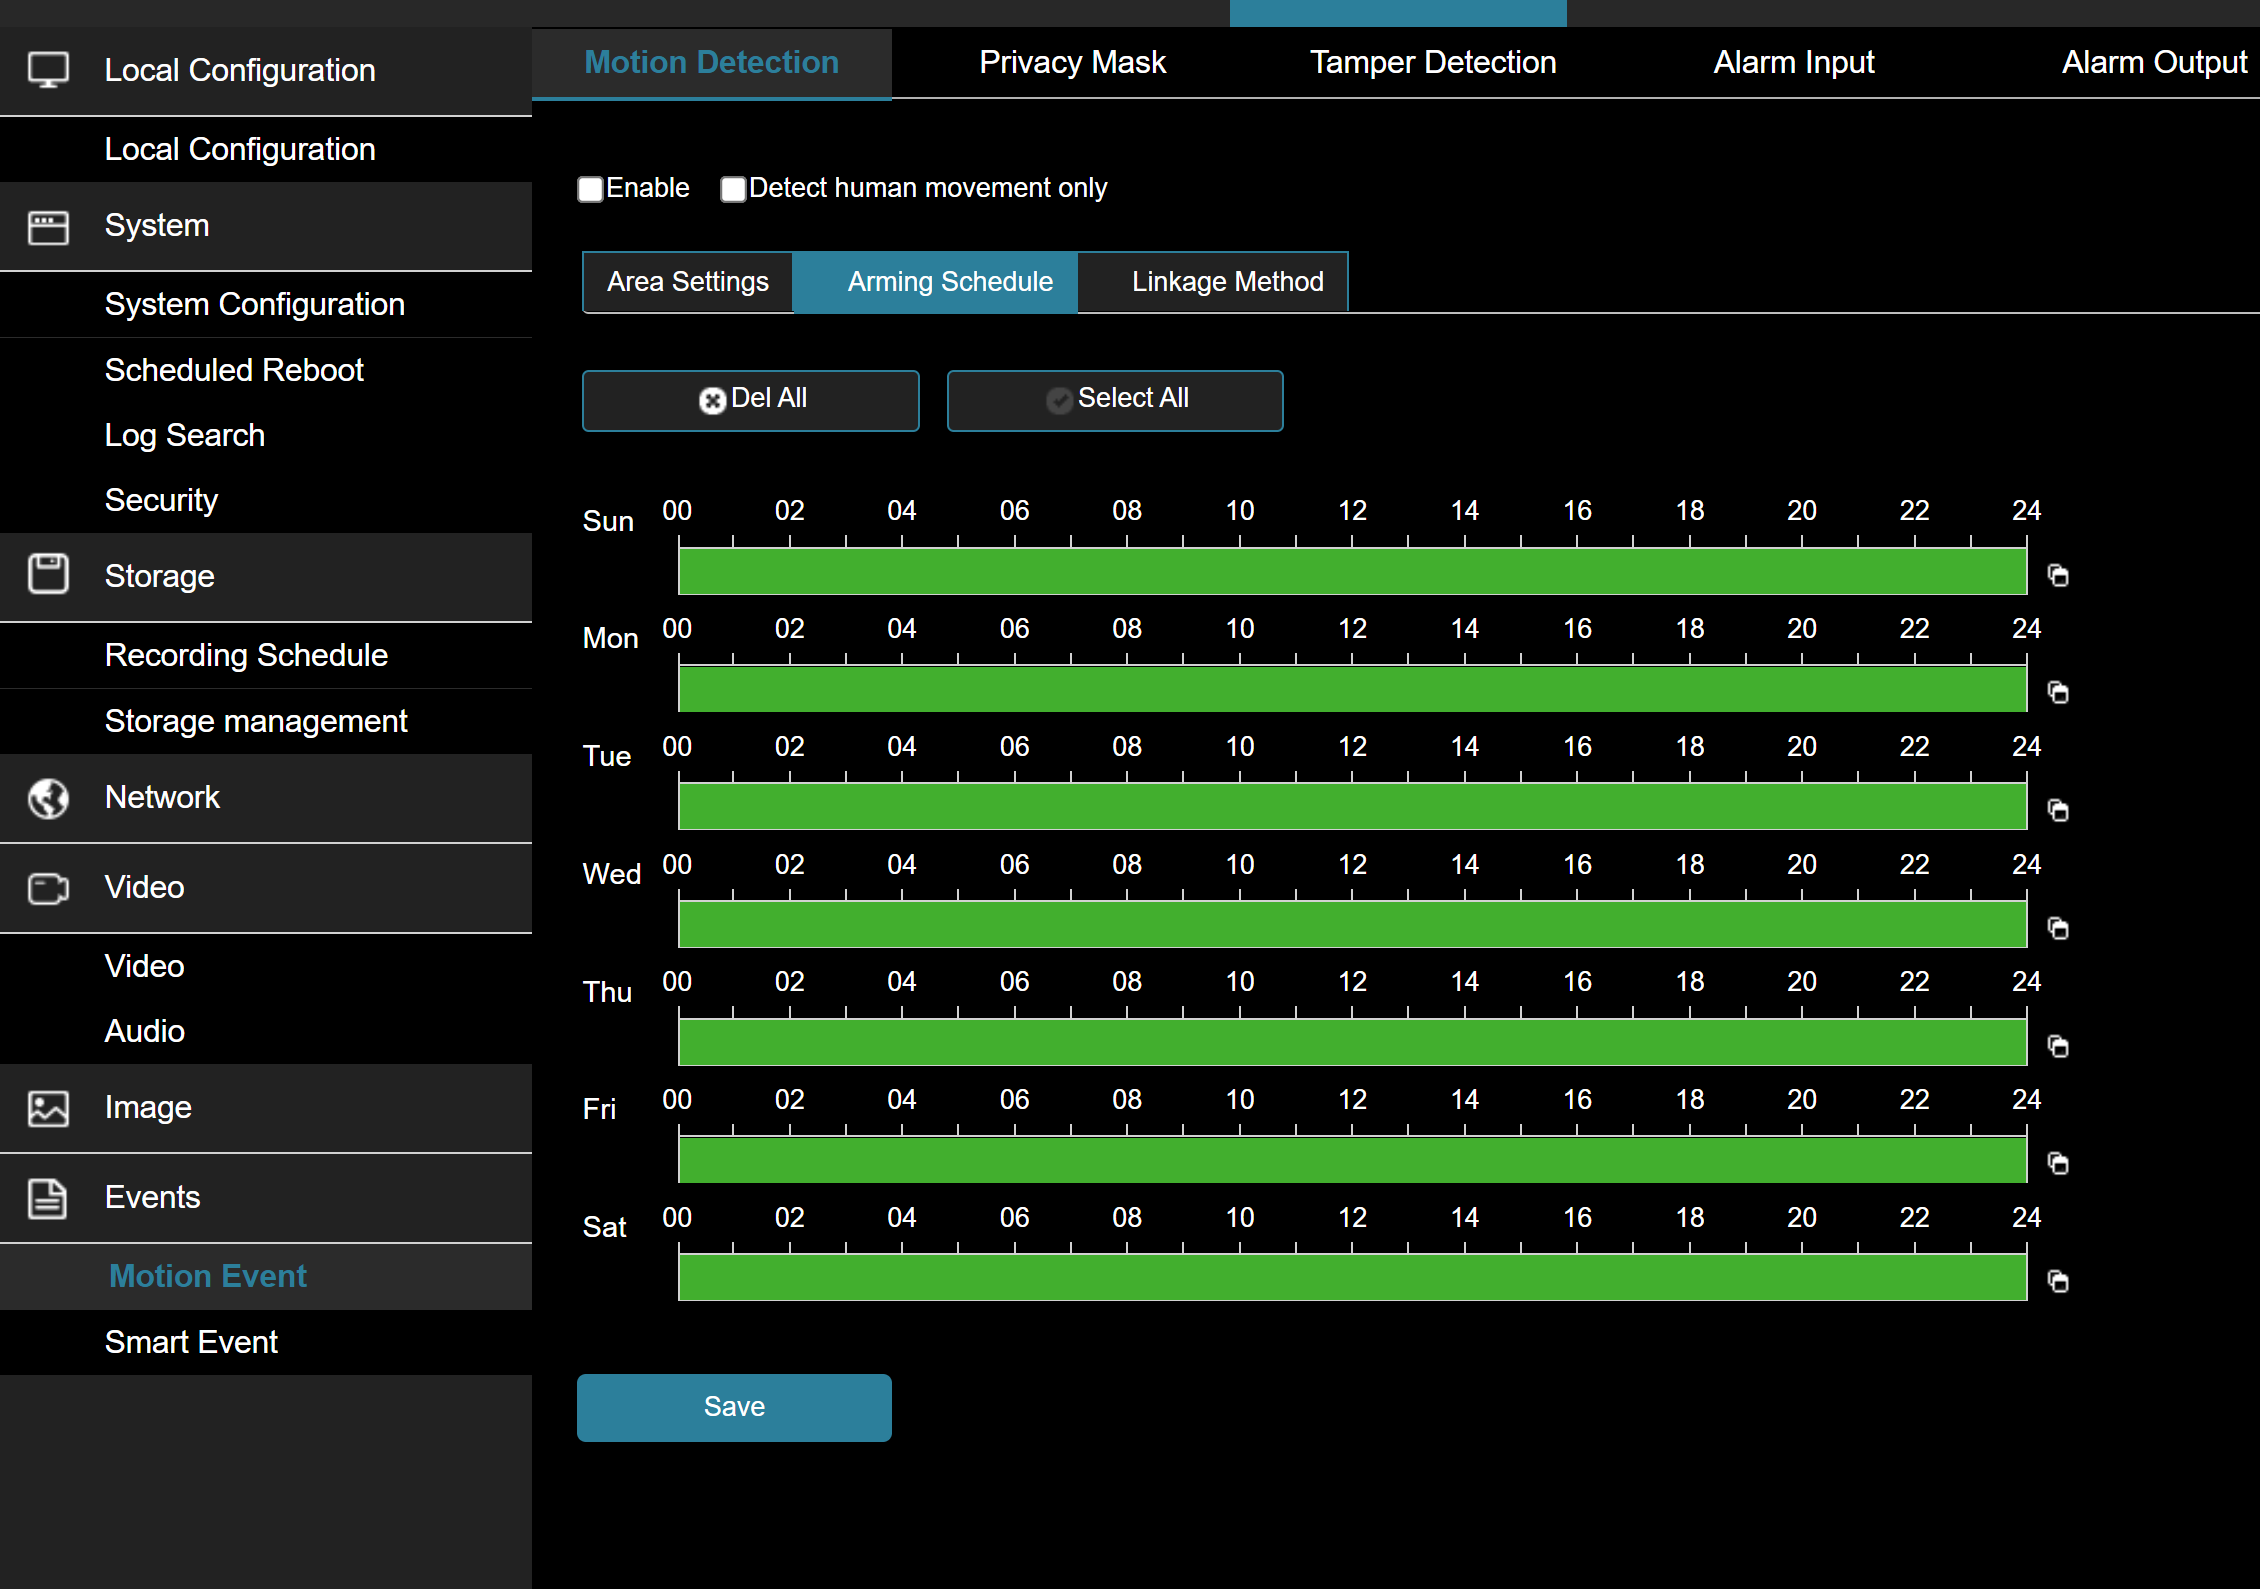
Step Four: Set the arming schedule.
The arming schedule is what controls when the camera will process motion events. When a motion event is created, it is automatically sent to the push server (stand alone) or sent to the NVR for processing. Additionally, when a motion event is created, it will be sent to the recording engine in the camera and if configured to record, it will be recorded to the SD Card.
The arming schedule default is 7x24.
Caution:
It is easy to get confused by the multiple calendars that are in a camera or NVR. The event arming schedule shown above is the primary calendar you need to manage.
If your installation requires events to be disabled during certain hours of the day or days of the week ALWAYS do the following:
1. Use the event arming schedule to control when the event will be analyzed and propagated
2. Leave the record schedule on 7x24 record. DO NOT try to match the two calendars - use the event arm schedule to control when events happen NOT the record schedule.
Step Five: TEST
This is an easy thing to skip - make sure you test your setup! Watch the area of interest and make sure objects moving in that area are captured (go to the Playback tab to view). Equally as important, make sure you have filtered out areas that are prone to create false triggers: nearby foliage, pools, sidewalks, roadways etc.
DONE!
Last Updated: 10/06/2021