Preface
For information on Z-Wave and ClareHome, see Installing Z-Wave with ClareHome Tech Bulletin (DOC ID 1162).
Notes
- When installing Z-Wave devices, ensure that there is nothing inhibiting their signal. Z-Wave relies on radio signals. Metal or thick walls may limit their signal strength.
- We recommend having 2 or more repeating Z-Wave devices.
Introduction
The Honeywell TH8320ZW is a Z-Wave thermostat that has been tested and certified for integration with the ClareHome system.
By integrating the Honeywell thermostat to a ClareHome control system, your customers can send commands to the thermostat to change the modes, cool and heat settings, and the fan status from their mobile iOS devices or Android smartphone.
When integrating the Honeywell thermostat into your ClareHome project, no extra connection is necessary. Install the thermostat according to the Honeywell documentation, and then connect it to the home network using Z-Wave.
The Honeywell thermostat integrates with the ClareHome system in a way similar to the existing HVAC integrations. All HVAC integrations share a common UI, so that the user experience is consistent.
Temperature settings can be controlled via events. Use Fusion’s Scenes and Rules to automate the actions your customers want.
The following figure shows the Honeywell controls on the ClareHome UI.
Figure 1: User interface of the Honeywell thermostat
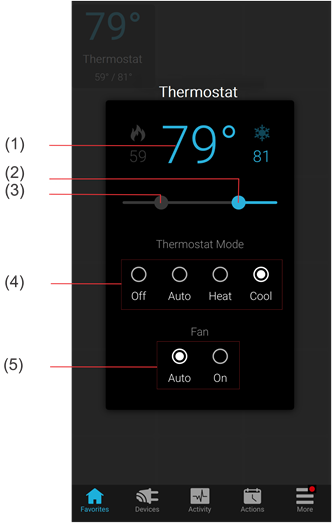
(1) Temperature setting displays on the ClareHome UI in Fahrenheit.
(2) Change the Heat set point by sliding the indicator left/right on the bar.
(3) Change the Heat set point by sliding the indicator left/right on the bar.
(4) Change the Operation mode by tapping the desired radio button.
(5) Change the Fan mode by tapping the desired radio button.
Installing the Honeywell thermostat
A qualified installation technician should install the Honeywell thermostat. Refer to the documentation that came with the thermostat for detailed installation instructions.
Pairing and removing the thermostat in ClareHome
Pair the thermostat to the project.
Note: You will need access to the physical thermostat device.
To add the thermostat in the ClareHome app:
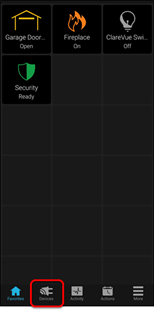
- Tap the ClareHome app’s Devices page.
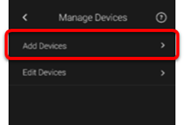
- Tap + Add Device.

- Tap Add Devices.
- Select the device category (Z-wave).
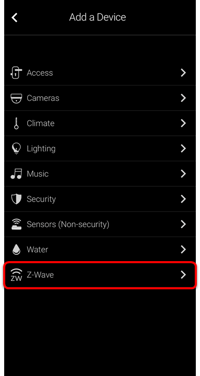
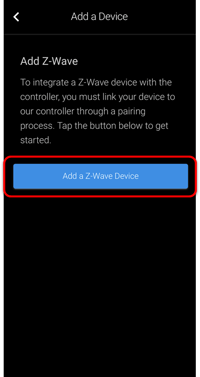
- Read through the displayed information, and then tap Add Z-Wave Device.
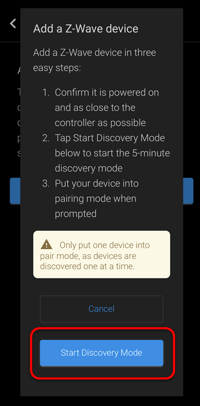
- Read the Z-Wave information, and then tap Start Discovery Mode.
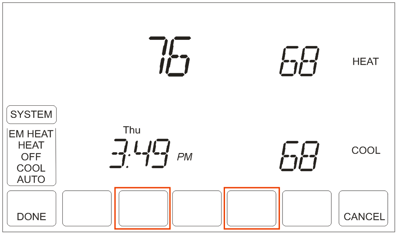
- Access the thermostat, and then press the System button.
The face of the thermostat changes.
- Press and hold the third and fifth buttons simultaneously until the screen display changes.
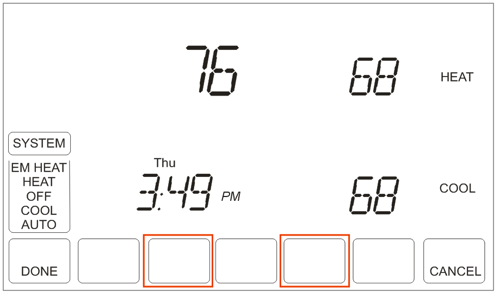
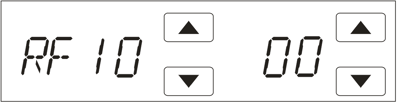
- Using the up and down arrows, set the first function to RF10.
- Set the second function to 01 to include the thermostat.
.png?width=400&name=Screen%203%20(1).png)
Note: To exclude the thermostat, remove it from the Z-Wave network, set the second function to 00. - The thermostat will be added when the second function is selected. Press DONE to return to the home screen.
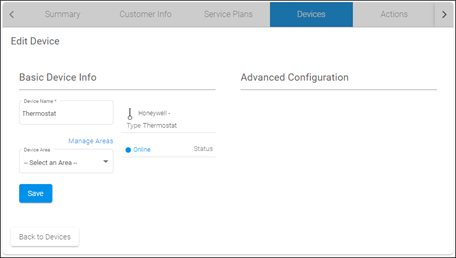
- Once paired in, the Edit Device page displays.
Customize the device name and location as desired, tapping Save when done.
Note: For scenes, notifications, schedules, and automations configuration, see ClareHome App Guide (DOC ID 1750).
To remove the thermostat using ClareHome:
- Tap the ClareHome app’s Devices page.
- Tap Z-Wave.
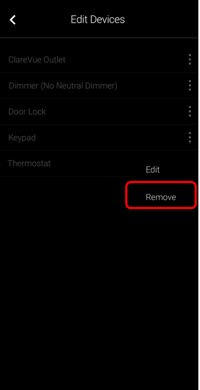
- Tap the 3 dots next to the thermostat, and then tap Remove.
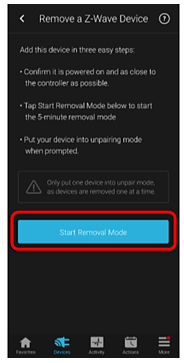
- Read through the displayed information, and then tap Start Removal Mode.
- Access the thermostat, and then press the System button.
The face of the thermostat changes.
- Press and hold the third and fifth buttons simultaneously until the screen display changes.
- Using the up and down arrows, set the first function to RF10.
- Set the second function to 00 to exclude/remove the thermostat.
Pairing and removing the thermostat in FusionPro
Pair the thermostat to the project.
To add the thermostat in FusionPro:
- Click Accounts in the side menu.

- Locate the desired account in the list, and then click View.
The Account sub-menu is now available.
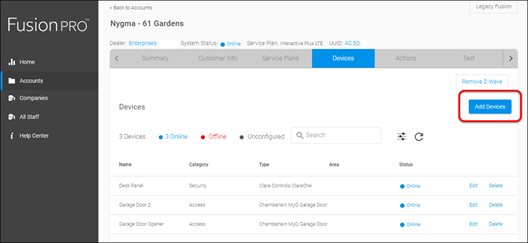
- Click the Devices tab, and then click Add Devices.
- Select the device category (Z-Wave).

- Click Add a Z-Wave Device, and then click Start Discovery Mode.

A popup displays waiting for a notification from the device.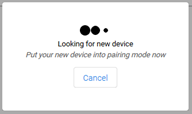
- Access the thermostat, and then press the System
The face of the thermostat changes. - Press and hold the third and fifth buttons simultaneously until the screen display changes.
- Using the up and down arrows, set the first function to RF10.
- Set the second function to 01 to include the thermostat.
Note: To exclude the thermostat, remove it from the Z-Wave network, set the second function to 00. - The thermostat will be added when the second function is selected. Press DONE to return to the home screen.
- Once the device is added, change the name and area as desired, and then click Save.
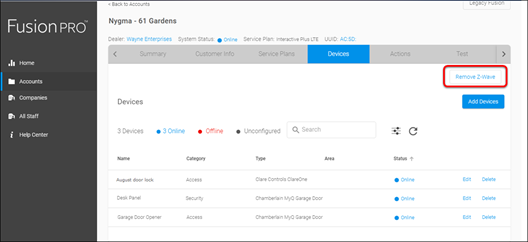
To remove the thermostat with FusionPro:
- Click Accounts in the side menu.

- Locate the desired account in the list, and then click View.
The Account sub-menu is now available.
- Click the Devices tab, and then click Remove Z-Wave.
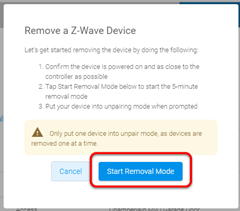
- Click Start Removal Mode.
- Access the thermostat, and then press the System
The face of the thermostat changes. - Press and hold the third and fifth buttons simultaneously until the screen display changes.
- Using the up and down arrows, set the first function to RF10.
- Set the second function to 00 to exclude/remove the thermostat.