
Getting Started with ClareOne
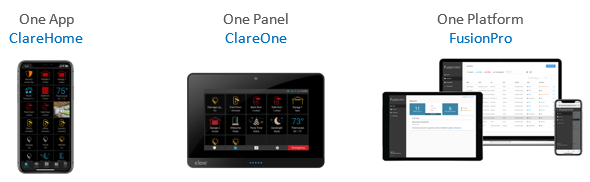
Welcome to ClareOne. At last, smart security meets personalized smart home control in a fully unified panel. The ClareOne panel and its ecosystem of encrypted sensors is supported by the new FusionPro management platform, enabling security professionals and home technology integrators to simplify setup, management, troubleshooting, and RMR of all ClareOne installations. And of course, the ClareOne smart security and smart home system is easily managed on mobile devices by the ClareHome app.
ClareOne, FusionPro and ClareHome represent a significant evolution of the smart and connected home solutions Clare Controls has delivered to security professionals, builders and their homeowner customers since 2009. At Clare, we believe in clarity and simplicity and have built our platform, products and processes to make it easier and more cost-effective for you, our dealer partner.
Let’s take a quick tour of that simple process to help you with your first installation and activation:
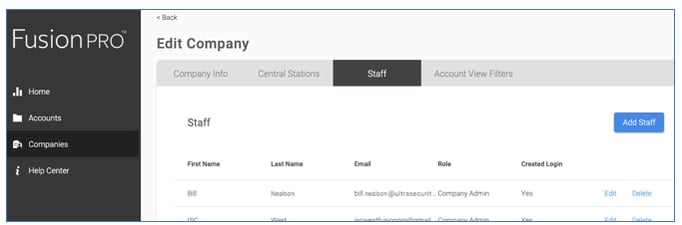
By the time you place your first ClareOne order, you are an authorized Clare Controls and Snap One Dealer and we’ve already set your company up on FusionPro. Below is a snapshot of the FusionPro screen from which you’ll manage your team of salespeople and technicians, your basic company info, and your central station numbers (ClareOne communicates with most Central Stations).
Navigate to the Clare Dealer Dashboard to view additional dealer resources, view latest dealer-related news and press releases, technical documentation, and more. You can access the Dealer Dashboard by going to https://www.clarecontrols.com > Dealer Dashboard. > FusionPro.
Login to FusionPro
Step 1: Set Up Your FusionPro Account
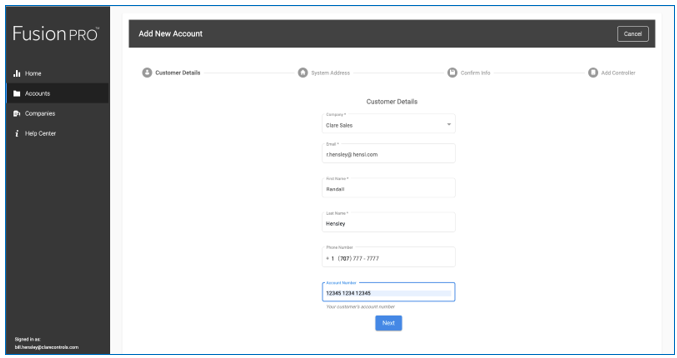
For a new customer account, log into FusionPro to set up the customer information. From the Accounts page, click Add Accounts in the upper right and the FusionPro Wizard will walk you through the process.

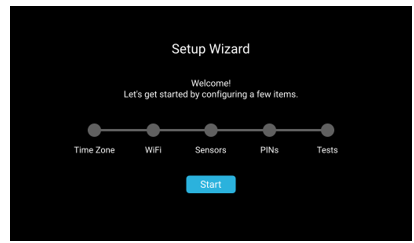
The Wizard will guide you through four simple tasks, shown below.

First, add the customer details and click the blue Next button at the bottom of the window (shown below).
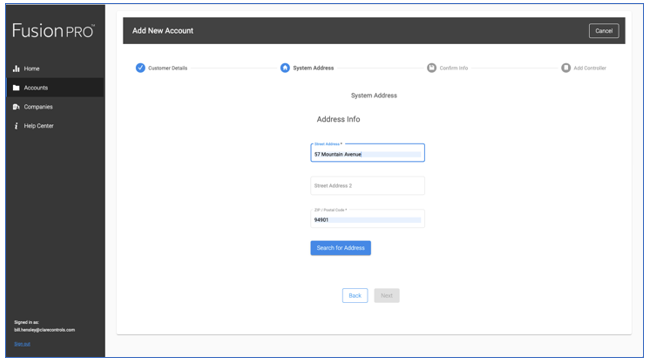
Next, enter the address where the ClareOne system will be installed (image at the top of the next page). The system lookup will confirm the accuracy of the address with online sources and present you with a couple Confirm Pop-Ups (not shown in this overview).
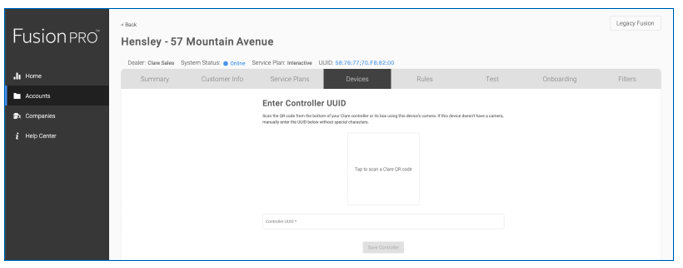
The final task, Add Controller, is to scan the QR Code on the back of the ClareOne panel you will be installing. You will be prompted to test the connection and then to save the controller (shown in the following images). This will establish the ClareOne controller with the Customer account in FusionPro.
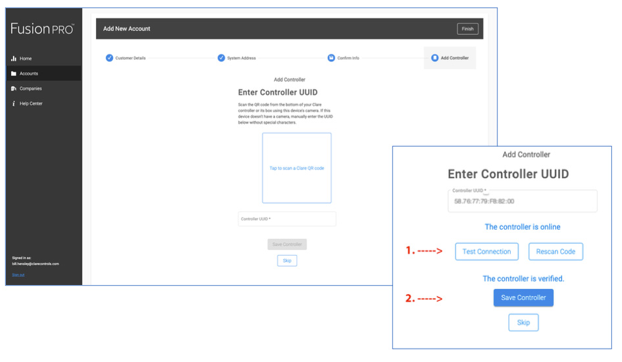
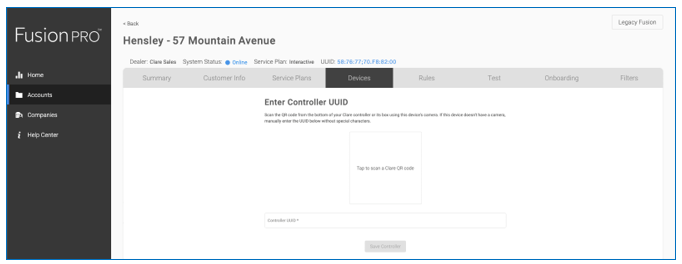
The last task can be skipped if you will be activating the panel after installing it in the customer’s home. You can, for example, set up multiple accounts at your office to expedite the on-site process for the technician installing ClareOne in multiple homes during the day. The technician can then add the ClareOne panel (the Controller) to FusionPro once it is installed on-site by going to the Devices tab for the customer’s account in FusionPro Accounts page (shown below) and scanning the QR code. This practice will make sure the right Panel is installed for the customer.
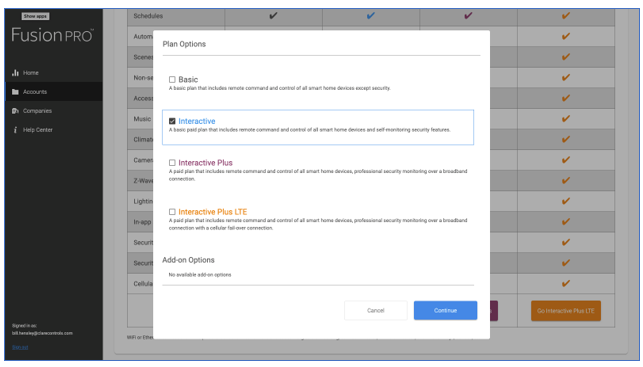
The tabs on the Account page include all the relevant information for each of your accounts. Under the Service Plans tab, you will select and then confirm the plan level your customer has selected as in the screenshot sample below. Clare offers four service levels with Basic being FREE, and you can set your customer prices accordingly. This competitive low cost from Clare can add up to large savings as your ClareOne volume grows. Contact your Clare Controls sales manager to learn more about our service layer options.
Step 2: Install the ClareOne Panel
Next, we’re onsite at your installation, and it’s time to install the ClareOne panel and the appropriate sensors for the project.
Follow the simple instructions in the ClareOne Quick Start Guide.
|
|
 |
See the ClareOne/FusionPro training center at https://snapone.com/. for installation details.
|
Step 3: Configure the Panel in FusionPro
When the ClareOne Panel setup is complete, log back into FusionPro. Navigate to the Accounts screen and select the customer. If you did not add the ClareOne controller to FusionPro earlier, click on the Devices tab to do so now. Follow the instructions to complete.
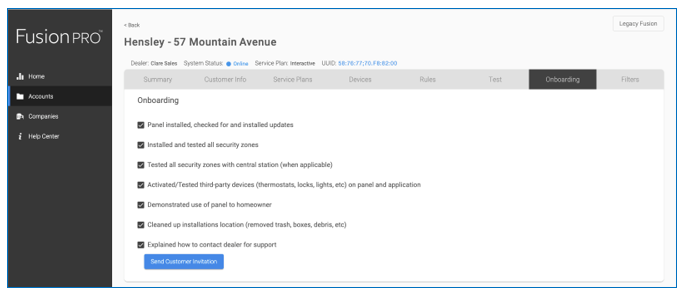
Next, click on the Onboarding tab. Confirm that you have completed the Onboarding steps by checking each box. Click the blue Send Customer Invitation button to send the Welcome email including the link to get the Apple or Android version of the ClareHome mobile app.
The Welcome email will be sent to the email address you assigned to the customer when you first created the customer account. Important note: If you are installing a system for yourself or your showroom, you must use a different email than the one you use for your business (in the My Company section of FusionPro). Instruct your customer to download the app and register with their preferred sign-in method—email, Google, Facebook or Apple.
Thanks for using ClareOne and FusionPro.
|
For more information, check: www.clarecontrols.com/clareone |
 |
Full PDF - ClareOne First Time Dealer Experience (DOC ID 1965)