Purpose
The LTE activation process for the ClareOne Panel has been changed with the latest update, version 9.5.4 released in April 2023. After this update, all LTE activation must be initiated in FusionPro. The purpose of this bulletin is to describe how the new process works.
NOTE: To connect the ClareOne Panel using LTE only you must first update the ClareOne Panel via a valid internet connection before taking the Panel to its final location.
Process
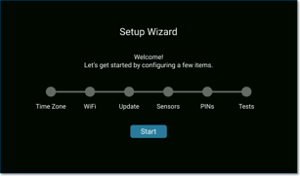
- Connect your ClareOne Panel to the internet using ethernet or connect to Wi-Fi in the setup wizard.
- Set the Time Zone.
- Connect to the local Wi-Fi.
- Check for updates.
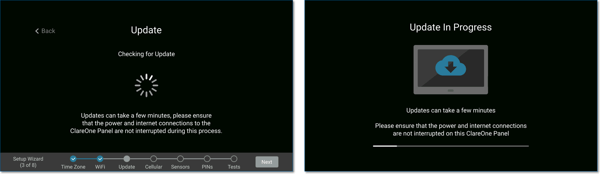
- Once the update is complete, the Wizard will restart at the beginning.
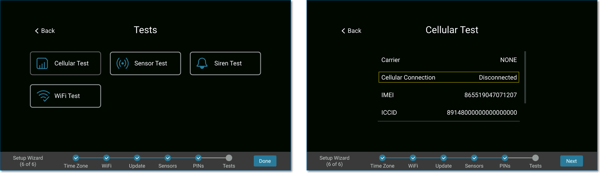
- The last step in Wizard is “Tests”. When performing the Cellular Test, the Cellular Connection will show “Disconnected”, this is expected behavior after updating to version 9.5.4.
- Open FusionPro to activate LTE service on the ClareOne Panel.
- If not already complete, create the account in FusionPro and add the ClareOne Panel to it.
- Click on the Service Plans tab and change the plan to “Interactive Plus LTE”.
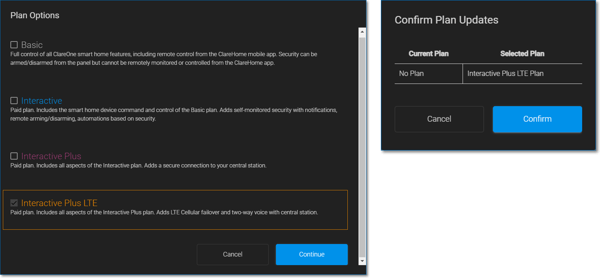
- Click Edit next to Cellular Account Status on the Service Plans tab, then select the applicable Cellular Provider from the pick list and click Save.
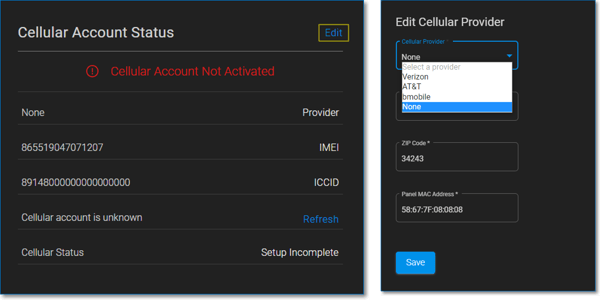
Note: The Cellular Provider can be determined by checking the Model Number printed on the label on the back of the ClareOne Panel. Model numbers with an “A” appended to the end are AT&T (CLR-C1-PNL1-A) Panels. If there is no “A”, they are Verizon (CLR-C1-PNL1) Panels. “bmobile” Panels have a specific application and are not sold in the United States or Canada. - After clicking Save, the LTE module will activate with the appropriate provider. Activation is usually completed within a few minutes but could take up to 24 hours.
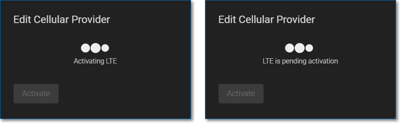
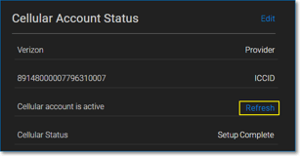
- Click outside of the status box to continue configuration while the activation status is pending. Click Refresh next to status until the Status changes to Active.
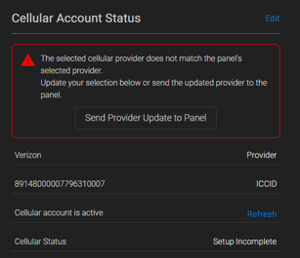
- If the ClareOne Panel is connected to the internet and the Cellular Provider configured on the ClareOne Panel does not match the provider set in FusionPro you will be prompted to update it. This will be true if the Panel had been configured previously with the wrong provider or if the ClareOne Panel is new as the provider is set to “None” by default. Click Send Provider Update to Panel to update the ClareOne Panel settings.
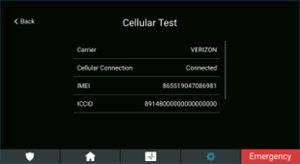
- Select System Test, the Cellular Test in Installer Settings. Verify the ClareOne panel Cellular Connection is “Connected”.
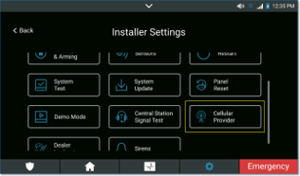
Note: The activation process is complete if the ClareOne panel is connected to the internet and step 11 above is completed successfully. Otherwise, continue with Step 12 to complete the activation process for a ClareOne Panel that has been updated to version 9.5.4 but is not connected to the internet. You can verify the current version on the About page under settings on the ClareOne Panel user interface. - Open Installer Settings on the ClareOne panel and tap on Cellular Provider.
- Select the appropriate Cellular Provider from the pick list, the tap Configure.
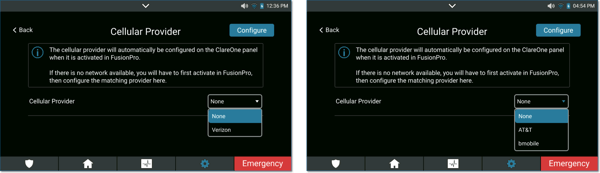
- The Cellular Provider is updated, saved, and the cellular hardware is rebooted. Once complete, the LTE module is ready for use.
- Select System Test, then Cellular Test under Installer Settings. Verify that the ClareOne Panel Cellular Connection is “Connected.”
Cellular activation is now complete.
Last Updated: 04/17/2023