In this article, we will cover the basics on setting up 2-way audio on ClareVision cameras and provide you with best practices when setting up audio input and output.
Index:
Audio Setup using External Microphone and Speaker
Audio Setup using Built-in Microphone
IMPORTANT NOTES:
- Not every ClareVision camera supports 2 way audio. Cameras must have an Audio IN and Audio OUT connector. Note that most have RCA type connectors while a couple have 3.5mm connectors. Refer to the ClareVision Camera Cables and Connectors Guide for a list of which cameras include external Audio In/Out.
- The ClareVision cameras do not provide power for any externally connect speaker or microphone, power must be provided to each according the manufacturers' specifications.
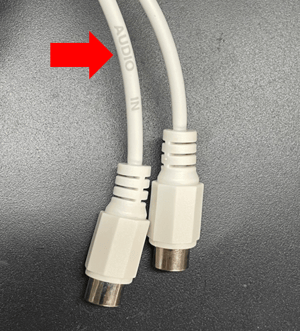
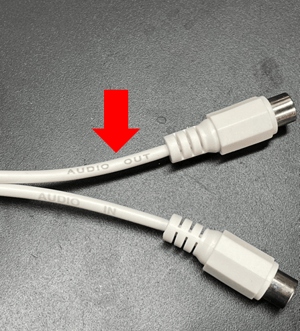
- The Audio IN and Audio OUT cables are clearly marked on the cables.
- It is acceptable to use a RCA to 3.5mm converter for speaker and microphone connections.
Audio Setup using External Microphone and Speaker
You will need to connect your external speaker and microphone to the camera using an RCA adaptor or 3.5mm jack with Wi-Fi cameras. ClareVision cameras do not provide power to the external speakers and microphone, you will need to make sure they are powered separately.
For a list of cameras that have built-in microphones or support external speakers and microphones, please refer to our ClareVision Camera Cable Guide.
- Connect the microphone to the cable labeled Audio In.
- Connect the speaker to the cable labeled Audio Out.
- Connect power to the external speaker and microphone according to their specifications.
- Using Chrome or Edge, browse and log in to the camera's user interface using the camera's IP address and navigate to the Audio Configuration settings.
Configuration > Video > Audio.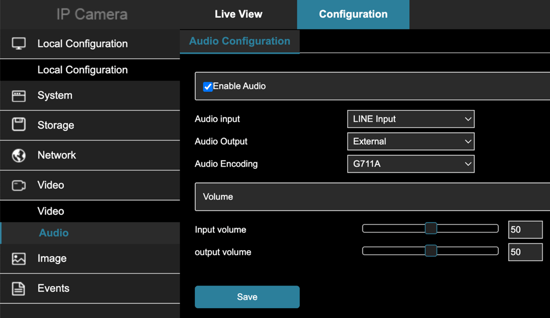
- Enable Audio settings and select:
- Audio Input: LINE Input
- Audio Output: External
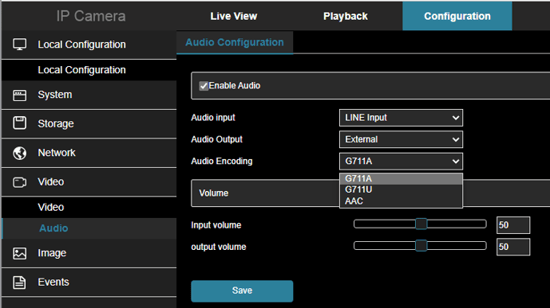
- Audio Encoding: G711A.
- You may need to adjust the Audio Input and Output volumes depending on your audio hardware.
- Tap Save to save your configuration settings.
TIP:
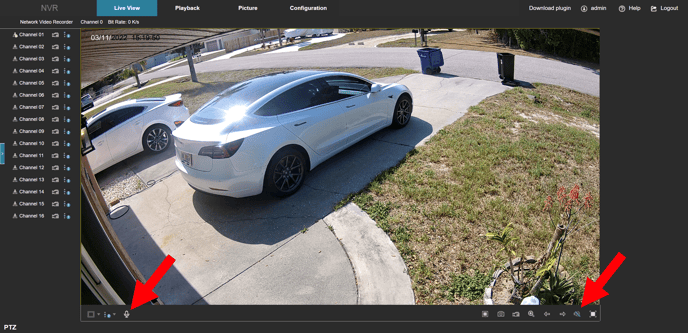
You can access camera audio from the web console by tapping on the Speaker Icon to hear sounds, and Microphone Icon to speak through the camera. Note: you will need to enable the Audio settings for Line In and Line Out, as well as allow the web browser to access your computer's microphone. You will not be able to play sounds out of a camera that does not support a Line Out external speaker.
Testing Audio
- Test the speaker and microphone by opening the ClareVision App.
- Select the camera you would like to test and enter the Live Feed.
- Tap on the Speaker button in the app to hear audio coming from the camera's connected microphone. You can tap on or speak into the external microphone while someone is listening on the app.
Note: Having the app too close to the external speaker and microphone may result in feedback.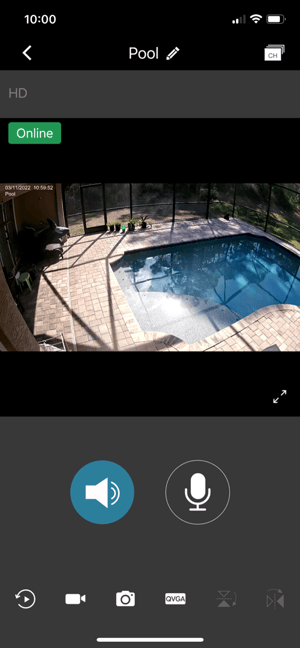
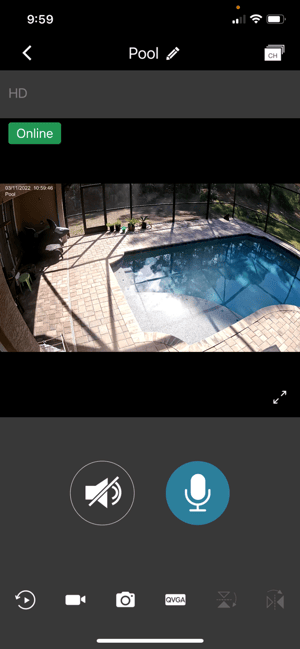
- Tap the Microphone button in the app and speak into your mobile device. You should be able to hear your voice through the connected speaker.
- Adjust the audio output and input from the camera Web Console in the Audio Configuration settings as needed.
- That's it, you are all set!
Audio Setup using Built-in Microphone
Some ClareVision cameras include a built-in microphone. You can access the microphone from your live video feed in the ClareVision App.
- Open the ClareVision App
- Select on your camera that supports a built-in microphone.
- Tap the speaker icon to start hearing audio.
Last Updated: 03/11/2022