Overview
This article will provide you with the information needed to add an ONVIF camera to a ClareVision NVR.
ClareVision NVR's are ONVIF S/T compliant as a client whereas the cameras are ONVIF S/T compliant as devices. ONVIF compliance implies ClareVision NVR's will enable discovery, receive and record streams, snapshots and motion events from ONVIF compliant devices.
Background on Discovery and Attachment
ONVIF uses a multicast method called WS-DISCOVERY. In essence the NVR sends out a multicast message to the network. All ONVIF devices listen for that multicast message to respond with information required to address the camera on the network. Remember, multicast discovery DOES NOT USE the IP address of the device it uses a multicast IP address. Here are a few things WS-DISCOVERY does not do:
- It does not modify or change the IP address of the discovered device
- It does not modify or change the UserID of the discovered device
- It does not modify or change the password of the discovered device.
What does this mean in practice?
ClareVision NVR's can discover ONVIF cameras anywhere on the LAN or on the physical channels of the NVR and display the existence, model number and IP address of the discovered device in the channel list. It DOES NOT mean it can communicate with it. Here are few facts to consider using Luma as an example (applies to any ONVIF camera):
- Out of the box, a Luma camera has a static IP address of xxx.xxx.xxx. If the camera is on your local domain and your local domain has a different address scheme the router will route exactly zero messages between the ClareVision NVR and the Luma camera.
- There is no discovery method in ONVIF to transmit UserID's and passwords, so even if the Luma camera is on the same domain as your NVR, the NVR will not auto-discover the UserID or password.
- If the Luma camera is on the physical port of the NVR, it will not be on the private domain of the ClareVision NVR (default 192.168.11.xxx). As a consequence, the NVR will not communicate with the Luma camera at all.
Attachment and Discovery Summary
|
Device Type |
Camera on LAN or Local Ports |
Discovery |
Auto-Change IP Address |
Auto Assign UID and PW |
|
ClareVision |
Local |
Auto |
Yes |
Yes |
|
ClareVision |
LAN |
Auto |
No, IP address change is not required |
Yes |
|
ONVIF |
Local |
Manual |
IP address must be changed |
No |
|
ONVIF |
LAN |
Auto |
No, IP address change is not required |
No |
Attaching a Luma or ONVIF Camera to a ClareVision NVR on a Physical Port
Step One: Initialize the camera and set the UserID and Password
Refer to you Luma or ONVIF camera user guide for UserID and setup.
Note:
Some ONVIF cameras do not have ONVIF turned on by default. Consult your user manual to determine the default status of ONVIF on the device and ensure it is active and the UserID and Password for that user on the device is known. For example, some Hikvision cameras require you to set up a specific ONVIF user while others do not.
Step Two: Set the Device IP Address to the Domain of the ClareVision NVR
The ClareVision NVR private domain is defaulted to 192.168.11.xxx. That default can be changed under the Configuration tab, System/Network:
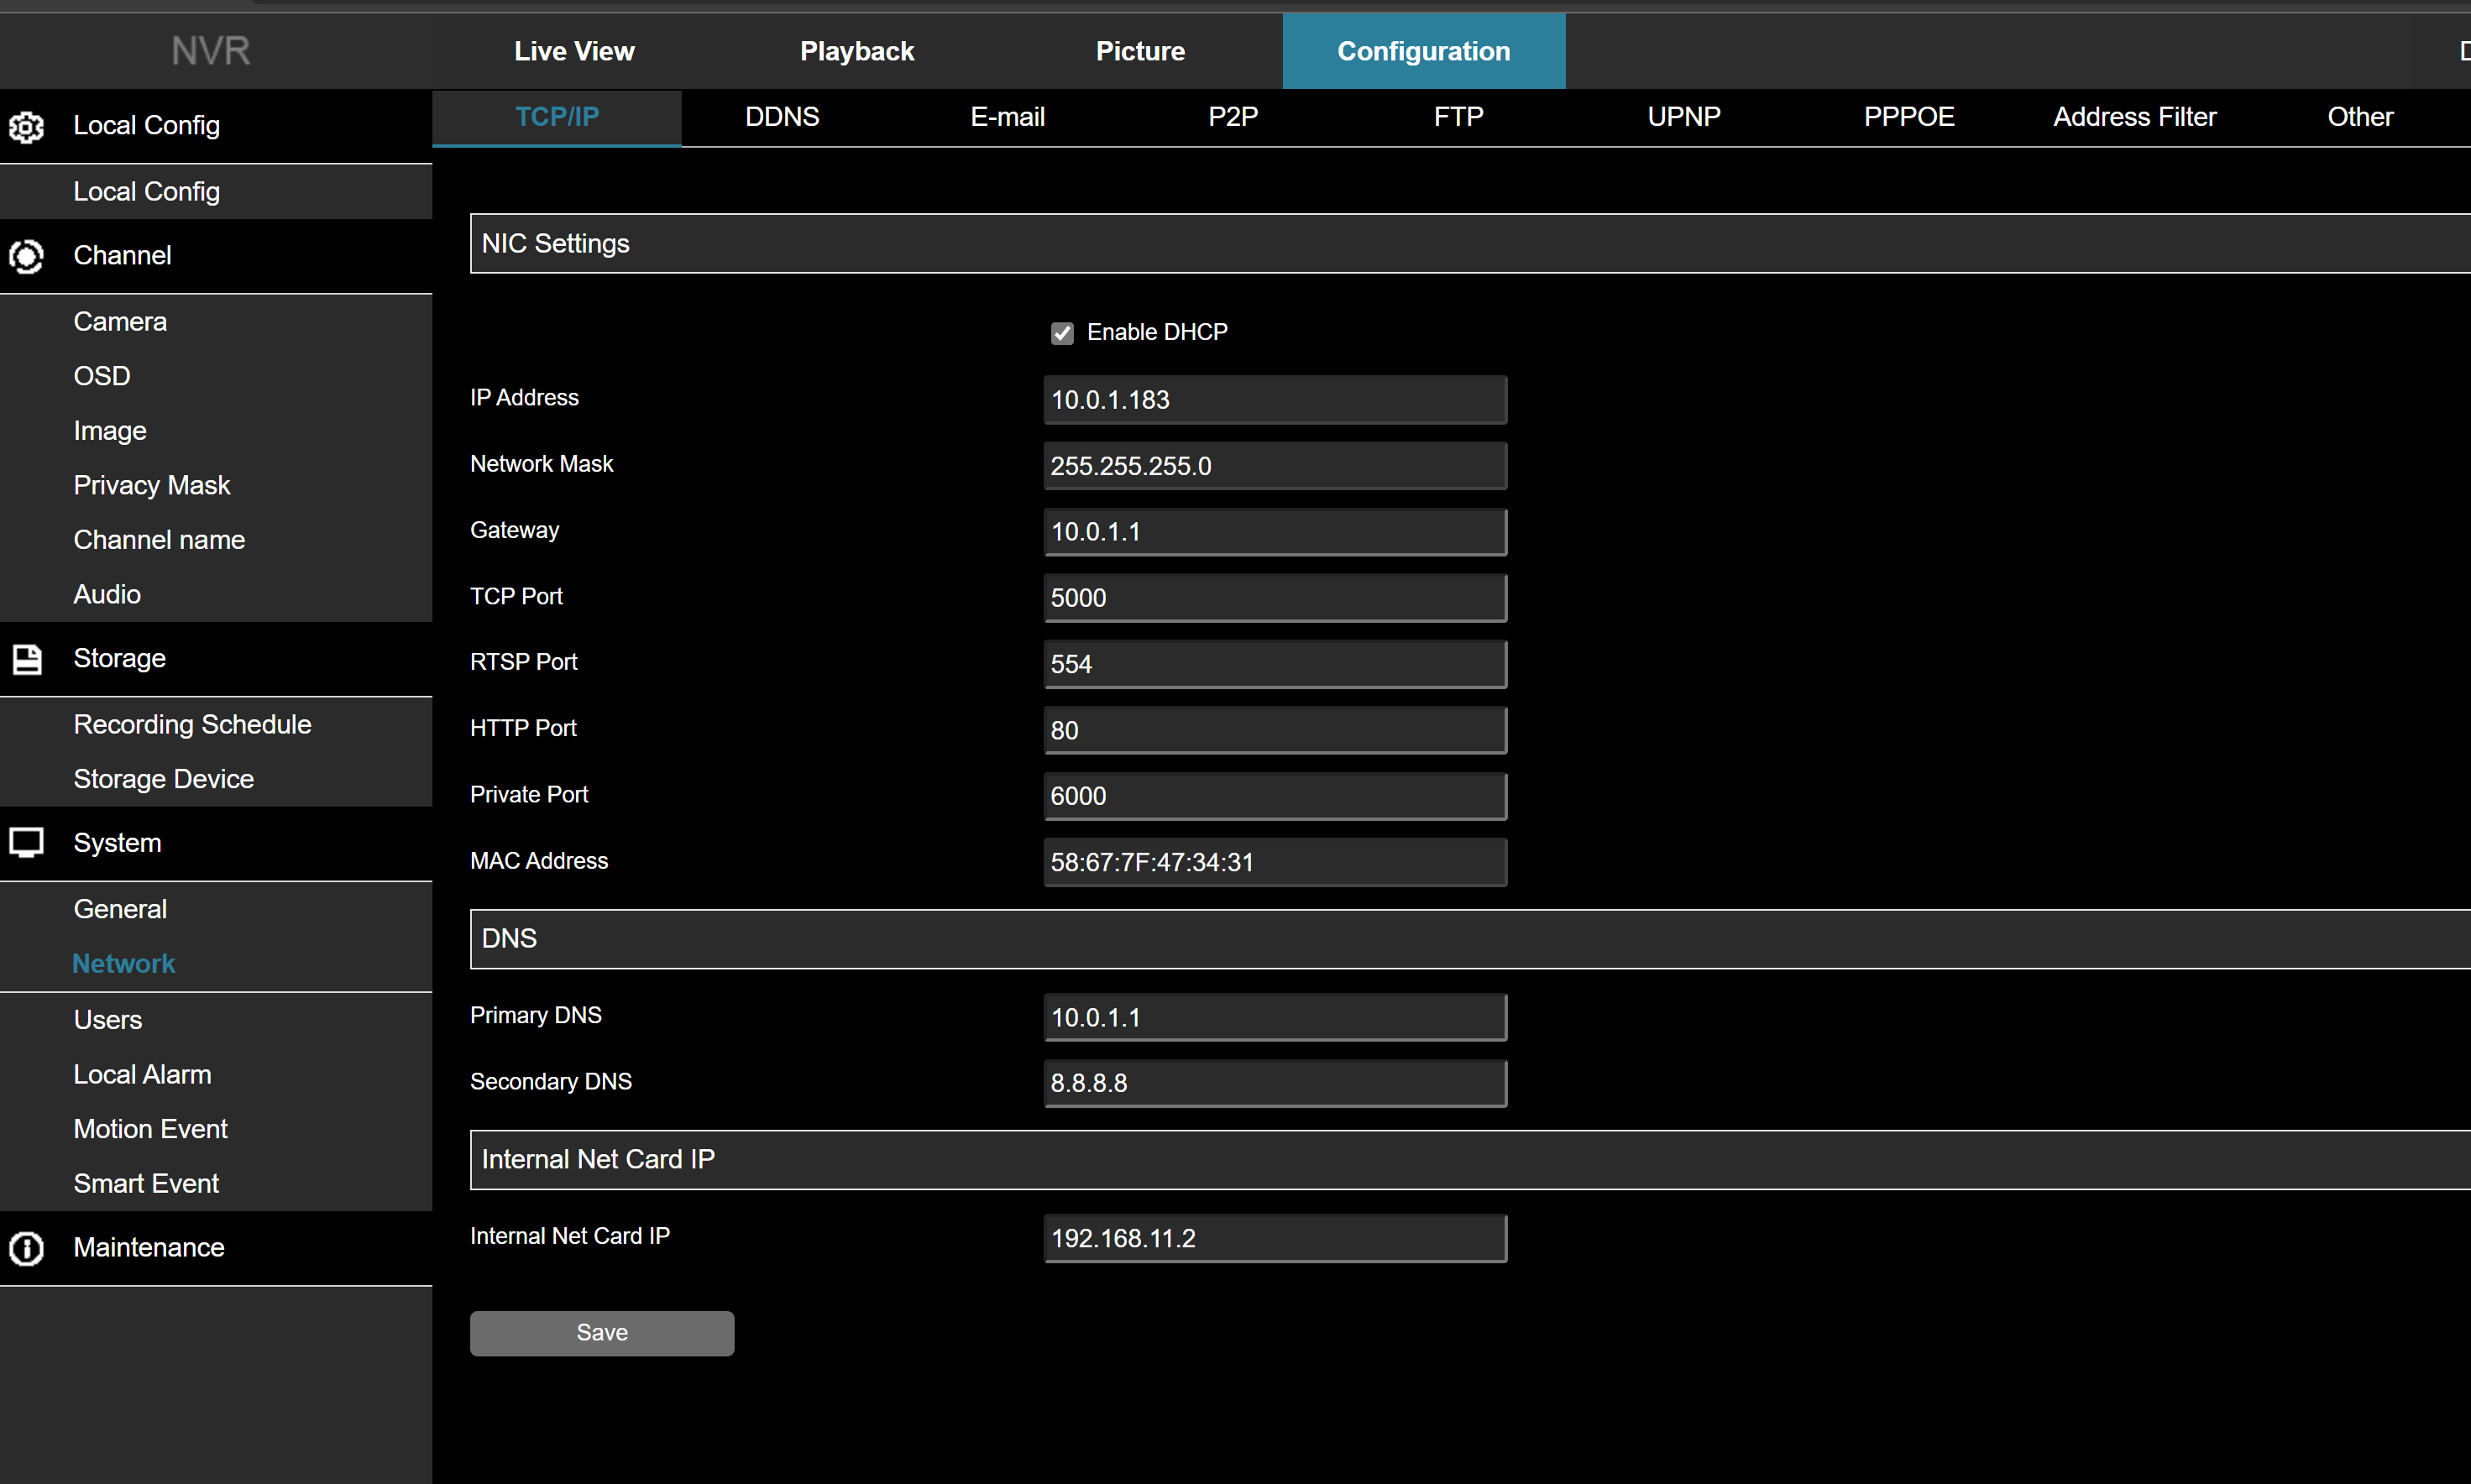
The bottom cell - Internal Net Card IP sets the private domain.
Make sure your ONVIF camera is on your general LAN and go to your network settings on your ONVIF camera and set the network settings as follows:
DHCP: disabled
IP address: 192.168.11.xxx, where XXX can be any address between 3 and 255. We recommend starting assignments at 26 to stay out of the range of the NVR's aut0-assignment range.
Step Three: Move the Camera to the Physical Port of the NVR and Use Manual Add
Once you set the IP address as required, you will not longer be able to log into the camera on your general LAN. Move the camera to any physical port of the NVR and let the camera boot up.
To to the Configuration tab, Channel/Camera
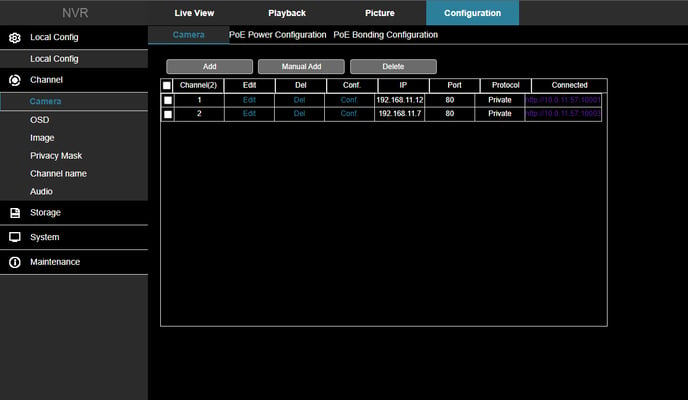
Hit "Manual Add"
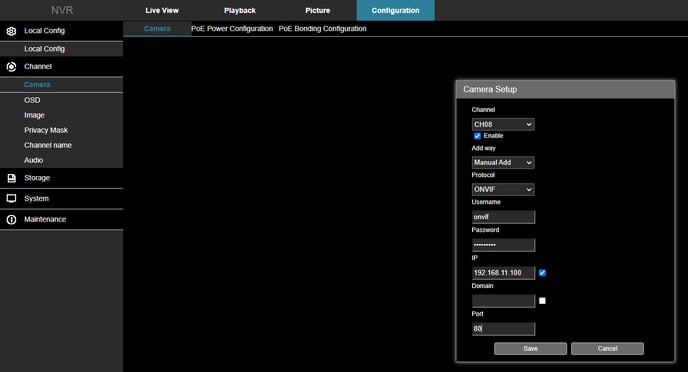
You must select the channel, enter the UserID and password, the IP address and the port number. Once complete, hit "Save"
That's it, you just added and ONVIF camera to a physical port of the NVR. Using ONVIF, the NVR will allow you to configure motion events, schedule recording of motion or full time recording. You can use the NVR driver or the camera driver via the Virtual Host as you can with ClareVision cameras and the live view, snap shots and events will all propagate to the ClareVision mobile app.
You can view the entire setup process in the videos below.
Setting up Hikvision/ONVIF Cameras connected to a ClareVision NVR:
Setting up networked Hikvision/ONVIF cameras to work with a ClareVision NVR:
Note:
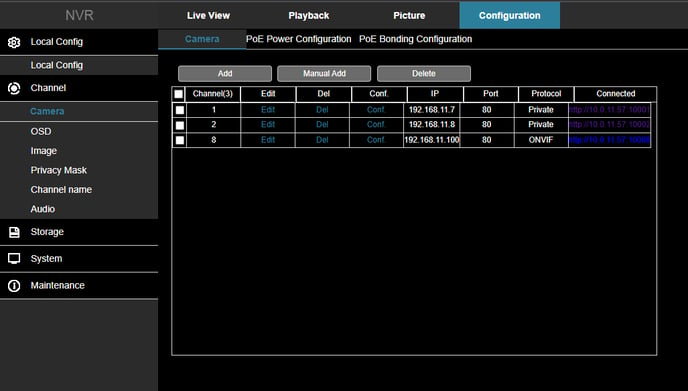
Notice in the protocol column that your ONVIF camera listed ONVIF and the ClareVision camera listed Private. It is the Private Protocol that allows cameras and NVR's from the same manufacturer to exchange information and settings without manual intervention. The ClareVision Private Protocol, upon discovery, will change the IP address of the camera if on a physical port and assign the NVR UserID and password to the camera which is what provides the Plug-n-Play feature set.
Last Updated: 10/07/2021