Dealers can add their own branding to the ClareOne Activation Screen, prompting new customers to contact the dealer to activate their smart home and security. Dealers can either select from a template or upload their own custom graphic. In this article, we will guide you how to add your own branding step-by-step.
IMPORTANT: Only the company administrator is able to configure custom branding. Once the custom branding is configured, installers will have to individually add the branding to each panel separately. Please refer to the full instructions below.
Configure Dealer Branding
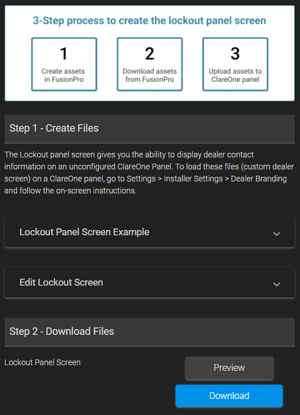
Before you can start adding your company branding to the ClareOne Panel, you must configure Dealer Branding in FusionPro for your company.
- Log into your company FusionPro account as a company administer.
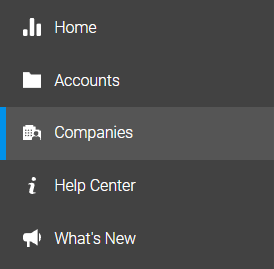
- Tap Companies.
- Tap Edit.

- Select the Dealer Branding tab.

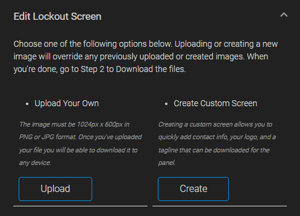
- Expand the Edit the Lockout Screen window by tapping on the arrow. Here you can upload your own custom graphic or creating a custom screen based on a template. Please follow the standalone instructions below:
- UPLOADING YOUR OWN GRAPHIC
- Tap the Upload button and navigate to where your graphic is saved on your computer.
- Tap Continue when finished.
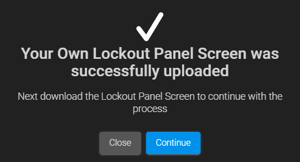
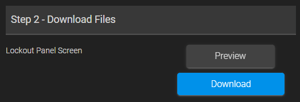
- Tap Download to download a copy of your graphic. You will need this file when connecting to a ClareOne Panel and uploading the graphic which you can do from a computer with WiFi connectivity or a mobile device.
- Tap the Upload button and navigate to where your graphic is saved on your computer.
- CREATING GRAPHIC FROM TEMPLATE
- Tap the Create Button.
- Input your desired custom message in the Tag 1 and Tag 2 fields, email, website URL, phone number, and logo.
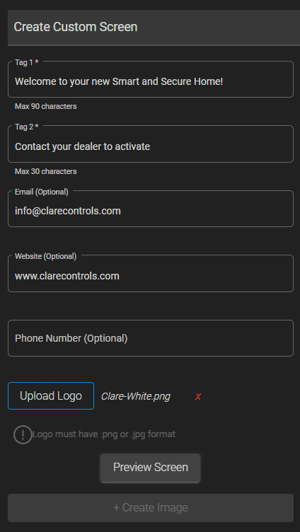
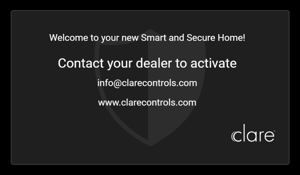
- Tap Preview Screen when finished to preview the graphic.
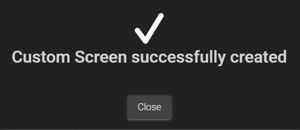
- Click below the image to exit the preview window and tap + Create Image.

- Tap Close one the success screen is displayed.
- Tap Download to download a copy of your graphic. You will need this file when connecting to a ClareOne Panel and uploading the graphic which you can do from a computer with WiFi connectivity or a mobile device.
- Tap the Create Button.
- UPLOADING YOUR OWN GRAPHIC
- Proceed to the next step on a ClareOne Panel to upload the custom graphic to the Activation/Lockout screen.
Enable Dealer Branding on the ClareOne Panel
To add your custom branding to a ClareOne Panel, you will need to enable the Dealer Branding setting under Installer Settings, connect to the Panel via AP Mode, and upload the graphic to the panel. Follow the steps outlined below.
IMPORTANT: Make sure you download a copy of the graphic you created above to a device that can connect wirelessly to the panel via AP mode. We recommend a mobile phone or laptop.
- Open the Settings Menu on the ClareOne Panel by tapping the Gear icon.
- Select Installer Settings.
- Input your Installer password.
- Scroll to the bottom and select Dealer Branding. This will turn on AP mode on the panel and allow you to connect your computer or mobile device to the panel to access the panels web server.
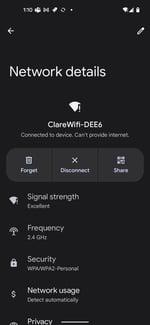
- Using your laptop or mobile device where you have your graphic saved, open your WiFi settings.
- Your device should discover the AP signal of the panel. Connect to the panel via AP mode.
- Tap View QR Code. This will generate a web URL that will allow your mobile device to connect to the panel. You can also connect to the panel by navigating to the IP address that is displayed on the panel setup instructions.
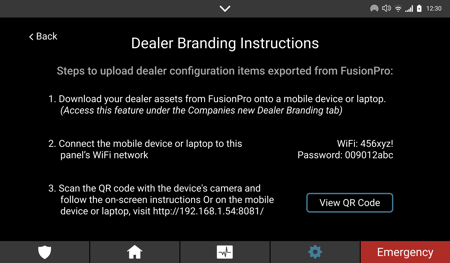
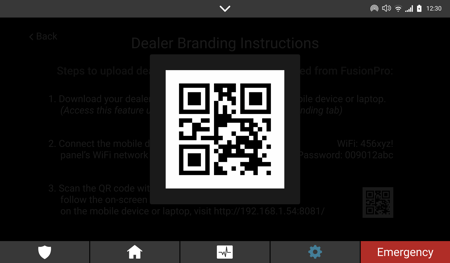
- Using your mobile phone or laptop, navigate to the IP address listed or scan the QR Code to open your web browser and connect to the panel graphic upload screen.
- Tap the Upload button and select the graphic file you saved earlier to upload it.
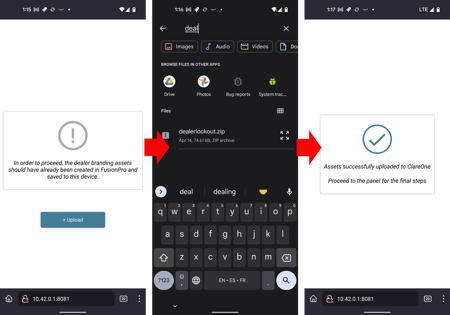
- Tap Submit.
- The panel screen will change, allowing you to enable the custom screen. Tap Enable Now.
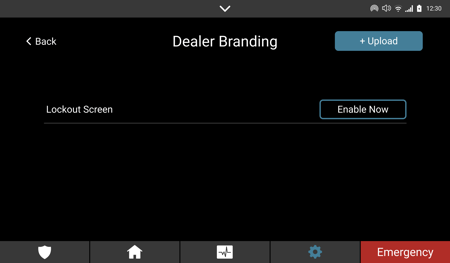
- You are all set. The screen will now be displayed.
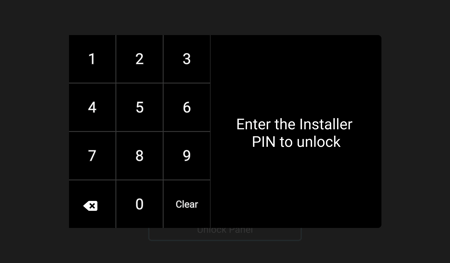
- You can exit the lockout screen by entering the Installer Password.
- You can re-upload a new screen by tapping on the + Upload button if needed.
That's it! Repeat this step on every ClareOne Panel you would like to display your custom Activation lockout graphic. In the future, we will be updating this process to allow your panel to download the custom graphic directly from FusionPro.
Last Updated: 07/01/2022