Users now have the ability to add NVRs to their account, as well as adding cameras to the NVR.
IMPORTANT NOTE: We recommend that the cameras are first configured individually and then added to the ClareVision app before adding them through FusionPro. This ensures that the password is reset on the camera. If attempting to add the camera in FusionPro with a 6-character password or less (which is the default) it will fail.
To add a new NVR:
- Access the desired FusionPro account and click to add a new device.
Desired Account > Devices tab > Add Devices > Cameras > (Select an NVR type)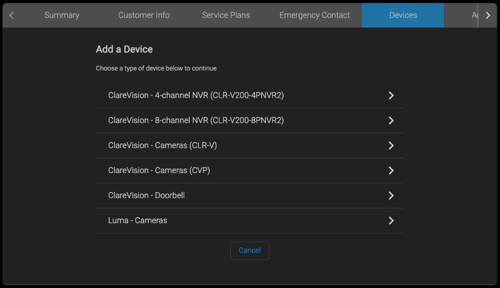
- Enter all the required info (IP address, username, password) and select the desired channels.
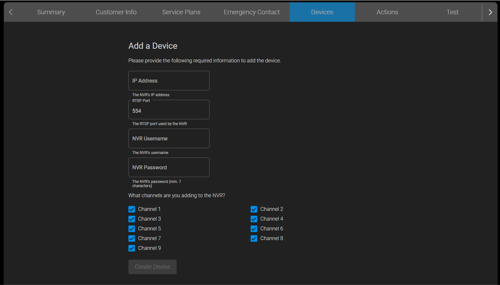
- Click Create Device.
Devices are created until an error occurs. If an error occurs, device creation will stop and it notes which channels were successfully added. If the user accidentally checked a channel that is not in use, simply uncheck the problematic channel and click Create Device.
If the user returns to the add device screen and enters the IP of an existing NVR, the existing channels are displayed.
To add a camera to an existing NVR:
- Follow the steps above for adding a camera.
– or –
Edit an existing camera on the NVR. - Scroll down to the NVR Cameras table.
- Click on an unconfigured row.
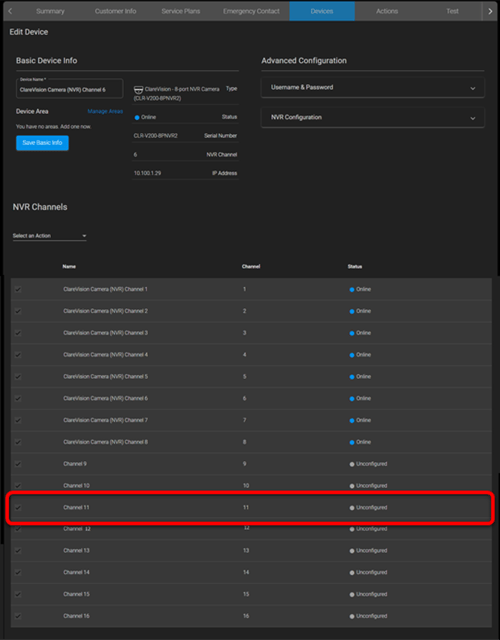
- Re-enter the username and password and click Save.
You can also navigate to any NVR channel device from another NVR channel device by clicking Edit in the NVR Cameras table of a configured channel.
To delete an NVR camera:
- Go to the Devices tab.
- Select the checkbox for the desired camera, and then select Delete in the Select an Action drop-down.