Scenes
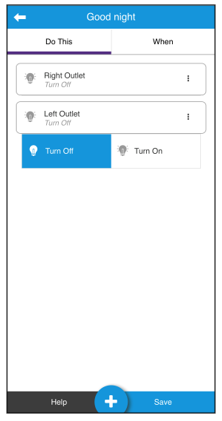
The Scene feature allows a user to configure specific device/service actions in the response to a button press. The following example walks through creating a goodnight scene, turning off the home’s lights.
To create a Scene:
1. Tap Scenes.
Existing Scenes are displayed.
2. Tap the Plus icon to add a new Scene.
3. Name the Scene, and then select the desired device actions.
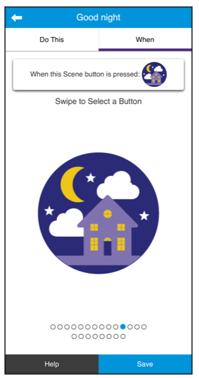
4. Tap the When tab, and then swipe left/right to select the desired button image.
5. Tap Save.
Schedules
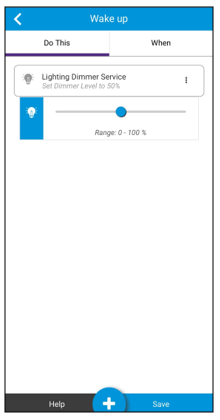
The Schedules feature allows a user to configure specific device/service actions at set times. The following example walks through creating a wakeup schedule, turning on the home’s lights Monday through Friday at 7AM.
To create a Schedule:
1. Tap Schedules.
Existing Schedules are displayed.
2. Tap the Plus icon to add a new Schedule.
3. Name the Schedule, and then select the desired device actions.
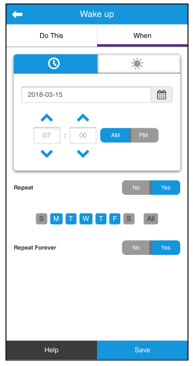
4. Tap the When tab, and then set the time and days for the schedule.
Notes
- The schedule can repeat or have a definitive end date.
- Tap the Clock icon to create a schedule using absolute time (7:30AM).
- Tap the Sun icon to create a schedule using solar time (time based on intervals before and after the sunrise/sunset).
5. Tap Save.
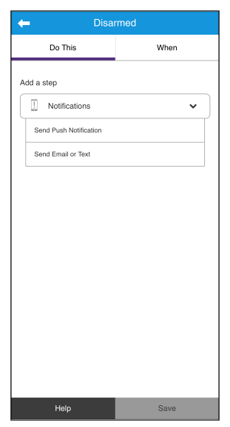
Notifications
The Notifications feature allows a user to configure push notifications or emails when specific device actions occur. The following example walks through creating a push notification when the security alarm is disarmed.
To create a Notification:
1. Tap Notifications.
Existing Notifications are displayed.
2. Tap the Plus icon to add a new Notification.
3. Enter a name for the Notification, and then select the notification type (push notification or email).
4. Tap the When tab, and then select the device action that triggers the notification.
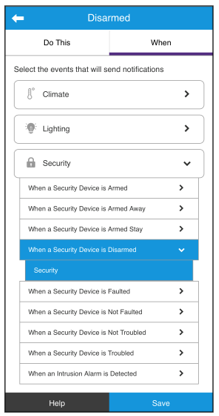
5. Tap Save.
The notification is displays in the Notifications list.
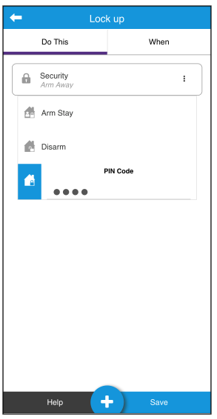
Automations
The Automation feature allows a user to configure specific device/service actions in response to other actions. The following example walks through creating a lockup automation, setting the alarm to locking the home’s front door when the alarm is set.
To create an Automation:
1. Tap Automations.
Existing Automations are displayed.
2. Tap the Plus icon to add a new automation.
3. Name the Automation, and then select the desired “Do This” action.
Note: This is the action that occurs in response of the “When”, or trigger, action.
4. Tap the When tab and select the desired trigger actions.
Note: A trigger action is what causes the automation to start. For example, when this (trigger) happens, then the alarm is set.
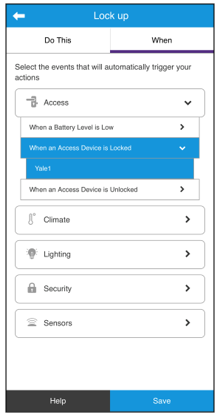
5. Tap Save.
For more information on the ClareHome App, see the full PDF.
Full PDF - ClareHome App Guide (DOC ID 1750)