Introduction
When a ClareOne panel is installed without a local network connection, either WiFi or Ethernet, the panel’s LTE/cellular can be activated using FusionPro. This document is meant to guide the installer on how to activate the LTE.
Notes
- You will need access to the panel’s UUID, ICCID, and IMEI. This information is found on the panel’s label.
- This is done before powering on the panel. If the panel is already powered on, reset the panel and then follow the instructions to activate LTE/cellular.
To reset the panel:
-
- Tap Settings, and then tap Installer Settings.
- Enter the Installer PIN as prompted, and then tap Panel Reset.
- Tap Panel Reset to confirm.
Allow the panel to restart and begin activating LTE/Cellular.
To activate LTE/cellular on a ClareOne panel:
Notes
- Cellular can only be used with the Interactive Plus LTE service plan.
- Cellular activation is not instant. It may take a short period of time for the cellular status to update.
- Create the customer account in FusionPro.
To create a customer account:- Click Add Account on the FusionPro dashboard.
/Account%20Management/add%20account%20-%20dashboard.png?width=550&name=add%20account%20-%20dashboard.png)
– Or –
Click Accounts, and then click Add Accounts./Account%20Management/accounts%20list%20-%20add%20account.png?width=550&name=accounts%20list%20-%20add%20account.png)
- Enter the customer’s email address, first name, last name, phone number, and (optional) account number, and then click Next.
Note: The Account Number field is used to associate the customer with the dealer’s customer management system. It is not required.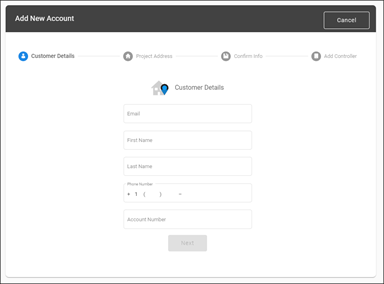
- Enter the customer’s address, and then click Next.
After entering the street address and ZIP code, the form populates the country and state information.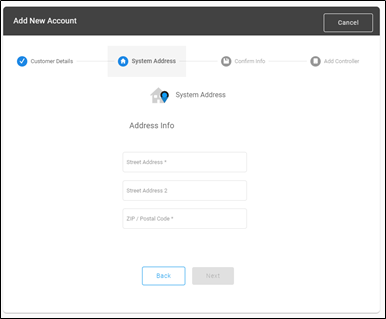
- Confirm that the correct address is displayed in the map and listed beneath the map, and then click Save.
Note: The address information is pushed to the ClareOne panel when it is online to validate and set the correct time zone.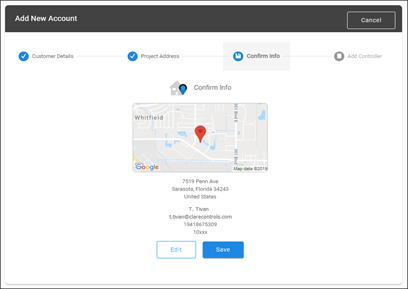
- Enter the controller’s UUID information, by scanning the QR code or by manual entry.
Scanning the QR code (preferred method): Click the box, and then use your device’s webcam/phone camera to scan the QR code on the ClareOne panel’s label. This auto-populates the UUID, ICCID, and IMEI.
– Or –
Manual entry: Using the information on the ClareOne panel’s label, enter the controller’s UUID in the box. Enter the Serial Number, and then click Verify.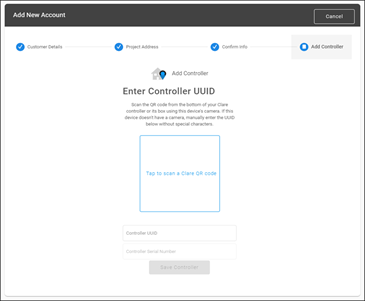
- Complete the Add New Account wizard.
The account Summary tab displays.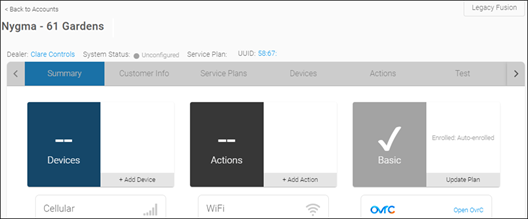
- Click Add Account on the FusionPro dashboard.
- Click the Service Plans tab.

- Select and configure the Interactive Plus LTE service plan.
To add a service plan:- Click the Service Plan tab, and then select the Interactive Plus LTE.
/Account%20Management/account%20-%20service%20plans%20-%20select%20a%20plan.png?width=550&name=account%20-%20service%20plans%20-%20select%20a%20plan.png)
- Click Continue, and then click Confirm to save the plan.
/MicrosoftTeams-image.png?width=330&name=MicrosoftTeams-image.png)
Note: Monitoring cannot be activated until the panel is online.
- Click the Service Plan tab, and then select the Interactive Plus LTE.
- While on the Service Plans tab, click Edit next to the Cellular Account Status.
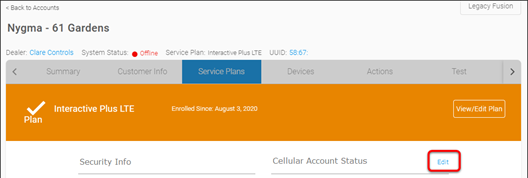
The Edit Cellular Services popover displays.
If the ICCID and IMEI fields are not pre-populated, manually enter the information from the ClareOne panel’s label.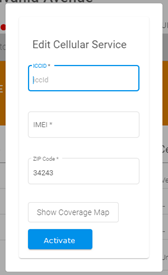
- Click Activate.
/activate.png?width=175&name=activate.png)
A success message displays if the combination was entered correctly. In the event of an error message validate the entries and resubmit.
Notes- The ClareOne panel status does not display Online in FusionPro until the device is powered on and the LTE/cellular is communicating with the cellular carrier.
- It may take several minutes for the carrier to activate LTE/cellular. You may check activation status by clicking the LTE/cellular Refresh button. This is showing the activation status of the cellular carrier account only.
/cellular%20refresh.png?width=400&name=cellular%20refresh.png)
- Power on the ClareOne panel and complete the wizard, skipping WiFi configuration.
- Check the panel for updates after completing the wizard.
To check the panel for Updates:- Access the panel’s user interface, and then tap Settings.
- Tap User Settings/Installer Settings, and then enter the Master/Installer PIN as prompted.
- Tap Check for Updates.
- A prompt appears is there are available updates, tap Update Now.
Note: Cellular data is typically slower than broadband network connections. As such, an update could take an extended period.
- Add devices and zones as desired through the panel user interface.
– Or –
Using FusionPro when the panel appears online.