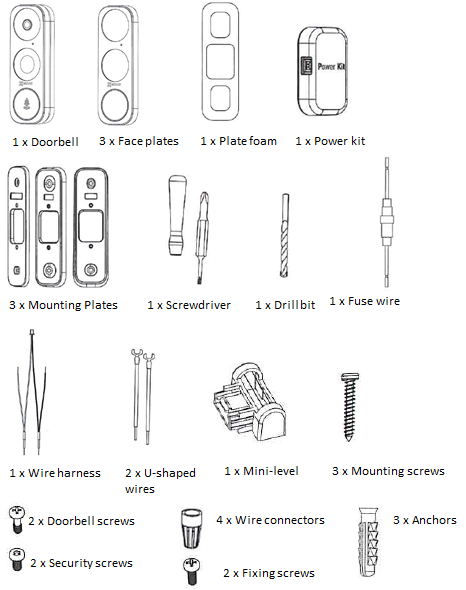
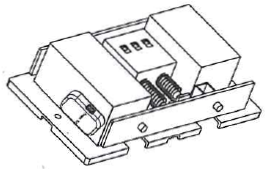
Package contents
Installation notes
- You may need a pencil and power drill.
- If you have a mechanical chime installed in your home, install the power kit and doorbell.
- If you have an electronic chime, refer to the chime’s manual for installs with the power kit, and doorbell installation.
- If no chime is installed, skip power kit installation and install the doorbell following option B: To install the doorbell, step 7.
Power kit installation
Follow these instructions to ensure that the power kit is installed correctly. Serious injury or death may occur if any of the warnings are ignored. Injury or equipment damage may occur if any of the cautions are neglected.
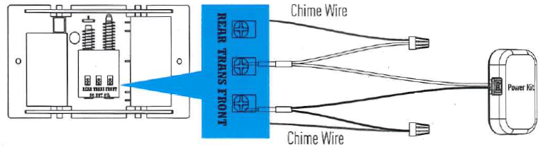
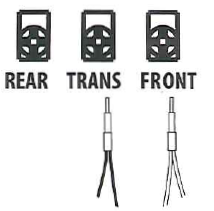
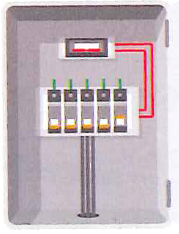
Figure 1: Wiring overview
To install the power kit:
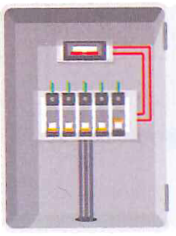
- Shut off the electricity at the doorbell’s circuit breaker.
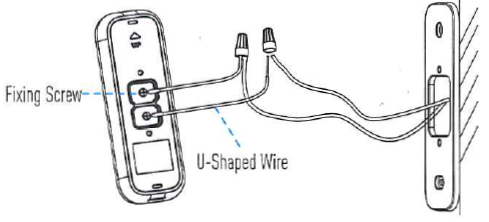
- Insert one end of the wire harness into the power kit.
- Remove the mechanical chime’s cover.
- Remove the existing chime wires from the terminals labeled TRANS and FRONT.
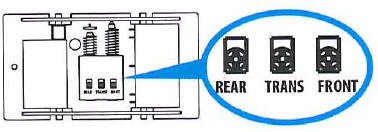
- Connect the wire harness to the chime’s terminals labeled TRANS and FRONT.
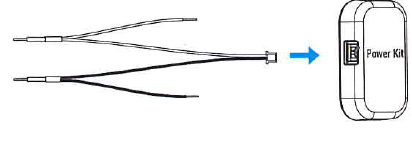
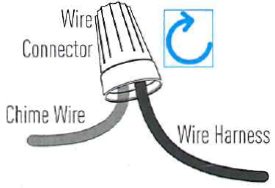
- Insert the existing chime wire and the other end of the wire harness into the wire connector and twist it tightly. Repeat this step for the other chime wire.
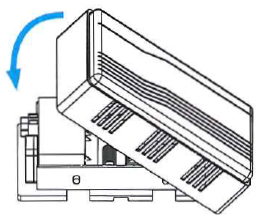
- Mount the power kit to the side of the chime.
- Replace the chime cover.
Clare Video Doorbell (CVD) installation
Follow these instructions to ensure that the doorbell is installed correctly. Serious injury or death may occur if any of the warnings are ignored. Injury or equipment damage may occur if any of the cautions are neglected.
To install the doorbell:
- Shut off the electricity at the doorbell’s circuit breaker.
- (Optional) If the wall is uneven, paste the foam plate to the mounting plate.
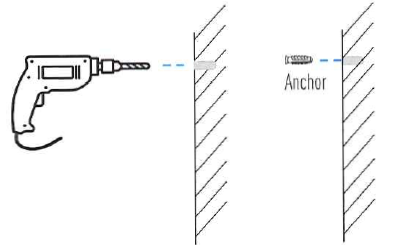
- Insert the mini-level into the mounting plate, and then mark the drill points when the level’s bubble stays in the center.
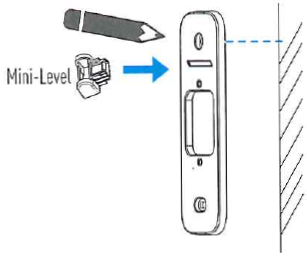
Note: Remove the mini-level after marking the drill points. - Drill holes according to the drill points, and then insert the anchors.
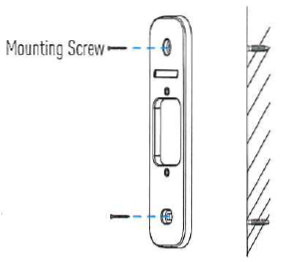
- Fix the mounting plate to the wall.
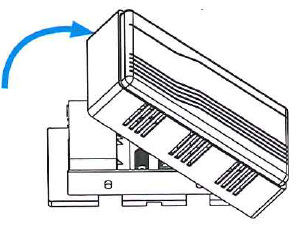
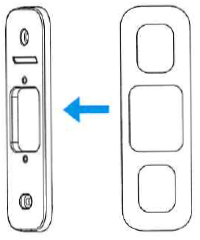
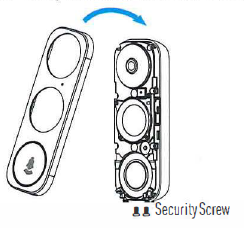
- Remove the doorbell’s faceplate starting from bottom working to the top.
- If you have a chime installed follow option A; if not, follow option B.
Option A
Connect the doorbell with your existing doorbell wires.
Option B
Connect the fuse wire with your existing doorbell wire.

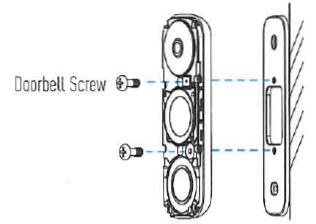
- Use the doorbell screws to affix the doorbell to the mounting plate.
- Restore the electricity at the breaker.
Notes
- When the doorbell flashes blue quickly, it is powered on. Continue doorbell setup.
If the doorbell does not power on, verify the electricity is off, and then check the wiring.
- Due to the internal “chime” battery charging requirements, first time doorbell chime operation may take up to 3 hours
- When the doorbell flashes blue quickly, it is powered on. Continue doorbell setup.
- Use CVP app to join the doorbell to the network.
a. Connect your smartphone to target Wi-Fi network.
b. Open the CVP app.
c. Tap Scan QR Code.
d. Scan QR code from CVD button or from label on the cover of this quick start guide.
e. Tap Connect to Network.
f. Tap the Next button if CVD is flashing blue, otherwise reset the CVD by pressing and holding the reset button until the voice prompt states, “Reset Successfully”.
g. If not already connected to target network, tap Change Network and follow the onscreen prompts to connect to the target network, otherwise enter network password and tap Next.
h. The app connects to the CVD AP network.
i. If it fails, tap Cancel and then tap Configure Wi-Fi.
-
- Find the associated AP network SSID ClareCVD_serialnumber and forget the network.
- When the network reappears in SSID list, tap on it and enter the network password ClareCVD_verificationcode, the verification code is located on the label affixed to the front of this quick stat guide. It is 6 uppercase alpha characters.
- After connecting to the AP network, wait for app device to prompt you to allow network connection without internet.
Note: UI and messages for this differ from phone to phone.
If not accepted, the app device will not stay connected to the AP network and CVD configuration does not complete.
If this occurs, forget the network and rejoin according to steps i.b and i.c above.
- After connecting to network, return to CVP app, CVD should now join the target network. The following voice prompts should be heard during this process:
“Connecting to Wi-FI, please wait.”
“Platform registration successful.”
“Configuration complete.”
- Follow remaining on-screen prompts.
11. Put the faceplate back and insert two security screws into the bottom of the doorbell to secure the faceplate.
Appendix
Basics

LED indicator
Blue light
- Flashing : Doorbell is ready for Wi-Fi configuration
- Steady on: Doorbell is working
Red light
- Flashing fast: Device exception
- Steady on: Doorbell is powering on
SD card management

- In the app, tap the Storage Status in the Devices Settings interface to check the SD card status.
- If the card status displays Uninitialized, tap to initialize it.
The status will then change to Normal and it can store videos and/or pictures.
Full PDF - Clare Video Doorbell v3 Quick Start Guide (DOC ID 1890)