Overview
This article is intended to assist you with adding Z-Wave devices to your ClareOne or Clare CLIQ automation system each referred to as your controller throughout the rest of this guide. In order to add Z-Wave devices you will need to be in your home with the ClareHome app in hand and connected to your system.
NOTE:
Clare products are sold and installed by independent dealers. Those dealers are responsible for installation and support, and operate independently of Snap One and Clare. Your dealer should be the first point of contact for all sales and support inquiries. You should only contact Clare support where your dealer is not able to provide support.
While Clare support may be able to assist with specific issues, most issues will be referred back to your installation professional or dealer. Any fees or service charges for onsite assistance are at the discretion of your installation professional or dealer.
About Z-Wave
Z-Wave devices communicate with each other and the ClareHome or ClareOne system (“controller”) using a proprietary Z-Wave mesh network (“the network”), they do not use the WiFi or internet connection in your home. The more Z-Wave devices you have the stronger the network and by association the better the communication. Most Z-Wave devices on the network will “repeat” commands and communication so that devices which are farthest away from the controller may receive those commands and communication. The network will also assist when adding new Z-Wave devices as neighboring devices will communicate the adding information to and from the controller. Z-Wave devices that aid in pairing or use other devices to pair are referred to as “Network Wide Inclusive”. The Z-Wave control device in your controller will periodically optimize the network to ensure all devices are communicating effectively.
Z-Wave door locks and garage door openers are unique in the Z-Wave network as they are “secure” devices and are not Network Wide Inclusive. As such they do not repeat communication, nor will they use neighboring devices to add to the network. Because they are not Network Wide Inclusive, they must be within 5 feet of the controller when added, then moved to their final location. When a Z-Wave door lock is the only device and not in reasonable proximity of the controller, they are susceptible to falling offline. When this occurs, it may be necessary to add additional repeating Z-Wave devices which will assist with the communication between the door lock and the controller.
We recommend that you add additional Network Wide Inclusive Z-Wave devices to your system if Z-Wave door locks are the only Z-Wave devices in your home. Most Z-Wave devices are DIY and can be installed and added to your system without the assistance of your installing partner.
Adding Z-Wave Devices
Before continuing with these instructions, please ensure that:
- You are at home
- You have the ClareHome application open and are connected to your Clare system
- You have the instructions for the Z-Wave device you are adding to your system. You’ll need to be familiar with the Z-Wave device’s specific inclusion process as each device and manufacturer differs.
NOTE:
This process demonstrates how to add a Z-Wave appliance module. The same steps are generally true for all Z-Wave devices. The exception are sensors and repeaters as they do not appear as devices on your ClareHome app favorites page.
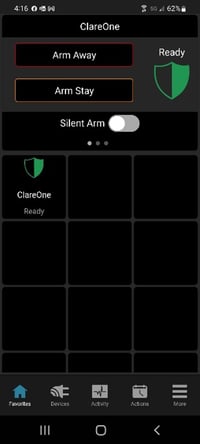
- Open the ClareHome App and connect to the location to which you will add the new Z-Wave device.
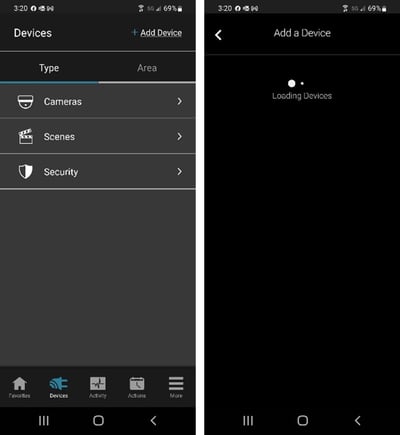
- Tap the devices icon at the bottom of the screen. Then tap “+ Add Device” at the top of the screen, wait for the device type list to load.
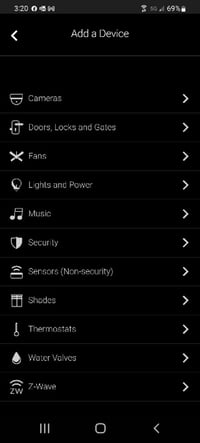
- Tap “Z-Wave” at the bottom of the screen.
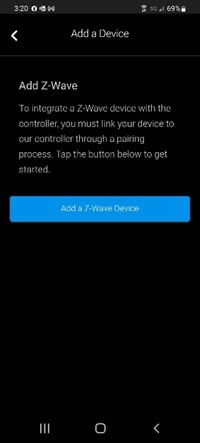
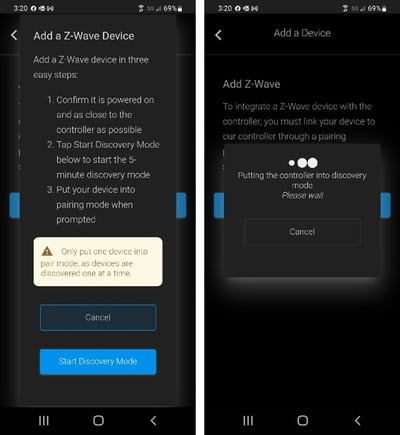
- Tap the “Add a Z-Wave Device” button.
- You are now ready to put your controller in discovery or inclusion mode. Tap on the “Start Discovery Mode” button, then wait for the app to tell you that it is looking for new device.
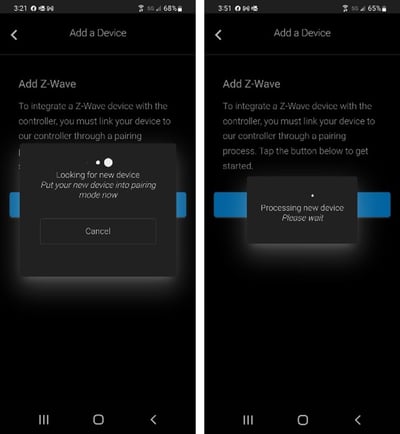
- After the application indicates that it is in discovery mode, follow the device instructions for adding/including it on your Z-Wave network. When added successfully the screen will change from looking for new device to processing new device.
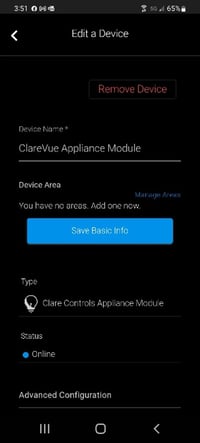
- If the Z-Wave device is manageable (not a sensor or repeater) the Edit a Device screen will appear. The device name and available Advanced Configuration can be modified here. Tapping the back button will complete the adding process.
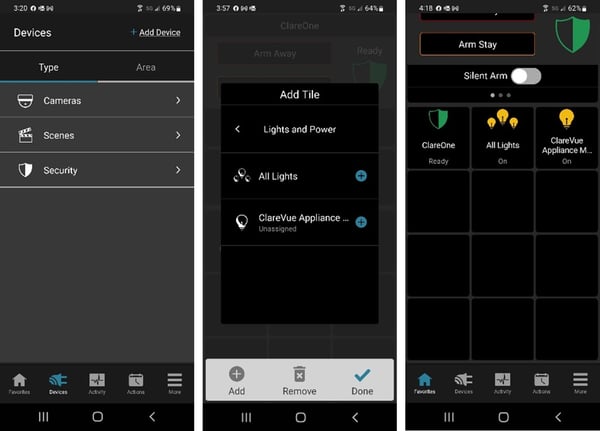
- Tap the Favorites icon on the bottom of the screen to add the new devices to the Favorites screen.

- Favorites screen into tile management mode. Tap any of the blank tiles to place the new devices, the + symbol will appear on that tile, tap the tile again to get a list of device categories which can be added to the tile.
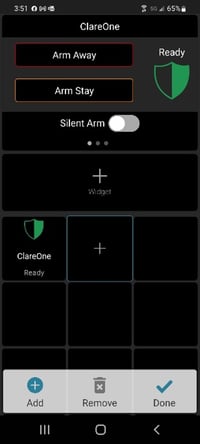
- Select the category then tap the + next to the device to add to this tile. Repeat steps 9 and 10 for each additional device. Tap the Done icon when complete.
Last Updated: 01/31/2022