Discover and Preconfigure Cameras
Note: not all Hikvision cameras will have the following configuration settings. Where the settings are exposed, they must be set accordingly.
- Locate cameras on LAN by using Hikvision SADP tool.
Note: The ClareVision NVR PoE port hardware is a simple data switch. Meaning any device connected to the PoE ports are visible from the LAN side of the NVR. With the Hikvision cameras connected directly to the NVR, you can use the Hikvision SADP tool do discover the cameras from the LAN side of the NVR. - Set cameras to DHCP using SADP tool.
- Open Internet explorer as administrator. Browse to and log into first camera to be configured.
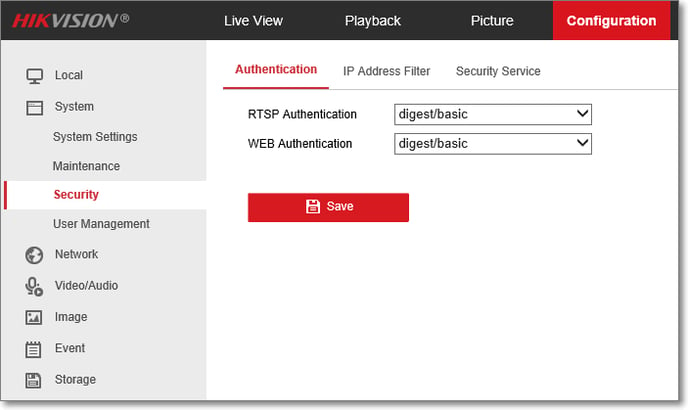
- Configure camera Security, navigate to Configuration > System > Security > Authentication
- Change RTSP Authentication to "digest/basic".
- Change WEB Authentication to "digest/basic".
- Click Save.
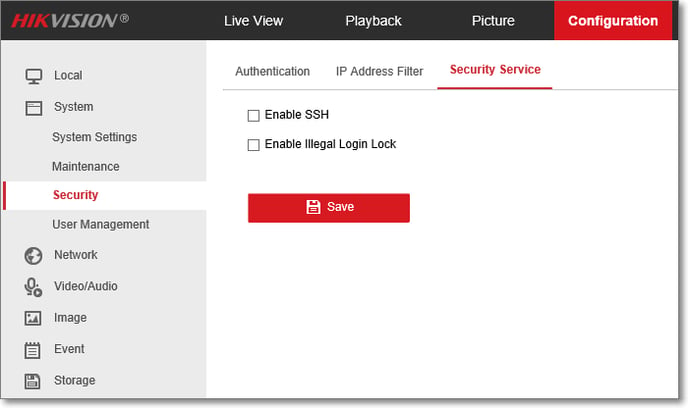
- Disable Illegal Login Lock, navigate to Configuration > System > Security > Security Service.
- Uncheck Enable Illegal Login Lock.
- Click Save.
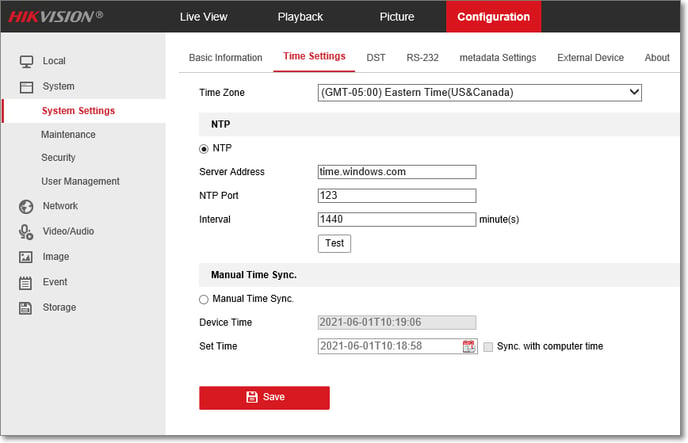
- Configure camera Time Settings, navigate to Configuration > System Settings > Time Settings.
- Select correct time zone from Time Zone pick list.
- Select NTP, and test.
- Click Save, ensure Device Time updates accordingly, repeat save until updated.
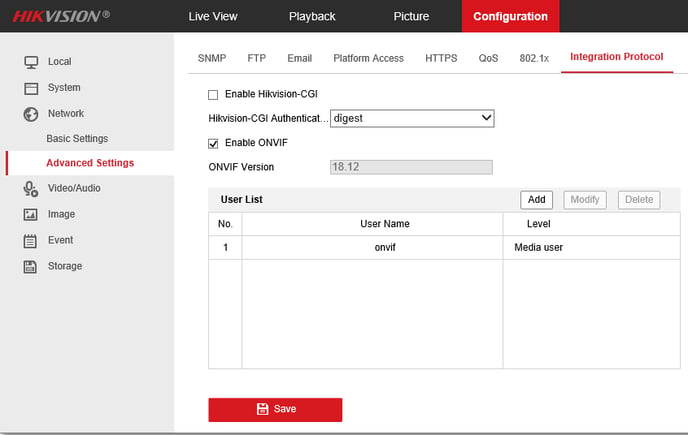
- Configure Integration Protocol and add ONVIF user, navigate to Configuration > Network > Advanced Settings > Integration Protocol.
- Ensure Enable ONVIF is checked.
- Click Save.
- Click Add above user list.
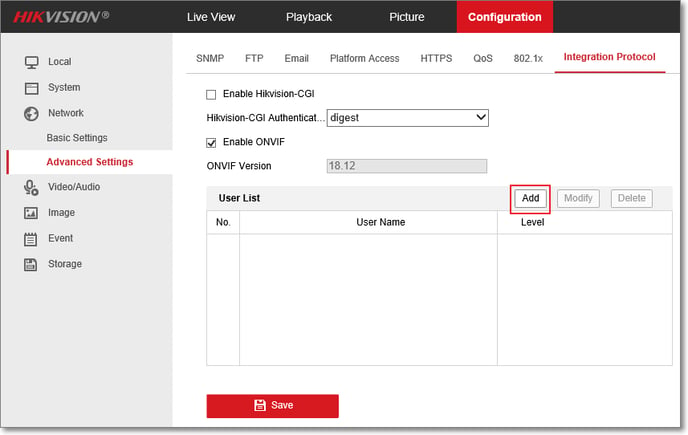
- In the add user dialog box, enter the user name (we used "onvif" for this example), the preferred password and password confirmation, and the mark the user type as Media User.
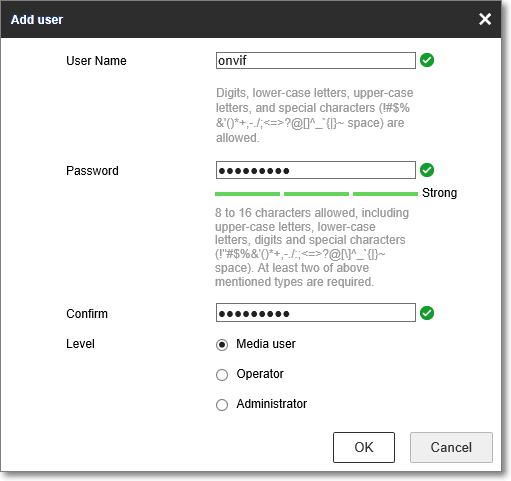
- Click Save and verify the user is added to the user list.
Note: This is the user that will be used in the NVR to authenticate camera on the NVR.
Add camera to NVR
- Locate NVR on LAN using IP Search tool.
- Open Internet Explorer as Administrator.
- Browse to NVR and Login. Install NVR plug-in if prompted (follow on-screen instructions).
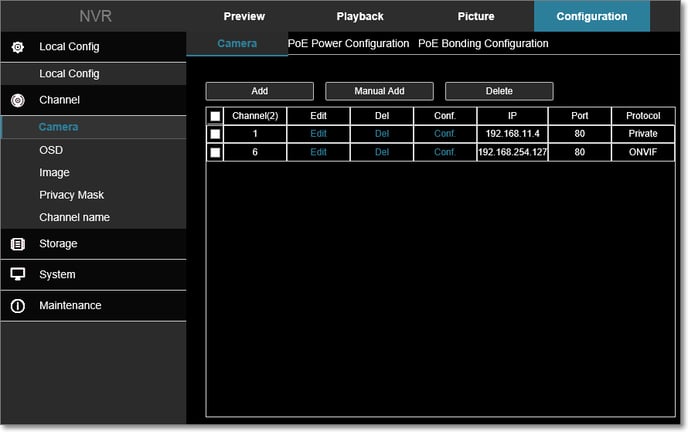
- Add camera to NVR, Configuration > Channel > Camera.
- Click Add.
- Find Hikvision camera on displayed list.
- Click check box next to camera or cameras to add.
- Click Add on Camera list dialog.
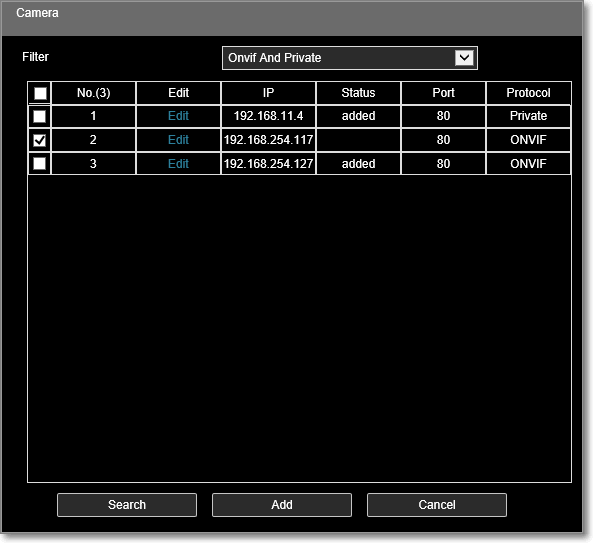
- Click Cancel.
- Verify camera is now displayed in added camera list, Configuration > Channel > Camera.
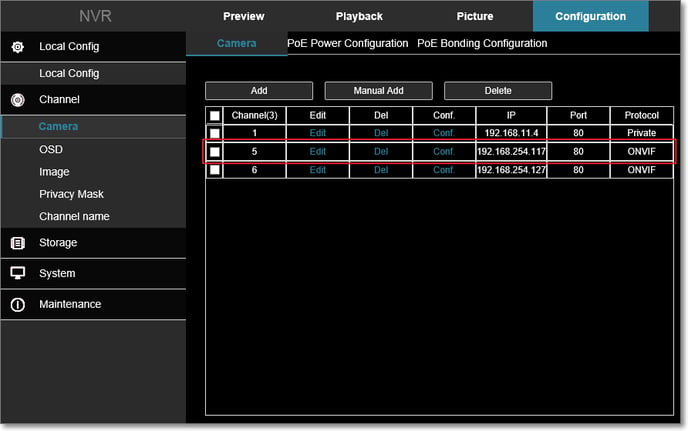
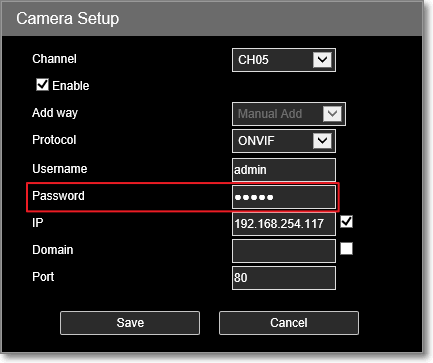
- Click Edit next to camera on list.
- Enter ONVIF user password created for camera and click Save.
- Click Conf. next to camera on list.
- Verify Resolution field automatically populates with camera stream resolution for Main Stream and Sub Stream if supported.
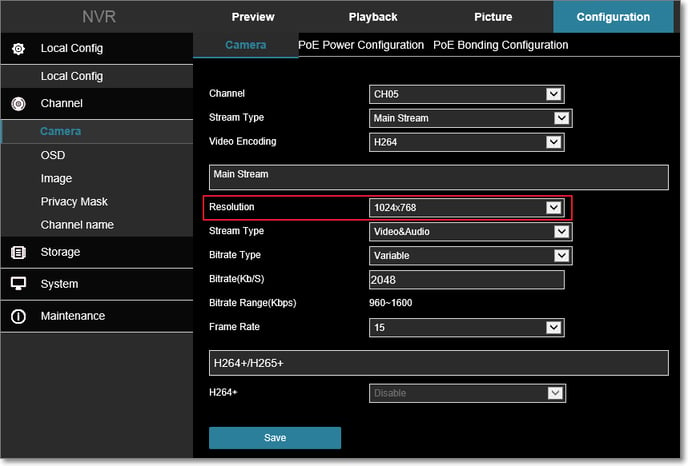
- If stream resolution is displayed, click Save.
- Click Add.
- Verify camera is streaming.
- Select the Preview tab and proceed with the next step. Repeat all steps above if stream resolution is not displayed.
- Click Play button on bottom of Preview window.
- Repeat ALL previous steps for each Hikvision camera to be added to NVR.