Honeywell Lyric Thermostat Driver Release Notes
Introduction
The Honeywell Lyric line is a set of smart thermostats. The Lyric thermostats have been tested and certified for integration with the ClareHome system.
By integrating the Lyric thermostat to a ClareHome control system, your customers can send commands to the thermostat to change its modes, cool and heat settings, and fan status from their mobile iOS devices or Android smartphone.
When integrating the Lyric thermostat into your ClareHome project, no wires or extra connections are necessary. Install the Lyric according to its documentation, and then connect it directly to home network’s Wi-Fi.
The Lyric thermostat integrates with the ClareHome system in a way similar to existing HVAC drivers. All HVAC drivers share a common UI to keep user experiences consistent.
Supported Honeywell Lyric thermostats models
T-5 Smart
|
RCHT8610WF2006 |
RCHT8610WF2014 |
|
RCHT8610WF3005 |
RCHT8612WF2005 |
|
RCHT8612WF2015 |
RCHT8612WF3006 |
T-6 Pro Smart
|
TH6220WF2006 |
TH6320WF2003 |
T-9 Smart
|
RCHT9510WFW2001 |
RCHT9510WFW2017 |
|
RCHT9610WFSW2003 |
RCHT9610WFSW2019 |
Round Smart
|
TH8732WFH5002 |
RCH9310WF5003 |
|
RCH9310WF5011 |
|
The Following figure shows the Lyric controls on the ClareHome UI.
Figure 1: User interface of the Honeywell Lyric thermostat
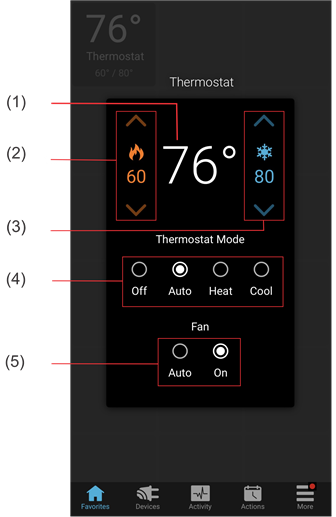
(1) Temperature setting displays on the ClareHome UI in Fahrenheit.
(2) Change the Heat set point by sliding the indicator left/right on the bar.
(3) Change the Heat set point by sliding the indicator left/right on the bar.
(4) Change the Operation mode by tapping the desired radio button.
(5) Change the Fan mode by tapping the desired radio button.
Installing the Lyric thermostat
A qualified installation technician should install the Lyric thermostat. Refer to the documentation included with your Lyric devices. Clare Controls does not assume any responsibility for damages caused by improper installation or connection to the network. Register your thermostat on the Lyric website/app before adding and configuring the device in the ClareHome app.
Connecting the Lyric thermostat to ClareHome
Use the Honeywell Lyric app. Once the app is installed, follow the displayed on-screen instructions for thermostat and account setup.
Adding and removing the thermostat in the ClareHome App
Once you have installed and setup the thermostat using the Honeywell Lyric app, add and configure it with the ClareHome app.
Notes
- An internet connection is required when adding a Lyric device. It cannot be added when the CLIQ.mini is in AP mode.
- You will need the homeowner’s Honeywell Lyric account credentials.
- The Honeywell Lyric thermostats must be added and configured on the Honeywell website before they can be added to ClareHome.
To add the thermostat in the ClareHome app:
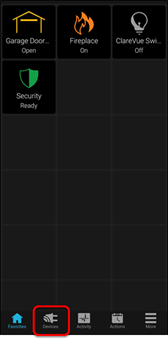
- Tap the ClareHome app’s Devices page.
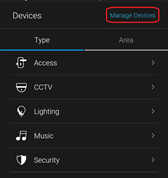
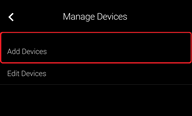
- Tap Manage Devices.
- Tap Add Devices.
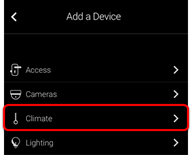
- Select the device category, Climate.
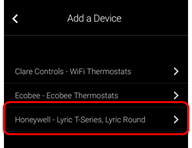
- Tap Honeywell – Lyric T-Series, Lyric Round.
- Read the displayed Device Authorization message, and then tap Authorize Device.
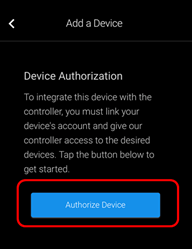
The Lyric Login page displays.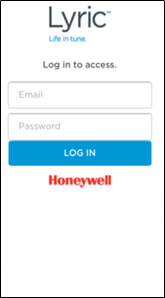
- Login with the credentials created using the Honeywell app.
You are prompted to authorize ClareHome access to the Honeywell thermostat.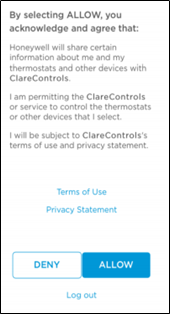
- Tap Allow, and then select the desired available thermostat devices.
Note: Each device added this way appears on this Clare Controls account.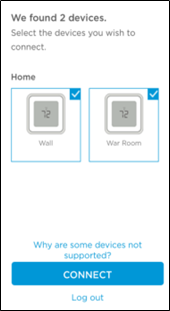
- Tap CONNECT.
Once the devices are authorized, a success message displays, the thermostats are now accessible in the ClareHome app. - Once paired in, the Edit Device page displays.
Customize the device name and location as desired, tapping Save when done.
Note: For scenes, notifications, schedules, and automations configuration, see ClareHome App Guide (DOC ID 1750).
To remove the thermostat in the ClareHome app:
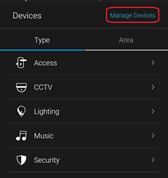
- Tap the ClareHome app’s Devices
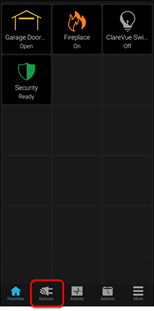
- Tap Manage Devices.
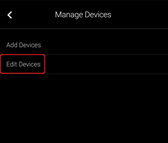
- Tap Edit Devices.
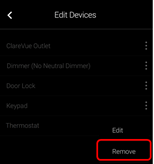
- Tap the 3 dots next to the thermostat, and then tap Remove.
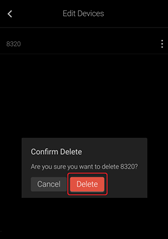
- Tap Confirm.
Pairing and removing the thermostat in FusionPro
Pair the thermostat to the project.
To add the thermostat in FusionPro:
- Click Accounts in the side menu.
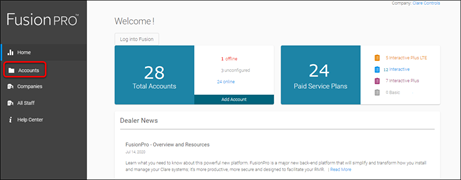
- Locate the desired account in the list, and then click View.
The Account sub-menu is now available.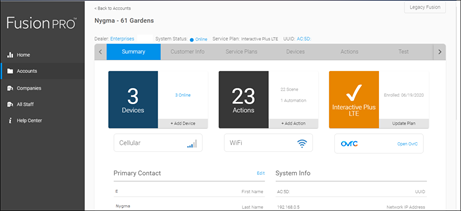
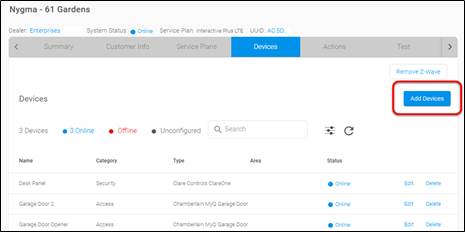
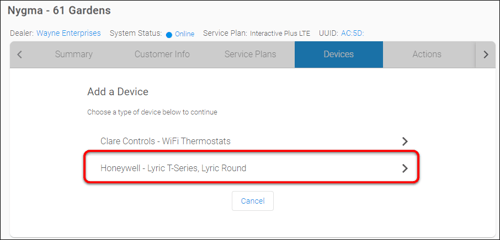
- Click the Devices tab, and then click Add Devices.
- Select the device category (Climate).
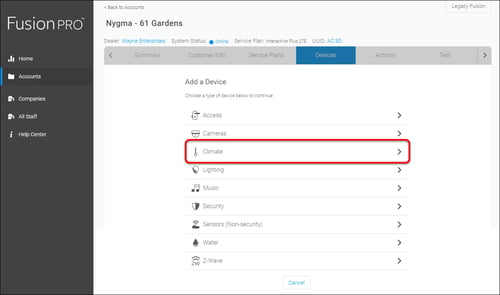
- Click Honeywell – Lyric T-Series Round.
The Lyric Login page displays.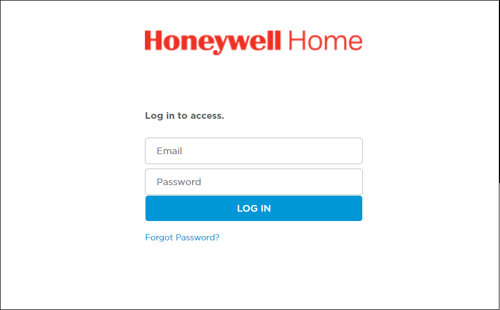
- Login with the credentials created using the Honeywell app.
You are prompted to authorize ClareHome access to the Honeywell thermostat. - Click Allow.
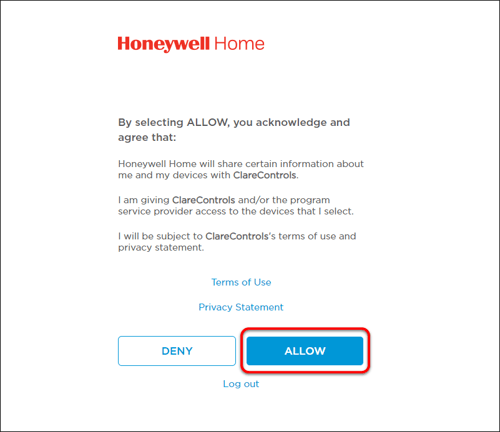
- Select the desired available thermostat devices.
Note: Each device added this way appears on this Clare Controls account.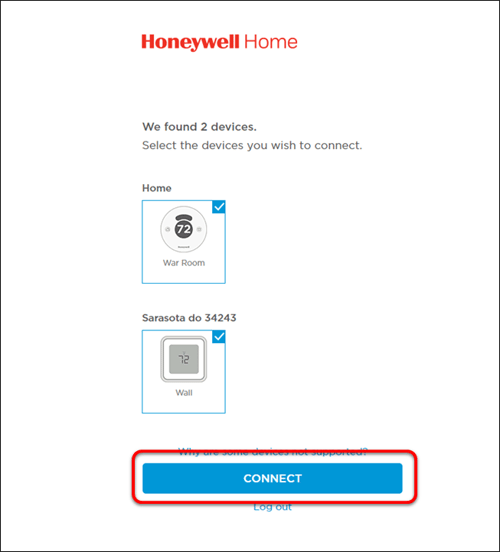
- Click CONNECT.
Once the devices are authorized, a success message displays, the thermostats are now accessible in the ClareHome app. - Once paired in, the Edit Device page displays.
Customize the device name and location as desired, tapping Save when done.
Note: For scenes, notifications, schedules, and automations configuration, see ClareHome App Guide (DOC ID 1750).
To remove the thermostat with FusionPro:
- Click Accounts in the side menu.

- Locate the desired account in the list, and then click View.
The Account sub-menu is now available.
- Click the Devices tab, and then click Delete next to the desired device.
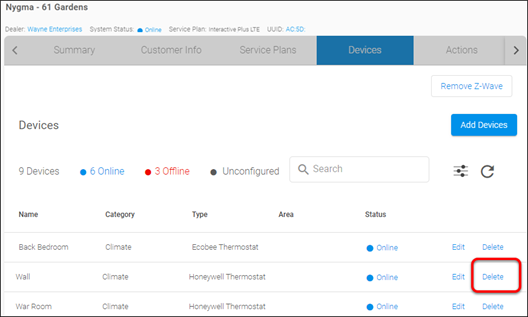
- Click Delete to confirm.
