ClareVue Lighting Appliance and Dimmer Module Release Notes
Preface
For information on Z-Wave and ClareHome, see Installing Z-Wave with ClareHome.
Notes
- When installing Z-Wave devices, ensure that there is nothing inhibiting their signal. Z-Wave relies on radio signals. Metal or thick walls may limit their signal strength.
- We recommend having 2 or more repeating Z-Wave devices.
Introduction
The ClareVue Lighting Appliance (CL-APS-10) and Dimmer (CL-LDM-10) Modules integrate with ClareHome via the Z-Wave network. Installers only need to pair (add) the unit into ClareHome. The modules provides real time light status indications.
By integrating the ClareVue Lighting Appliance Module or ClareVue Lighting Dimmer Module into the ClareHome control system, your customers can control the associated devices from their Android or iOS devices.
Installing the module
Only qualified installation technicians should install ClareVue lighting devices. Follow the installation and programming instructions that came with your ClareVue lighting devices.
Note: The modules look virtually the same, a user can tell the modules apart by their model numbers. The appliance module has an A in the model number and the dimmer module has a D in the module number.
Pairing the appliance/dimmer module in ClareHome
After installing the appliance/dimmer module, pair it.
To pair the appliance/dimmer module using ClareHome:
- Tap the ClareHome app’s Devices page.
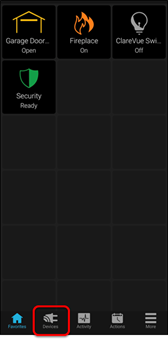
- Tap + Add Device.
/tap%20add%20device.png?width=200&name=tap%20add%20device.png)
- Tap Add Devices.
/Add%20deivce%20-%20circled.png?width=200&name=Add%20deivce%20-%20circled.png)
- Select the device category, Lighting.
/IMG_1522.png?width=200&name=IMG_1522.png)
- Select the device type, Z-Wave Device - Lighting.
/Add%20-%20lighting%20type.png?width=200&name=Add%20-%20lighting%20type.png)
- Read through the displayed information, and then tap Add Z-Wave Device.
/Add%20zwave%20device.png?width=200&name=Add%20zwave%20device.png)
- Read the Z-Wave information, and then tap Start Discovery Mode.
/IMG-1425.png?width=200&name=IMG-1425.png)
- When prompted, use the manufacturer’s instructions to pair the device.
- Once paired in, the Edit Device page displays.
Customize the device name and location, tapping Save when done.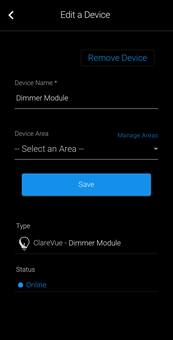
Note: For scenes, notifications, schedules, and automations configuration, see ClareHome App Guide (DOC ID 1750).
To remove the device using ClareHome:
- Tap the ClareHome app’s Devices page.

- Tap Lighting.
/IMG_1522.png?width=200&name=IMG_1522.png)
- Tap the 3 dots next to the switch, and then tap Remove.
/0%20-%20dimmer%20module%20-%20dots.png?width=200&name=0%20-%20dimmer%20module%20-%20dots.png)
/0%20-%20dimmer%20module%20-%20remove.png?width=194&name=0%20-%20dimmer%20module%20-%20remove.png)
- Read through the displayed information, and then tap Start Removal Mode.
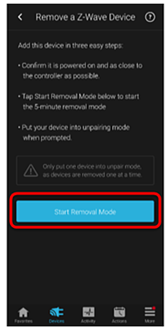
- Use the manufacturer’s instructions for switch removal.
Note: Press and hold the same button used in pairing the device to remove the device.
Pairing and removing the modules in FusionPro
Pair the module to the project.
To add the module in FusionPro:
- Click Accounts in the side menu.
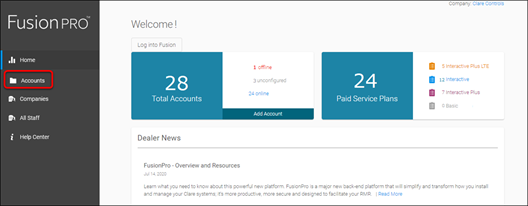
- Locate the desired account in the list, and then click View.
The Account sub-menu is now available.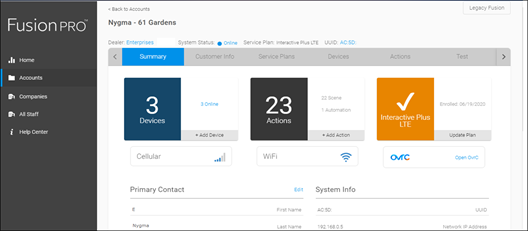
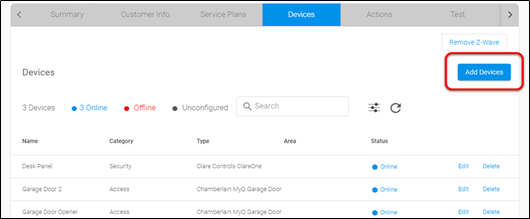
- Click the Devices tab, and then click Add Devices.
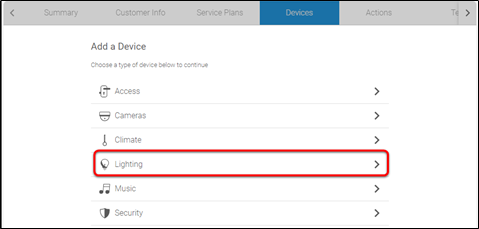
- Select the device category (Lighting) and then the device type (Z-Wave Device – Lighting).
- Click Add a Z-Wave Device, and then click Start Discovery Mode.
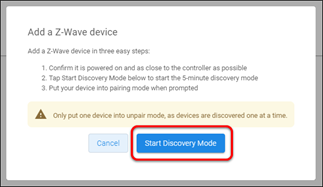
A popup displays waiting for a notification from the device, pair the Z-Wave device according to the manufacturer’s instructions for each device.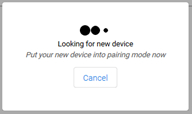
- Once paired in, the Edit Device page displays.
Customize the device name, location, and Advanced configuration as desired, tapping Save when done.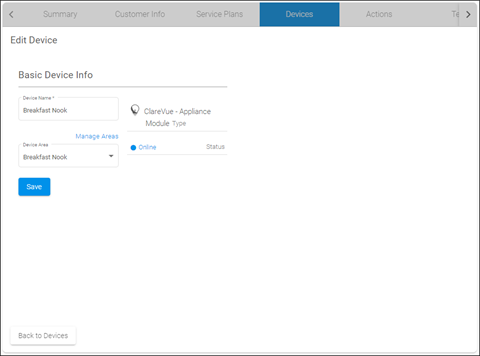
To remove the module with FusionPro:
- Click Accounts in the side menu.
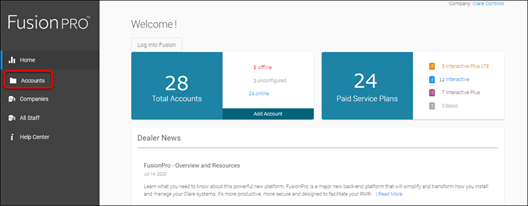
- Locate the desired account in the list, and then click View.
The Account sub-menu is now available.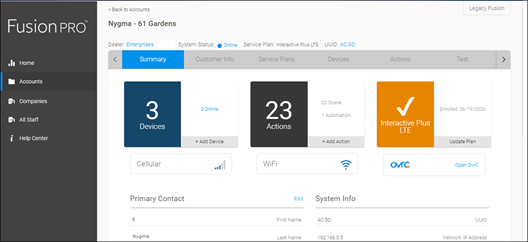
- Click the Devices tab, and then click Remove Z-Wave.
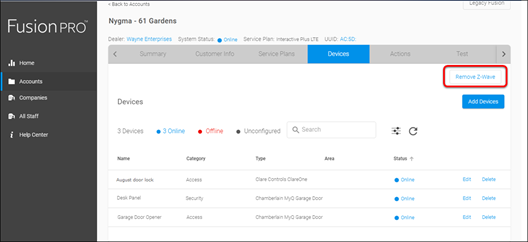
- Click Start Removal Mode.
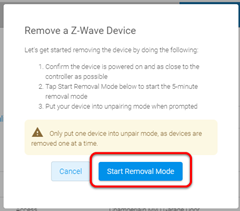
- Use the manufacturer’s instructions for device removal.
Using the module in ClareHome
Once added, the user can add the device to their favorites page.
Figure 1: Appliance module on and off
/Light%20on.png?width=200&name=Light%20on.png)
/light%20off.png?width=185&name=light%20off.png)
Figure 2: Dimmer module at 60% and off
/Dimmer%20on.png?width=201&name=Dimmer%20on.png)
/Dimmer%20off.png?width=200&name=Dimmer%20off.png)